
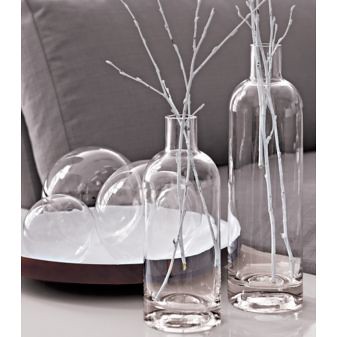
About a week ago Ms. Jenna from Hey Homeslice e-mailed me because she had just completed and inspiring project. The idea involved the much loved glass bubble balls sold by CB2 (which just happens to be one of my favorite stores to visit when I travel to a big city). The bubble balls have endless project potential in my opinion, but in the picture below they are simply used as coffee table decor.
Enter inspiration.

So here’s how we did it.
Supplies:
Wood board (we used a 1×4 foot, white MDF)
Trim
Glass bubbles (we got ours here and used 5 large, 10 small)
Drill and bits (we used 3/16 and 3/8 but this will depend on the thickness of your string)
Screws and dry wall anchors
Small finishing nails and nail set or wood glue
Caulk or wood filler (only if using finishing nails)
Paint or stain
Sandpaper
String or fishing line
Ornament toppers (we got ours here because they had some real small ones – 5/16 in. wide)
Alrighty. Well the first steps are to prepare your board.
After deciding where you want your bubbles to hang, drill your small holes all the way through the board.

Then on the back (the side that will be against your ceiling) drill halfway through the board with your larger bit, like so.

So each hole looks something like this… (you can disregard my numbers… I’m kind of wacky)

If you really want to do it JUST like us, than you can drop your board at this point and smash the corner so you have to start all over. Oh life.

Next you’ll need to attach some molding. I guess you don’t need to, but we wanted ours to have that ‘finished’ look, so we did. I didn’t take any pictures of this (I know, terrible) but I’ll sum it up for you.
We considered using wood glue to attach the trim, but after reading that it would take DAYS (DAYS!) to fully cure, we opted for finishing nails. If your more patient than me (which is probably 99% of the world) feel free to use the glue. If you’re like me, read on. Just hammer small nails into place, and then tap them in the rest of the way using a nail set. Then you’ll need to caulk (or use filler) to cover the holes, and once that’s dry, sand it down so it’s smooth. Sounds like a lot of steps, but it isn’t hard and goes faster than you might think. Just be sure to wait until your caulk/filler is really dry before you sand or you’ll end up with a hot, gooey, mess.
After the holes are drilled and the trim is attached, go ahead and paint or stain it if you are going to. And while that dries…
Onto the bubbles!
So take your little ornament tops (I spray painted mine black beforehand), in case you’ve missed the holiday season your whole life, here’s what I’m talking about..

Loop your string through it like this (let’s all just pretend I have pretty hands, deal?)

And then when you stick the little legs into the bubble (I bent the top flat) it looks like this:

(No that’s not dust… no way is that dust..)
Board, check.
Trim, check.
Bubbles, check.
ASSEMBLY TIME!
This is pretty straightforward, I’ll admit. All you need to do is thread your string through the holes (from the front to the back, so the bubble is below). Then tie a good knot at the top.

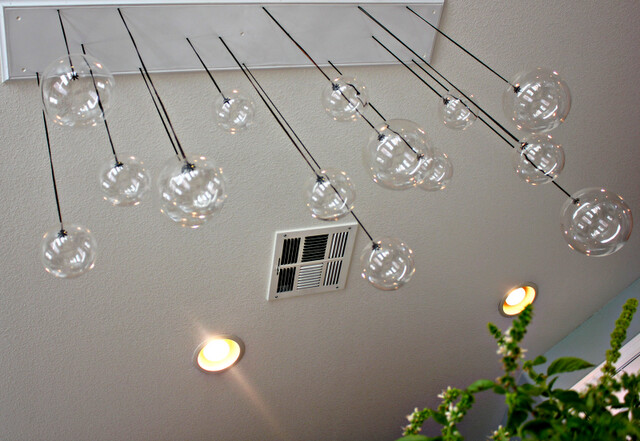
When you pull it tight the knot will hide in the larger hole you drilled, but the smaller hole will keep it from pulling all the way through. Then just trim off the top of your strings and your board will sit flush against the ceiling. My brilliant husband thought that one up.

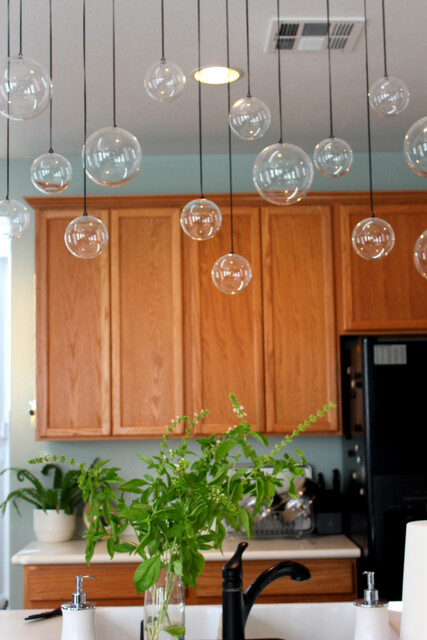
Now just secure it to your ceiling. We used screws and dry wall anchors to make sure it was really secure (the bubbles are VERY light and delicate, not heavy at all, but better safe than sorry.. especially with this much glass involved!)