Happy Friday! Thanks so much for your kind comments on the post yesterday. I appreciate your feedback!
This week I’ve focused mainly on projects/ideas that take very little skill, time, or cash. Today I am going to step up the skill level just a bit, but I think you’ll agree the extra effort is worth it. 🙂
Sometimes I make things out of necessity, but most of the time I make things because I have an off-the-wall idea that I want to try out. I’ve been sitting on this combo concrete and wood side table idea for months now, and I finally got around to fleshing it out! 🙂
Any ideas on how I made it?! You’ll be surprised at how easy it is! 🙂

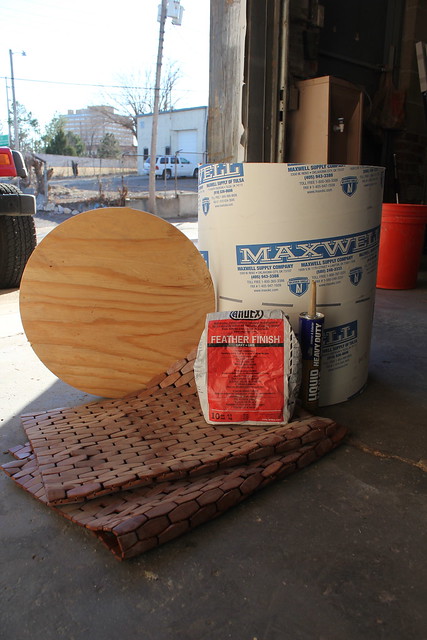
Let’s start with a materials list. You will need:
– A Circular Concrete Form (find these at Home Depot or your local concrete supplier)
– Plywood
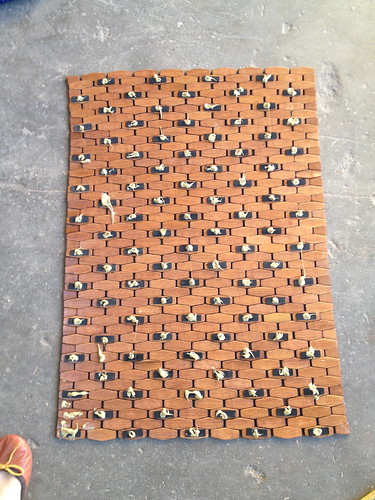
– Wood Bath Mat (mine are from Target)
– Construction Adhesive
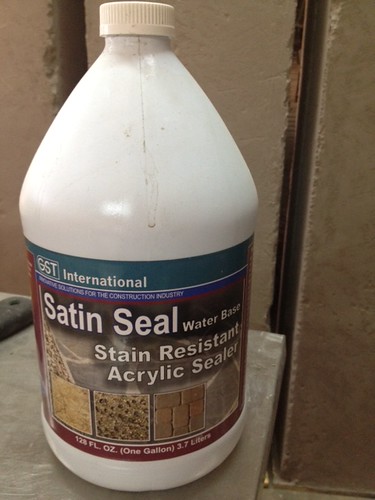
– Concrete Sealer
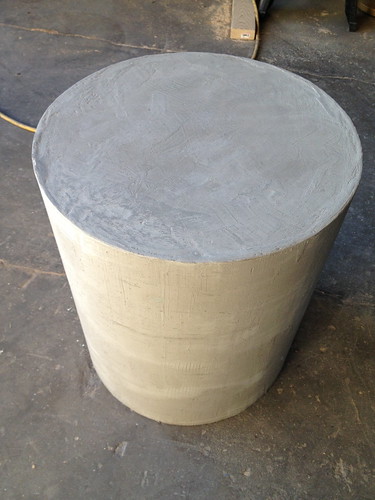
Step 1- Cut your concrete form down to the desired size. We used a table saw, but you could use a jigsaw or hand saw.
Step 2- Use a jigsaw to cut out a 3/4 inch plywood circle that will fit just inside the concrete tube. Try to make this a nice, tight fit, but don’t worry if the piece is slightly undersized.
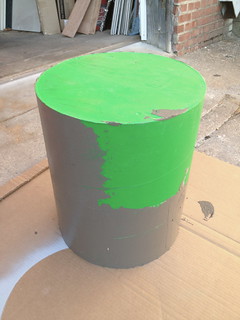
Step 3- Screw or nail the plywood piece into place so that it is flush with the top edge of the concrete form.
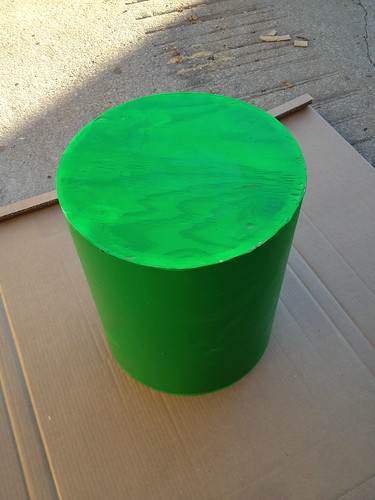

(You may be wondering why my piece all of a sudden turned green. We used this in a commercial a few months ago and had to paint it because we were shooting on a green screen. That is the only reason it is green. You do not need to paint your piece green.)
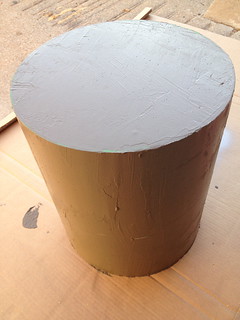
Step 4- Next, mix up your ARDEX Feather Finish to a pancake like consistency and use a trowel to cover the whole piece. Make sure you add a little extra Feather Finish to the edges so that we can sand things down without revealing the tube underneath.
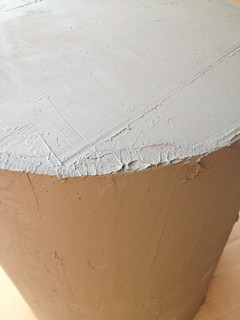
Tip- ARDEX dries very hard, which means it is difficult to sand. I’ve learned that if you use a very fine grit sand paper before the ARDEX is totally dry, you will get a nice, smooth finish with a fraction of the work!
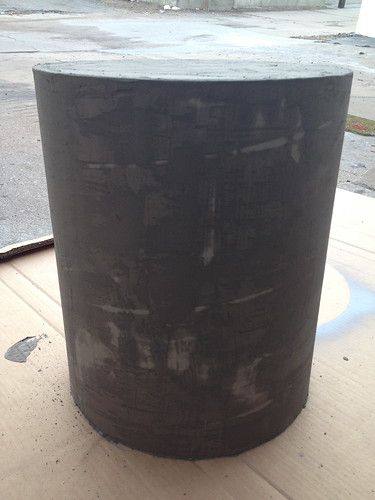
Step 5- Once the ARDEX is completely dry and you have sanded it down to your desired finish, use construction adhesive to attach the wood bath mats around the concrete form. Once the mats were in place on my piece, I added extra adhesive around the top and bottom edges. Use ratchet straps to hold the mat(s) in place until the construction adhesive dries completely. (PS- I made sure to cut my concrete form so that the height of the mat matched up perfectly. This made the fabrication super easy!)
Step 6- Use concrete sealer to keep the top of the table from getting stains. We like GST’s Satin Seal Acrylic Sealer (
order it here!).
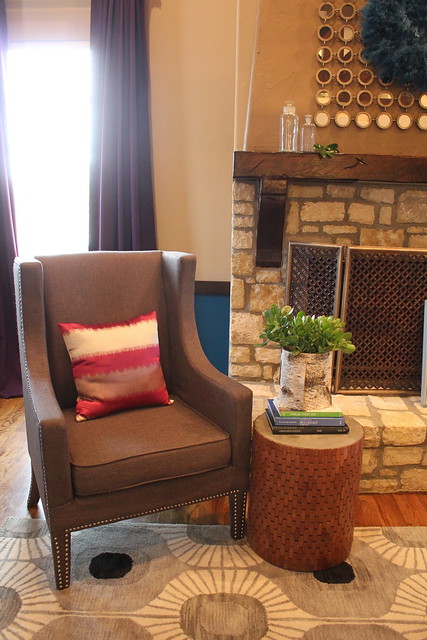
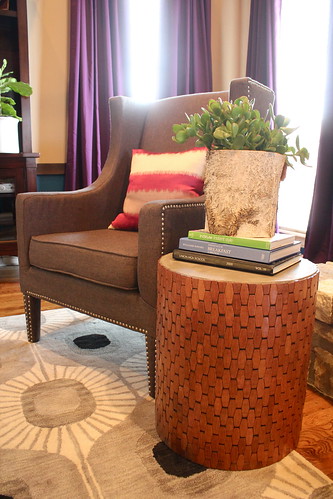
And here’s the final look!
I love the texture of the wood tiles. And I think the warm wood and the cool concrete are a nice combo.

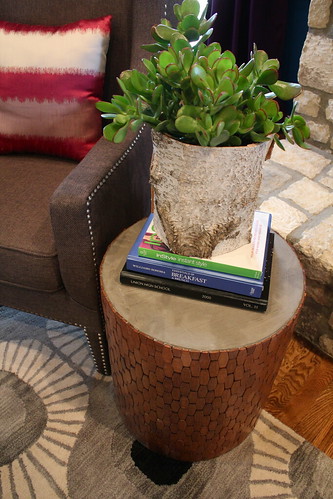
Overall the piece is functional, textural, and affordable- that’s a win in my book! 🙂 What do you think?

This is a great DIY, I almost love the plain concrete one as much as with the wooden tile on it.
http://www.warfieldfamily.com
What a great project! When I first saw the supplies, I was thinking you were going to fill the tube with concrete…that would make for one heavy table!. The mix of the materials looks perfect together.
Hi guys! Love this table, you two are too adorable xoxo chelsea
I’m definitely a fan of this combo…creative, unique and awesome!
wow that is fantastic! looks awesome with the tiles.
Love this!!
Wow! That is really impressive! What an awesome piece – and a bathmat!? Genius 🙂
You have convinced me to order some Ardex! I have an offbeat project slightly similar. Using leftover penny tile on an old tall tin can to make a modern planter. Now I want to use a concrete tube.
You have convinced me to order some Ardex! I have an offbeat project slightly similar. Using leftover penny tile on an old tall tin can to make a modern planter. Now I want to use a concrete tube.
Great beat ! I would like to apprentice at the same
time as you amend your site, how could i subscribe for a blog web site?
The account helped me a appropriate deal. I have been tiny bit acquainted of this your broadcast provided shiny transparent idea
my web blog :: forex system
That looks fantastic! You are so creative, I never would have thought of that!
You guys always have the BEST ideas!
All I can say is….AWESOME!!!!! This is just beautiful and does seem genuinely doable! I’d like to know what the dimensions of the table are as it looks like you may have used two mats(?). Also, do you really need to use the Ardex around the whole form? In other words, couldn’t you just glue the mats directly to the form? Thx!!!!
WOW!!…Love it,could you use a concrete such as Quickcrete for this project?I have to try this so cool!
I absolutely LOVE this! So glad I saw this on Centsational Girl. I’ve been looking for one of those ceramic garden stools but they’re so expensive, and this actually looks beautiful and unique, something I’d love to buy at the store! So creative. I think I might like to try this one! Sharon
So cool! What would you say the total cost of this project was?