
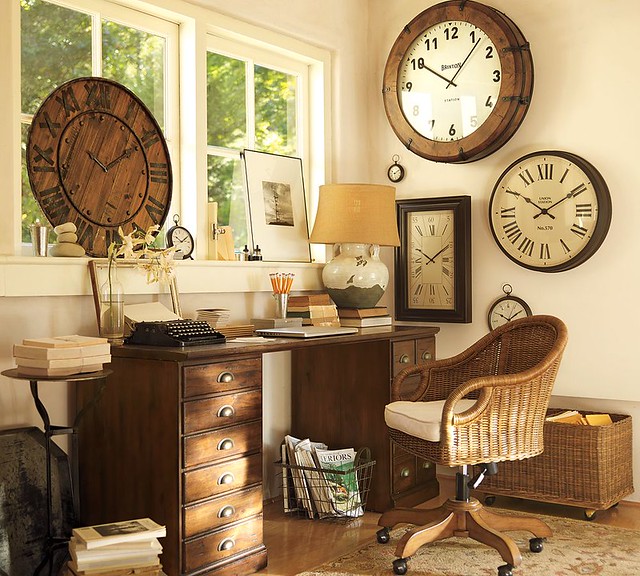
For a while now, I’ve been promising you that I would do a DIY Copy Cat version of Pottery Barn’s Rustic Wood and Iron Clock (it is the large one sitting on top of the window ledge in the photo below).
Pottery Barn’s version:
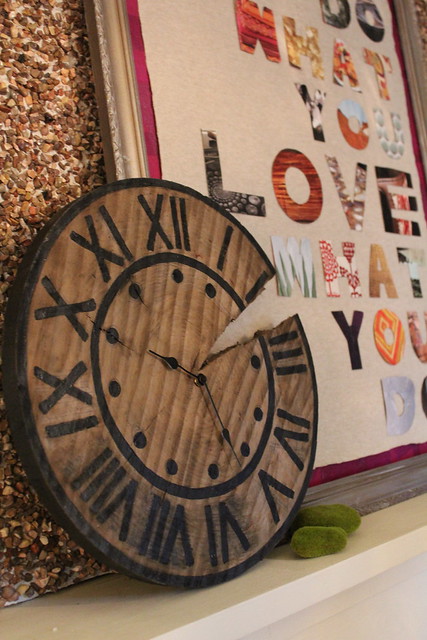
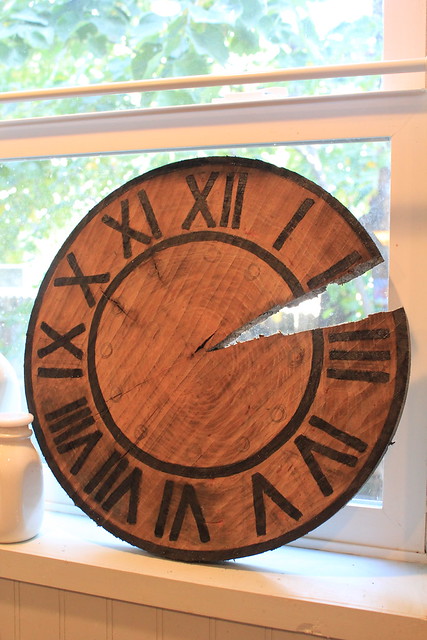
My version:
Well I finally got around to whipping up my own version and I am here to share how you too can make a rustic wood clock for a fraction of Pottery Barn version!
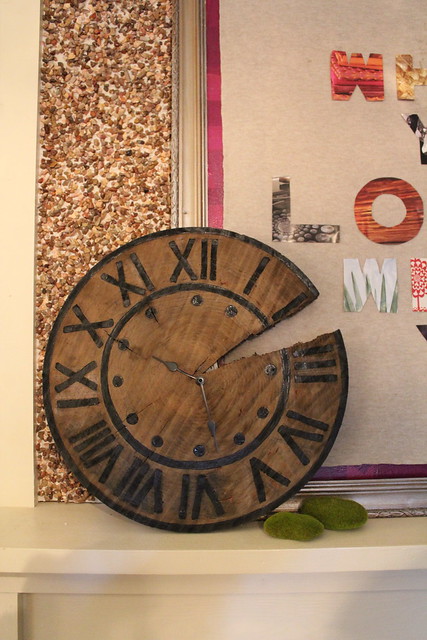
When Tim was prototyping his Steel Pipe Table, it took him a while to figure out how to make sure his wood disc top would not split. This left me with a few “imperfect” discs to play around with. After a few ideas, I settled on creating a clock out of this perfectly imperfect piece of wood.
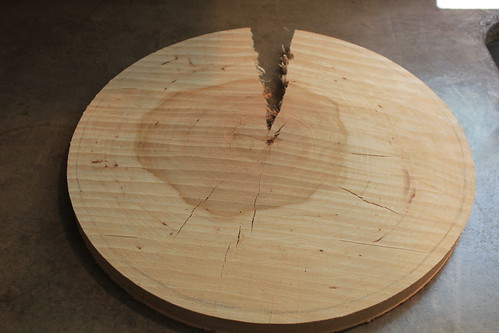
Step 1- So, your first step is to figure out the face of your clock.
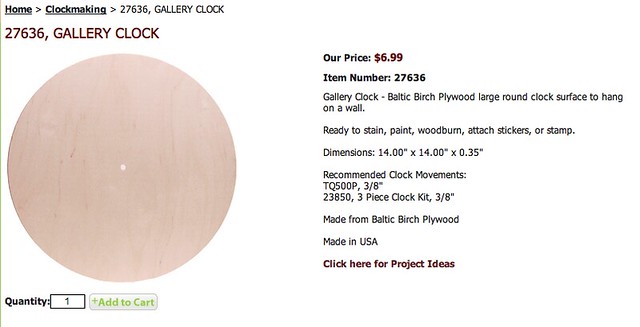
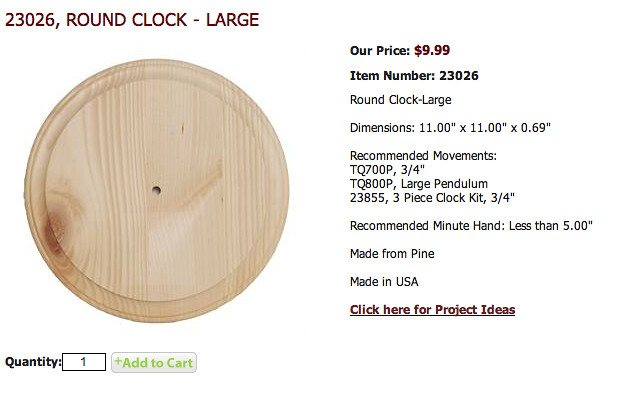
You probably don’t have a extra wood disc lying around, but here are a couple of ideas if you need them.
Walnut Hollow sells these two clock faces below for a mere $7 and $10. You can buy them here or here.
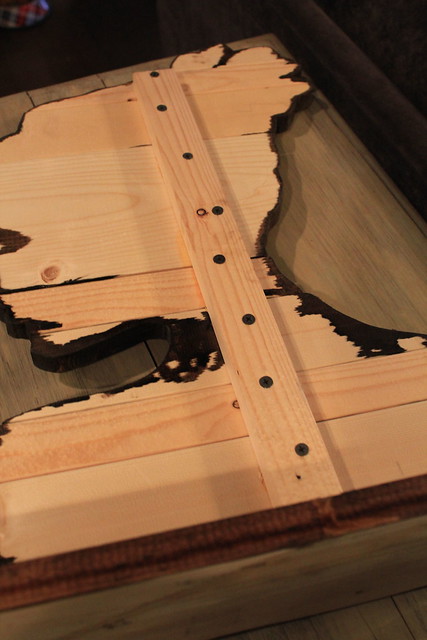
If you prefer a more reclaimed look, you could use old wood flooring or even beat up 1×4’s. You can stabilize the piece in the same way I built my wooden busts. You simply use a piece of 1X2 and screws as a cleat to hold the pieces together. Construction adhesive also helps.
Step 2- Stain your clock face.
Step 3- Next, it’s time to sketch out your border and numbers.

Step 4- Paint your roman numerals into the wood -or- go with my other suggestion.
I chose to simply paint my numbers onto the wood, but if you wanted to create more of the iron look that the Pottery Barn version boasts, you could cut the roman numerals out of poster board and then use the metallic hammered iron spray paint (found at most hardware stores) to make them look more dimensional.
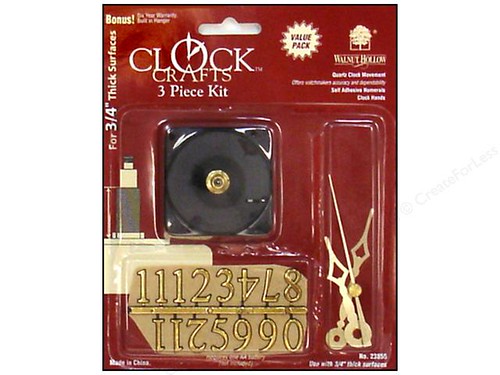
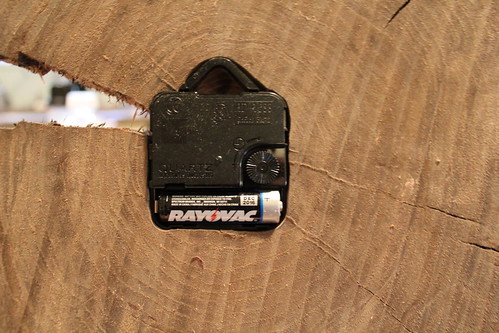
Step 5- Assemble and attach your clock pieces. You can find these kits at most craft stores- Hobby Lobby, Michael’s, ect. There will be instructions included in the package, but basically you drill a hole for the metal piece to poke through, slide on your hands onto the metal piece, and then use a tiny washer to secure everything.
Our wood disc was thicker than all the other suggestions I gave you, so Tim had to route out a place for the clock mechanism in order for the piece to fit correctly. Take this into consideration when you are deciding on what you will use for the clock face.
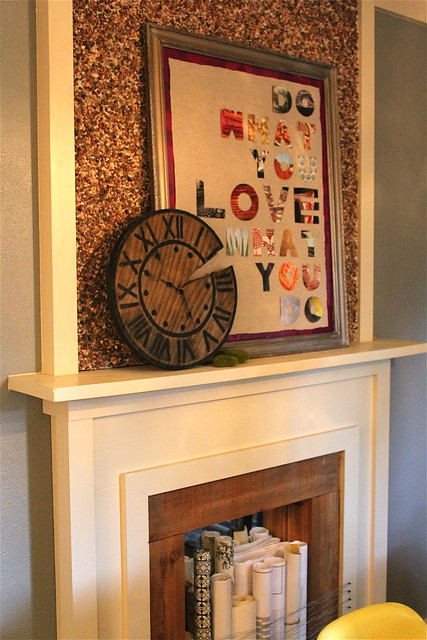
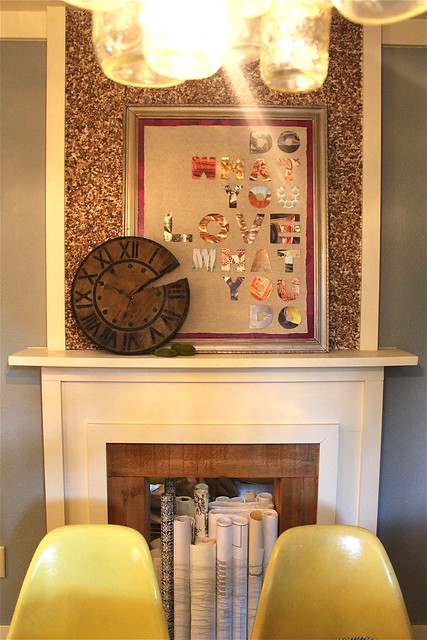
Step 6- Display your clock!
Here’s how mine turned out!
So what do you think? Do like my imperfect piece of wood? Do you wish I would have made the roman numerals more dimensional? Are you going to make one for yourself? Do tell!
OH it turned out great! The shaped of the imperfect wood makes me want to paint it like pacman, and now I can’t stop thinking about it.
It’s gorgeous! I love the character that the crack adds. = )
Just found your blog and LOVE it!
Especially love this clock project! You are one talented DIY girl!!
I love this. the pie shaped piece missing seems sort of symbolic, like slices of time sometimes go missing…or belong to someone else…or that’s YOUR time. really cute.
Awesome!
Love it!
Wow, I can’t believe how awesome that looks! You are so talented. nice job
Hello Kara, I would love to be considered for the job as your intern if you have not already filled it. You can reach me at woodruffkayla@gmail.com
By the way, that clock is a really great DIY copy-cat!
Love the clock. I plan on doing something very similar in the near future. Thanks for the tutorial!
Love it!!!
You are so talented!!
Thank you for sharing your talent!
Rose(from Brasil)
Love how the most simple projects can turn out beautifully! Great job!
You did a great job. I am wondering what you would do if you wanted to hang the clock. I made something similar but because of the clock mechanism it sticks out from the wall and leaves a gap that I don’t think looks good from the side. Any ideas or is propping my best option?
Could you find or make a round frame to hang around the clock to hide the gap. Another option for you might be trying to glue a piece of ribbon around the perimeter of the clock. That way it sticks off the back of the clock a bit and provides a lip to hide the clock mechanism. I don’t know if that makes any sense. Thanks for readying and have a great weekend.
Thanks Kara. I was playing around with the first option you mentioned and that may be the direction I go in, but the ribbon is interesting and I am going to experiment to see if I like the look of it. In the meantime I have it propped up on my fireplace mantle and I kind of like the look of it there too. Love your site – you really are a talented person.
Kara,
I have been admiring this clock at PotteryBarn for 2 years! I love this and I love your DIY. I actually bought a round disc (17 1/2″ diameter) from Home Depot a few months back for $5.99 in the lumber department. I had other plans for it but there is plenty more at home depot. Thank you for the idea!! I followed your design and it turned out great!
Thank you,
Mary (Michigan)
Pingback: 21 Pottery Barn-Inspired DIYsThe NEW N!FYmag