
UPDATE- Remember the Citi Sweepstakes ends soon, so be sure to go enter to win a 16GB mini tablet!!
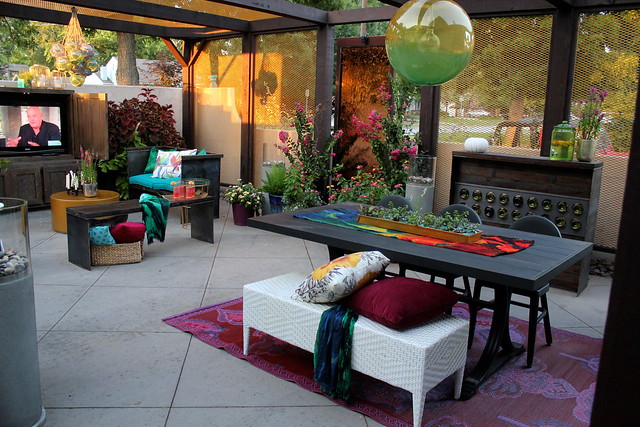
Hey Friends! You remember this Eclectic Courtyard that I revealed a couple of months ago, right?
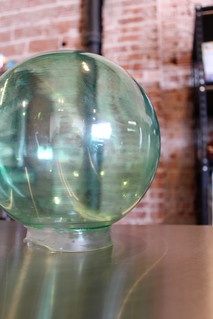
Well, there were a few elements that we never covered in the development of this design… one of them being this glass float “chandelier”.
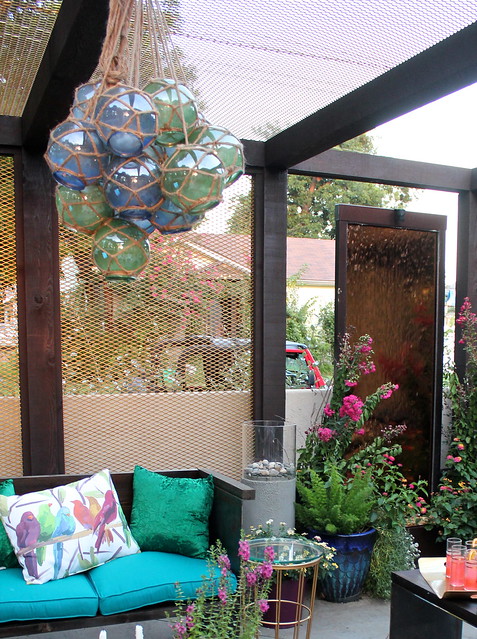
I used quotations around chandelier because the piece doesn’t actually light up. It serves more as a decorative sculpture over the lounging area of the space and I feel like it really adds to the design. PS- in the pic below, you can see how the netting around the floats mimic the decorative panels surrounding the pergola- I love that.
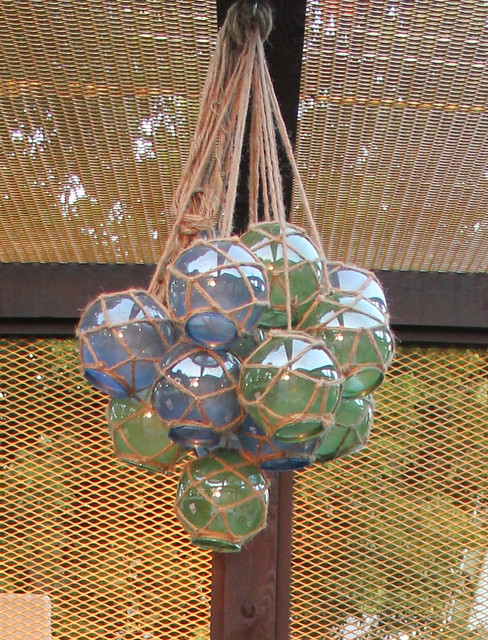
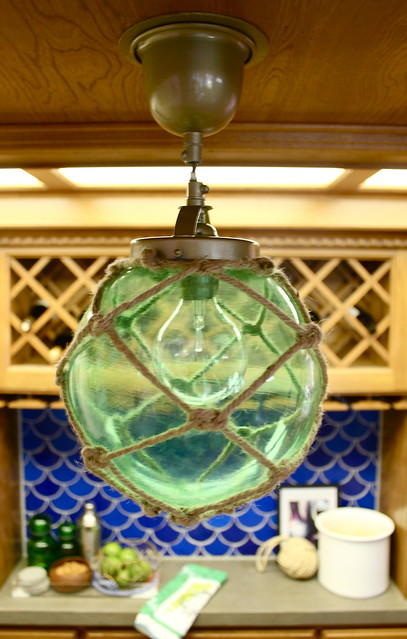
So, are you wondering how I created this piece? I would love to say all those glass balls were legitimate floats that I simply strung up, but that would have been extremely expensive and difficult to find in Oklahoma. So, I had to create my own japanese fishing floats. I used the same method I used when creating these lights in this space below…
Here’s the run down-
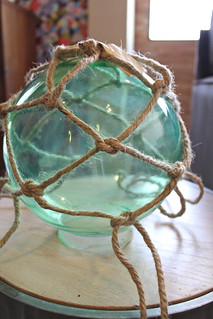
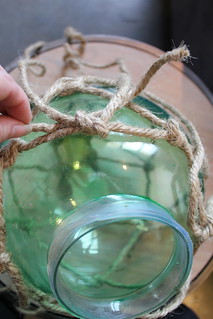
First, I bought a bunch of clear glass globes (find them at almost any hardware store). Next, I used blue and green transparent glass paint (bought from Michaels) to color the formerly clear globes. Then I began the process of creating the rope incasement. I used a thick jute for my rope. I tried to break this process down with detailed step by step photos. So, here’s to hoping you can follow them.
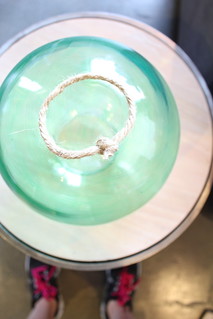
First, you’ll tie a circle and lay it on top of the globe. Next you will cut (4) 10 ft long pieces of jute. Double each piece up and tie it onto the jute circle. This will cause the circle to become more of a square. At this point you should have (8) 5 ft long pieces coming out from the circle/square.
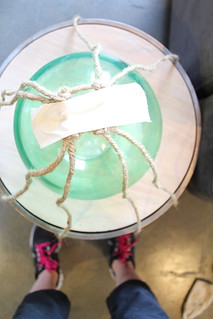
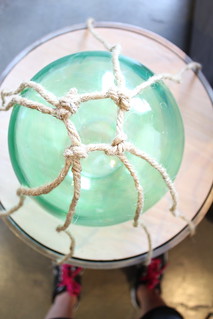
I like to use a piece of tape to keep the rope in place for the rest of the process. The next step is to take one piece from each rope pair and tie knots with the rope piece next to it. Try to keep things relatively uniform as you tie all the knots.
Continue to separate the rope pairs and tie knots as work your way down the globe. If the rope starts to slip back up towards the top of the globe, just use your fingers to pull it down and help it start to mold around the circular globe.
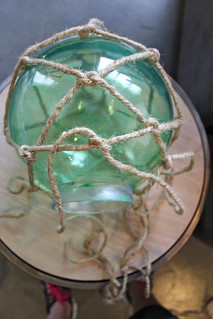
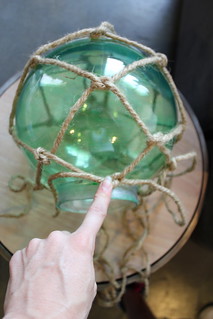
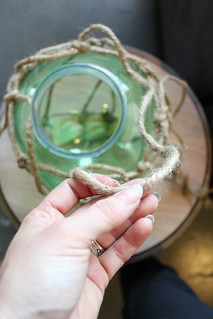
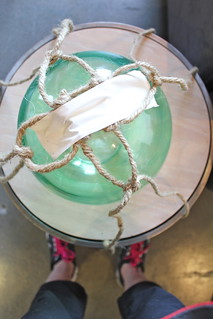
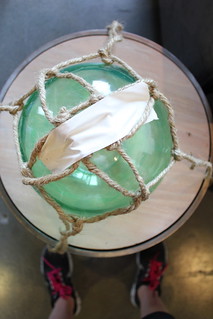
You know you are finished when you can pull one of the knots toward the lip of the globe and it stretches to the opening. Now you need to tie the “netting” you created off and secure it. To do that, cut and extra piece of jute.
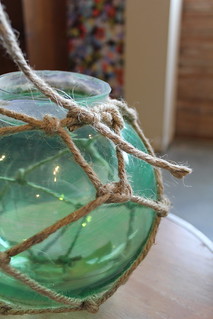

Begin to weave that piece of jute under and over the last layer of knots you created. Once you get back to where you started, tie the two ends together, pull tight (which will make the netting form around the globe) and cut off the access! Also, cut off any access left over from the 5ft rope pieces.
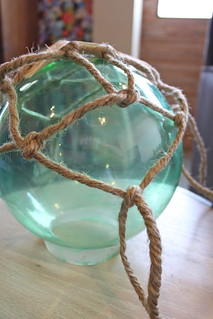
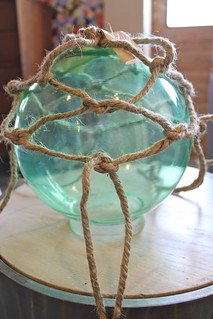
Lastly, cut more jute and string the pieces up, creating a beautiful bundle of green and blue glass! You can knot the jute strings to the netting you just created, or you can get a glass drill bit and make a hole in the top of the globe. Once your hole is made, fish the jute through and make a giant knot so the the globe rests on it.
And here’s what you’re left with!
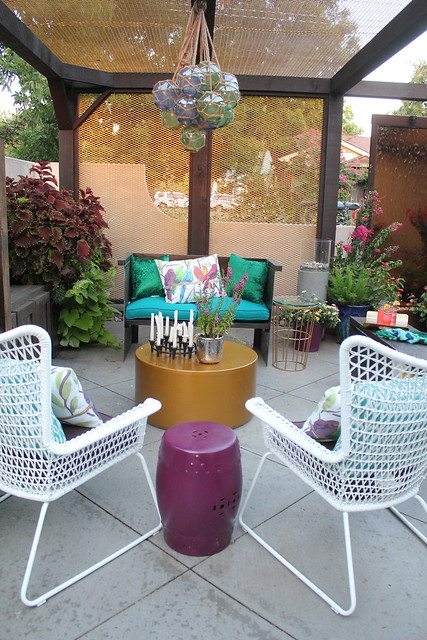
I love the bit of whimsy the piece brings to the space. More fun projects coming your way soon! 🙂
Well aren’t you clever! They totally had me fooled! I picked up a few reasonably priced floats at a nautical antiques store in Galveston last year, and now I want to grab a few more to make a pretty piece like this one. Love love love it. As always, fantastically done!
I love love LOVE this! We have a bunch of round-bottomed glass vases everywhere and this makes me want to put little rope netting all over them. It looks like it adds such great texture. Thanks for the tutorial – this is something I’ve always wanted to try but never would have attempted before ’cause it looks so darn intimidating!