
For those of you that missed the tutorial for my tufted ottoman over at Young House Love, here it is!!!


Hello everyone, if you missed my tutorial for this high impact DIY tufted ottoman over at Young House Love- here it is! If you like what you see, read on and learn how to make something similar for yourself! Oh, and there is a great possibility you can use the coffee table you already have too save some major mullah.
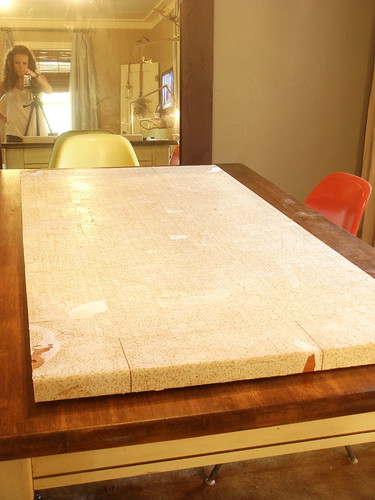
Step 1- Cut a piece of wood (or MDF) to the size you you are wanting, unless of course you are using your current coffee table. I would use 3/4 in. plywood (or MDF) to avoid sagging. Then drill small holes that will allow you to tuft later. Make sure to measure them out! 😉
As you can see I used the top from an old coffee table that I mod-podged in college. Ahh, yes the days of mod-podging. I will remember them fondly. 🙂
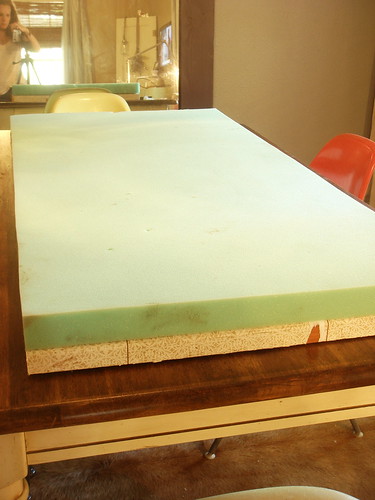
Step 2- Cover your wood top with contact cement and place 2in thick foam (cut in the same dimensions) on top. You can find the foam at your local craft store.
Step 3- Cover your top with extra-loft batting securing it underneath the table top with a staple gun. Then trim the excess.
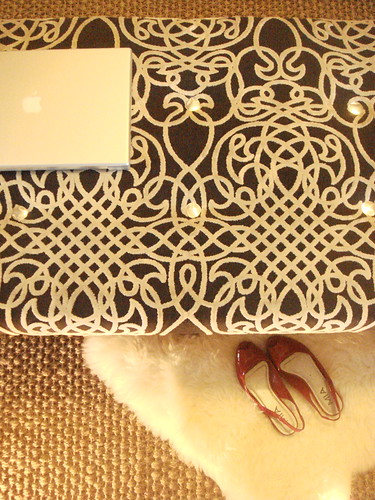
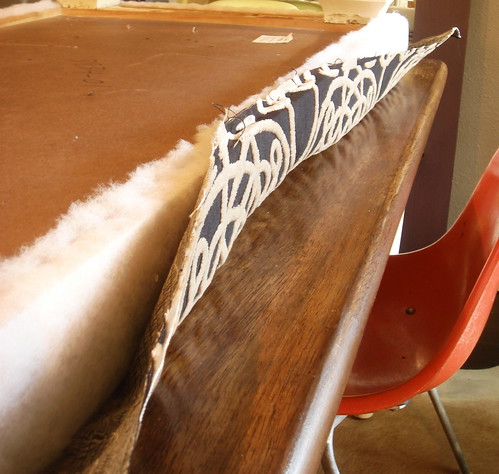
Step 4- Cover the batting with your chosen fabric. If your fabric has a pattern, make sure it is straight before placing all your staples.
When upholstering a simple square or rectangle: put a few staples in one side, then go to the opposite side, pull it tight, and add a few staples there. Do the same with the other two sides. This ensures that your fabric is taut and you don’t end up with bunches and bulges you didn’t expect.
Also pay attention to how tight you are pulling the fabric and keep the tension the same all the way around your piece for a professional look!
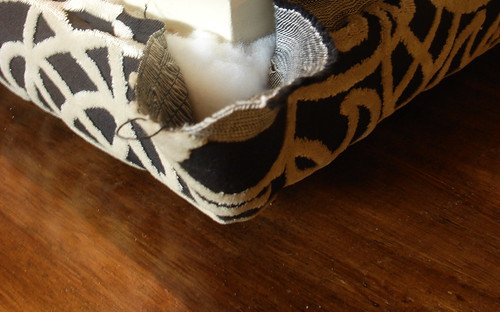
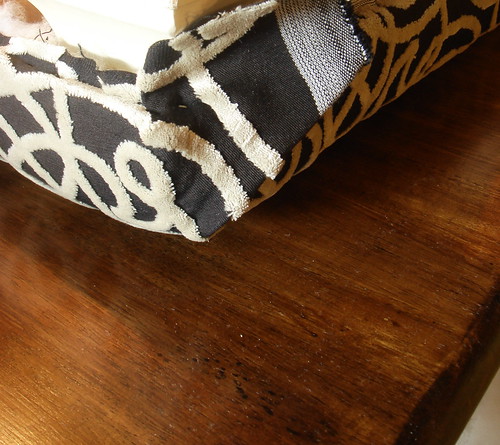
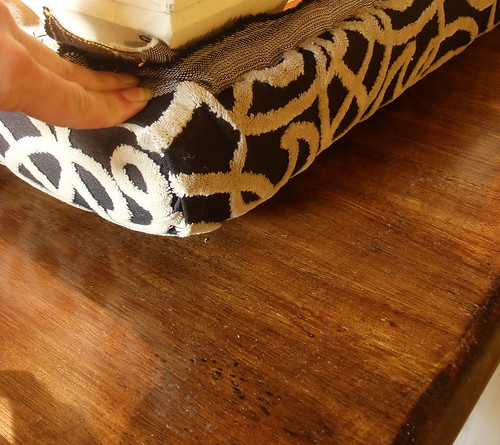
Step 5- Finish out your corners. They should look like the photo below at the beginning.
First, pull the left flap to the right and staple.
Then pull both flaps to the left and staple, being sure to smooth out any lumps and humps because regardless of what the song says, these are NOT lovely or ladylike! 🙂
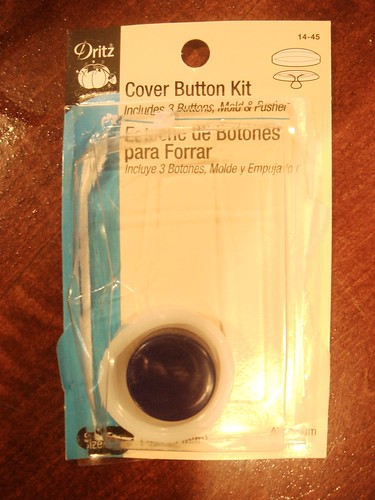
Now it’s time for tufting! You can find buttons and cover kits at your local craft store.
Step 6- Cover your buttons.
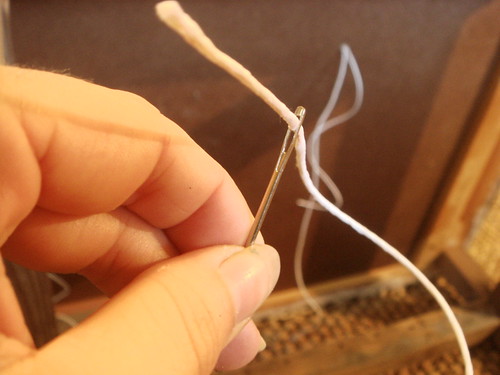
Step 7- String a heavy and strong thread through the eye of a very large needle. Do not cut the thread.
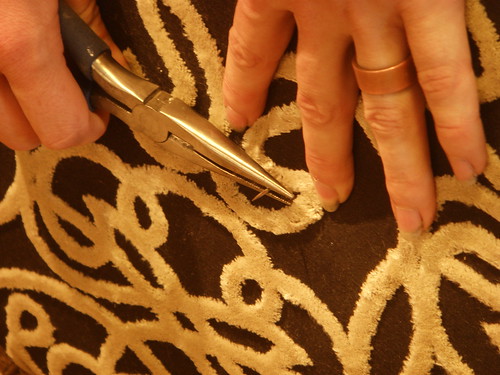
Step 8- Push the needle and thread through (from the back to the front) of your piece. You may need to use pliers to grab the needle and pull it through.
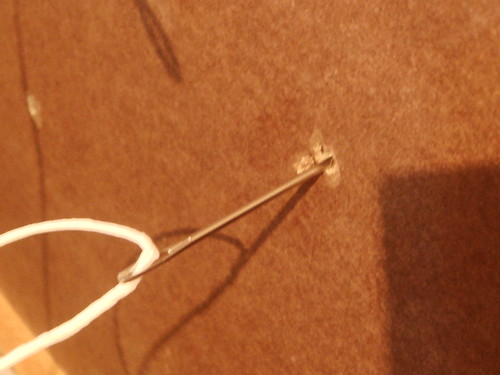
Step 9- String your button onto the thread and then push the needle back through. It may take a few tries to find the hole, but keep trying and you will get it!
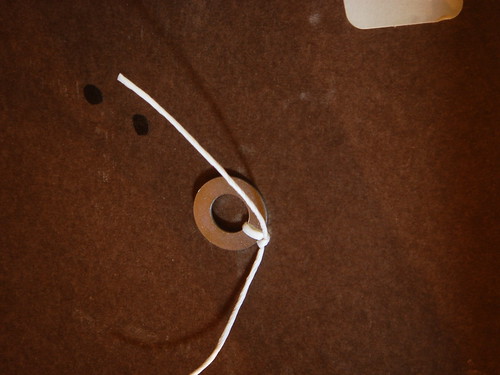
Step 10- Thread a washer onto one end of the string and then use both ends to tie a knot ensuring nothing comes loose. Have a friend or spouse push the button in on the other side while you tie the knot to ensure that all your tufts are the same depth.
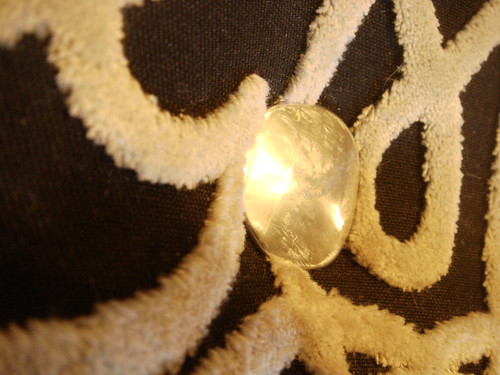
It should look something like this.
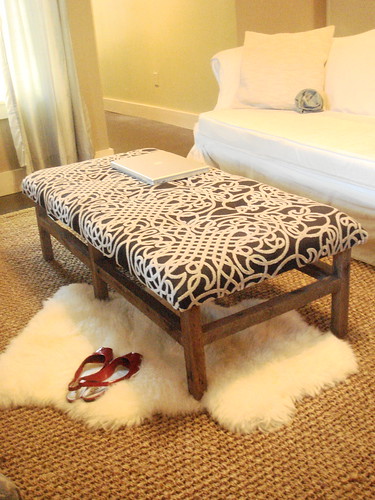
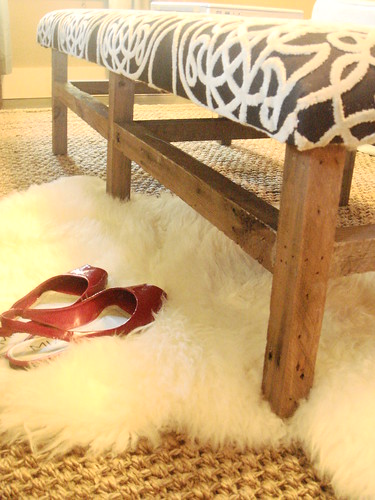
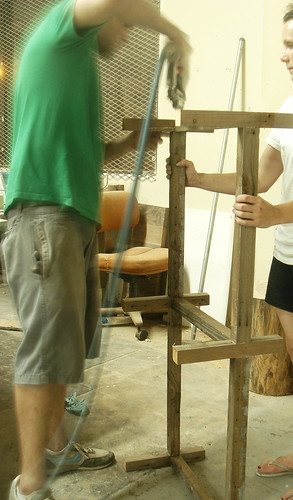
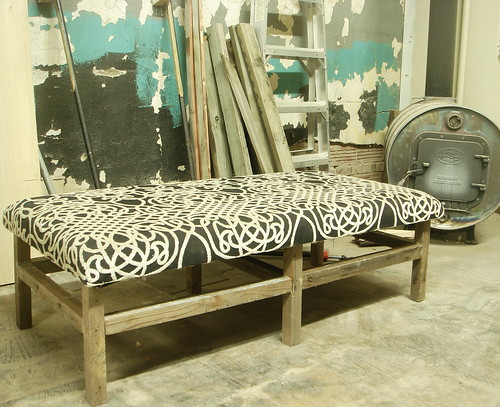
At this point you have a beautiful tufted HEADBOARD!!!! All you have to do is hang it! But I needed an ottoman so Tim and I put together some “look at me” legs!
I always like a piece with some history, so I chose to make my base with old 2×2’s that we removed from our house during its renovation. Our house was so old/not up to code, a few walls were made up of 2×2’s set in a grid pattern (instead of 2X4’s centered on 16’s)! YIKES!
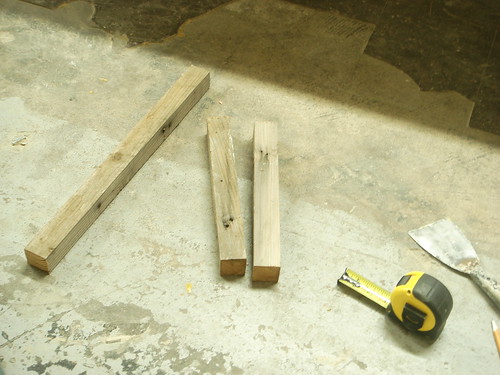
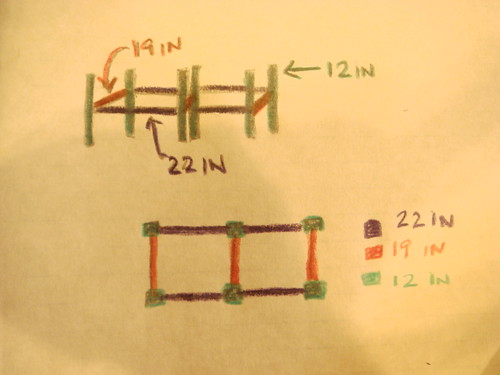
Step 11- I cut:
(6) 2×2’s at 12 inches
(3) 2×2’s at 19 inches
and (4) 2×2’s at 22 inches
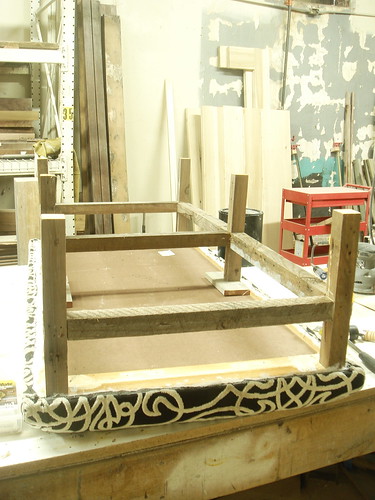
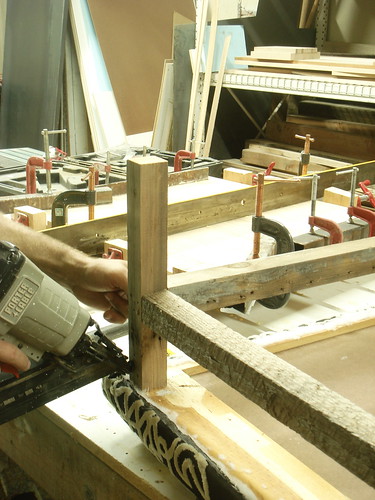
Step 12- Bring your base together.
Now would have been a great chance to use that Kreg Jig John has been flashing, but unfortunately we don’t have one. 🙁 So, we opted for a 1-2 punch of finish nails and liquid nails. You could also use screws and liquid nails. Things are pretty sturdy in the beginning, but once the liquid nails hardens up, things are Jillian Michaels tough!
Here is a color coded drawing to show you how we put the pieces together. The 1st drawing is a side view while the bottom drawing is a birds eye view.
Step 13- Attach the base to the top. We used liquid nails again and then toe-nailed our finish nails to secure the top to the bottom. To “toe- nail” simply means to nail things in at a diagonal. You should also do this if you are using screws (and be sure to pre-drill)!
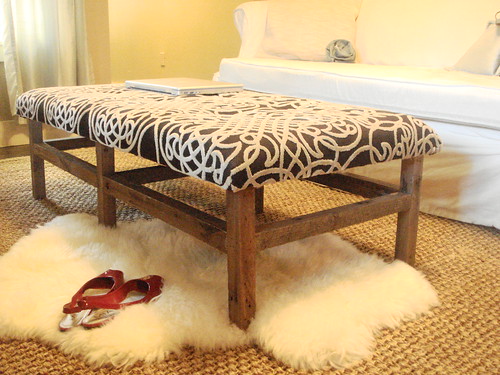
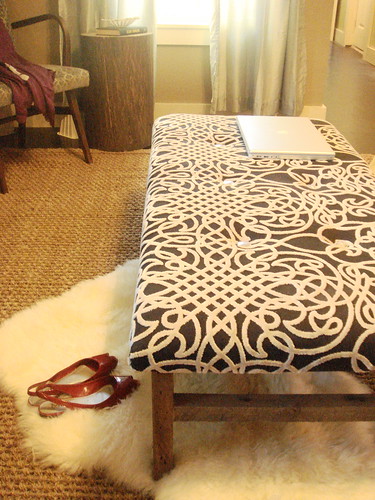
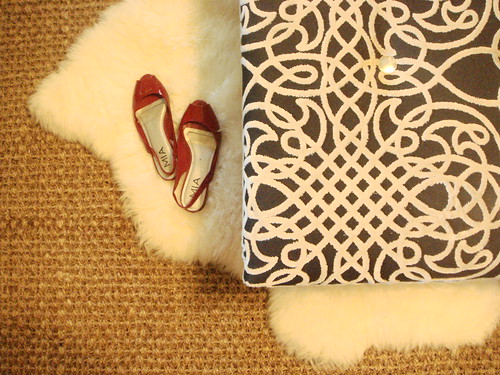
Now that we’re finished, let’s see what it looks like in our living room!

We are so excited to have a brand new piece of furniture that is incredibly functional, serves as a reminder to our renovation experiences, was made from mostly reclaimed materials, and only cost us about $35! Here is the budget breakdown!
Top from former coffee table- FREE
2in thick foam- $27 (with 40% off coupon)
Contact cement- already had and we only used a little bit- FREE
Fabric (scrap piece) – FREE
tufting buttons- $5
Reclaimed wood legs- FREE
TOTAL COST: $32
Although we lucked out by finding pieces we could reuse, we’re sure you can do the same by upholstering a coffee table you already have, using an old curtain panel for your fabric, and scouring your local REstore for wood scraps!
That is freaking awesome:)
I love your ottoman. Nice fabric.
Lovely greetings…
Actually, I did see it on Young House Love.
It’s lovely!
http://www.kellyloves.wordpress.com
I LOVE this, and definitely want to try it. How hard is it to do on an existing coffee table? Would any of the steps be different or modified? Specifically I’m wondering if I would first need to detach the legs in order to properly cover the top with the foam, batting, etc.
Could you tell us the dimensions of the table top you used for the ottoman? I am not sure how much bigger the top should be than the legs. Thanks for the help. I can’t wait to get started.
I’m also looking for the dimensions of your table top. I want to get working on this project, so I appreciate your help! love this so much!
I just discovered your blog because I am bored at work (don’t tell anyone!) and I absolutely LOVE this idea. I’m moving this weekend and was planning on simply repainting my old coffee table, but now I’m definitely doing this!! Thank you so much for posting so many great things. I’m adding you right now to my RSS Feed.
Lacey
Lots of people over at younghouselove (and me!) are wondering the name of your fabric or where to find something similar? Thanks! Planning to make your stump tables soon– they are at the top of my to-do list. Definitely above laundry…
Hey Audrey, the fabric was actually a sample I got from a store that was throwing them out. Unfortunately the style was being discontinued! 🙁 Sorry I can’t help more!
Kara, in a similar vein to Audrey’s question, do you know what type of fabric it is? It kind of looks like canvas with chenille coming out of it?? I’ve googled my heart out. Could you tell us about the weight and feel of it?