
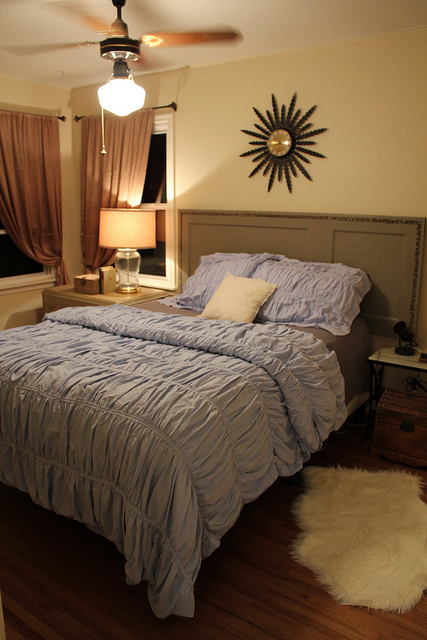
Remember when I showed you this room and headboard I recently completed for a charity project?


Well today I’m back to give you the full how-to on this amazingly simple DIY project! You can totally do this!
Step 1- Find an old door. For this project we actually used a door that we were removing from another part of the house. But don’t worry if you don’t have an extra door lying around, they are easily found at your local Habitat for Humanity Restore or on Craigslist.
(photo of a Habitat Restore)

Step 2- Paint, sand, or stain your door. Depending on the look you are going for you may want to paint a fresh coat of paint, sand down and stain your door, or simply distress it for a weathered look. I was going for a more elegant and refined look in this room so a fresh coat of smooth paint was the ticket for me. But I could totally see wanting a door that looked like this (below) for another room!
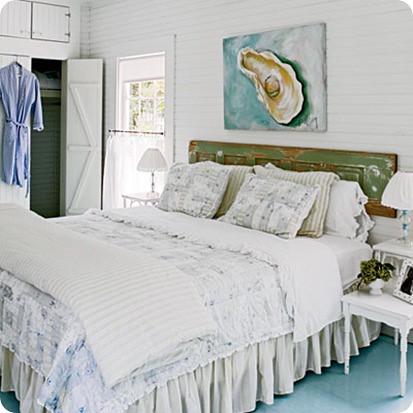
Room design by Jane Coslick.
Step 3- Use a ruler and pencil to draw a border around your door. I chose to make my border sit about an inch in from the outer edge.
Step 4- Choose your upholstery tacks based on the look you are going for. They come in all sorts of styles and finishes.

I bought mine from Lowes which meant they came in a package of 25 individual tacks, but if you go to an upholstery shop you can buy a nailhead trim strip which has a bunch of nail heads attached together but you only have to nail in every fourth one or so. Definitely a time saver!

photo courtesy of Matters of Style blog
Step 5- Hammer in your tacks or tack strip. Remember to use an upholstery hammer if you have one! An upholstery hammer is not a necessity but it is pretty cool if you want to invest in one. You see, upholstery hammers have a magnetized end so the metal tacks stick to them. This means you can nail in your tack without having to hold it with your fingers and thus avoiding a sore thumb!! 🙂 Here is what an upholstery hammer looks like.

Remember to follow your line carefully. I decided to do a double border around the headboard/door, but feel free to customize your design! I can’t wait to see what you talented people come up with!


So what do you think? Anyone gonna take this project on?
If you need some instruction on hanging the headboard you just made, click here and see Option 2!
Such a cute headboard! If we needed a headboard I’d totally take this on!
I am totally doing this! So excited to get started- I’ll let you know how it goes!
LOVE it!
Love this idea! Thanks for sharing.
http://www.nattybydesign.blogspot.com
Nice! I once remade a really ugly headboard with some crackle paint. I think some nailhead trim would have stepped up the style. Fortunately, I’m over my crackle-finish stage 🙂 but I might find a spot for some nailheads!
Well now I sure want to!
I never knew that you can find patterned nailheads!
I totally need a headboard. It’s one of those neglected areas of my house. Thanks for the inspiration!
i love this idea, but have one question… what do you do about the hole in the door where the door knob was? how do you cover it up?
Thanks, for this one I hung it low enough to be hidden behind the mattress. If you want it a little higher the pillows would still cover it most of the time.