
Let’s continue shall we?
Ok, so we left off just finishing our buttons which we will now tuft with!
Step 7- You need to find a big needle or a piece of wire that you can bend to create a hook. Now, thread string (make sure it is strong!) through the hook or eye of the needle and the button back, and then tie it off.


Step 8- Poke a skewer through one of the holes in the back of the headboard. As it pushes out the fabric in front make a small incision to allow the skewer to push through. If you are using a large needle you can skip this step.

Step 9- Remove the skewer and push your wire/needle through the front side to the back side.


Step 10- Once your wire/needle pops out the back of the headboard cut your string to release it from the wire/needle.


Step 11- Then hold the string as you pull the wire/needle back out the front.

Step 12- Last have someone push the button in from the front while you tie a knot in the back. Use a washer to keep the knot from going back through the hole.

Step 13- Finally, I used gimp (pictured below) to cover all visible staples.


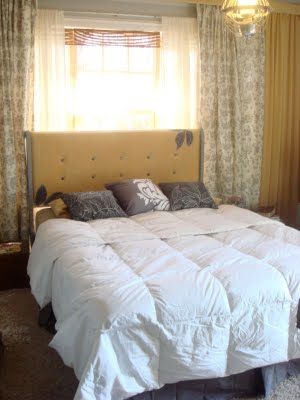
And of course (since I can never leave anything looking normal) I added some fabric cutouts! It may not be for everyone, but I LOVE IT!!!!

A quick Before and After!
BEFORE

AFTER
What do you think, do you like the new look?
It looks great! I love the cutouts!
I LOVE IT! Thanks for doing this. Now pray, that I can tackle this project someday! 🙂
I love it! I’m learning new vocabulary every time I come on here- gimp, tufted:) Thanks for showing all the details of how to do everything!
I think it is absolutely beautiful! And you gave such easy instructions too. Your room is swoon worthy, luv it!
Simply put- gorgeous! I love it.
Sherryd
I love the fabric cutouts. They add just a little something that make this project stand out from the rest. How did you do those? Please share.
Thanks.
This is amazing! I totally want to do something to my bed now!!!