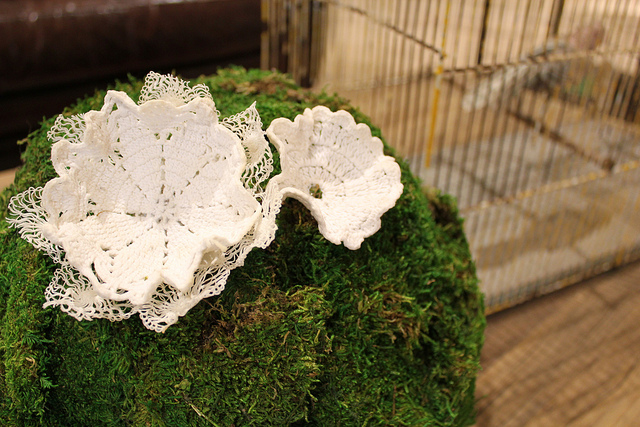
Remember months ago when I made these doily “flowers” for the one of my Anthropologie displays?


Well, this idea isn’t only perfect for the abstract Anthro display above (you can read more about that project right here). No, this idea and process can be used to make adorable doily bowls for your home!


The process is easy and inexpensive. Here’s how you to do it.
Gather your materials.
1. Doilies
2. Elmer’s Glue
3. An Extra Bowl- you will use this bowl as a template for your doily so make sure that it has a nice shape and is compatible with the size of the doily you are using.
Step 1- Mix the glue with water. (3 parts glue to one part water)
Step 2- Soak your doily in the mixture. Swirl the doily around a bit to make sure the mixture works itself all the way through the material.
Step 3- Turn the extra bowl wrong side up
Step 4- Ring out the doily and place it on top of the extra bowl. Make sure you lay the doily out exactly how you want it to dry. If you want it to have ruffled look adjust the fabric for that. If you want a clean look, smooth the fabric out.

Photo courtesy The Nester
Step 5- Let the doily dry for 24 hours and then remove it from the bowl!
Tip- Try to use doilies that are tightly knit. The looser the knit, the harder it will be for the bowl to hold it’s shape once dry.
Oh and if you’re like me, you may enjoy a few of the those doily “flowers” floating around as well!


And there you have it. Don’t you just love doilies and all their possibilities?! Some of you have asked for a tutorial on the doily fossils. I would love to give you one, just give me some time to get a few process pictures together! 🙂
Happy Wednesday!
I am apart of a swap group, and I just swapped for some doilies….love all of these ideas! I cannot wait to try them.
So creative. Love this idea.
Thanks glad you like them.
They are just adorable as small chandeliers on “christmas” light series and you can use them all year round