Are you wanting to get rid of those formica or tiled countertops? If so, concrete could be right for you! Many countertops can cost an unbelievable amount of money and for that reason replacing them is delayed or crossed off the home improvement list permanently. Concrete offers many perks when it comes to upgrading your kitchen. Inexpensive, durable, attractive, and relatively easy are all characteristics of concrete countertops!
My friends, Adam and Stacy, are building a picture-perfect patio and they agreed to let me tag along and document the process to show all of you out there just how easy it can be to create countertops with concrete.
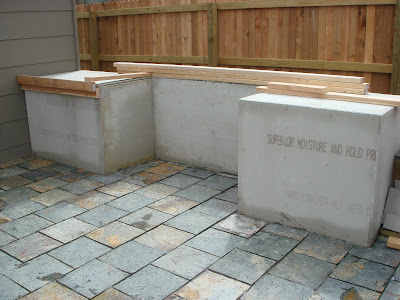
First you will need to cover the surface you will be pouring on with concrete hardibacker. You can cut hardibacker with a grinder or circular saw and attach it with roofing nails or screws.
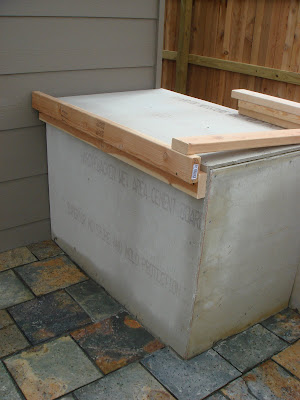
Next you will want to make an overhang with some wooden boards. Here we used 2X4’s but different sizes can be utilized depending on your preference. The wider the board, the thicker the edge will appear to be. Because a big fancy grill is going in the center of this countertop there is no need for an overhang on the inside stretches. Making sure all the boards are nailed in at the same height is essential to the countertop being level.
Tip: If you want your edges to be super smooth, cover your board with clear packing tape.
Next its time to mix your concrete. Pour the bag(s) in a wheel barrel and add water. Stir with a shovel folding the concrete like a cake batter to make sure the blend is mixed evenly. The consistency should look something like this:
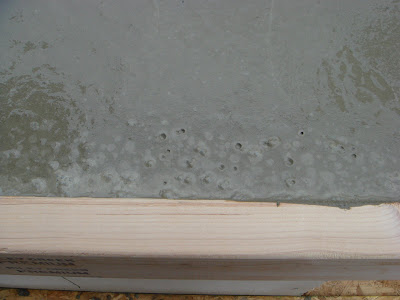
Once you have distributed the concrete to all the edges it’s time to vibrate. Place the side of a sander against the 2×4 (or whatever you are using) and hold it there. The vibrations cause the concrete to settle and fill in any cracks that it may not have reached. Bubbles will start to form on top of the concrete. This is a good thing, don’t worry!
Once your done vibrating its time to screed. Put a slight excess of the concrete mixture over the whole surface. Then take a straight board and do this:
This creates a perfectly level surface. Make sure that you have put some sort of protection on your floors/patio because there is bound to be overflow at some point during this process. Screeding is more difficult to do when one side of the countertop buts up to a wall. Placing a level on top of the board will help you to screed effectively in these cases.
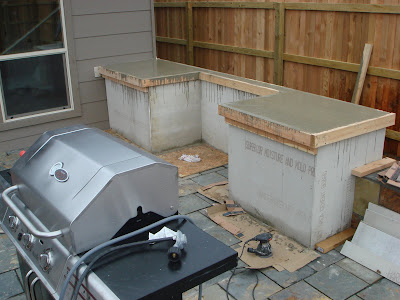
Here is what it should look like when you are done screeding the whole thing.
If you desire a rounded edge on your finished product, you will need to buy an edger from a home store. It will look like this:
You simply run the tool along the edge (where the board and concrete meet). Do this 10-20 minutes after you screed to allow the concrete to set up a bit.
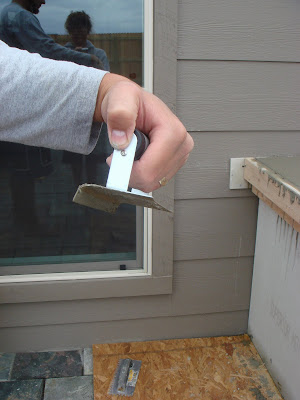
Now, just wait! Every 30 minutes to an hour you will want to go back over the top surface with a trowel. This helps to bring the slurry (also referred to as milk) to the top, which helps make the surface extremely smooth.
Tip: If the surface starts to look dry quickly trowel every 30 minutes, if not go with every hour. Do this for 3-4 hours.
TAKE IT OFF!
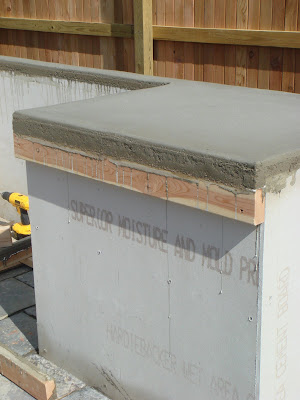
Now its time to unveil the edge. Unscrew the board against the concrete but leave the ones underneath the concrete (only remove these when it is completely dry). Depending on the look you desire, you may want to sand down the edge. Here, with the project being outside on the patio, we were happy with the rustic and rough look so we left things just as they were. You can also sand the sides and top if you want to reveal the aggregate underneath.
Sorry about the sideways video!
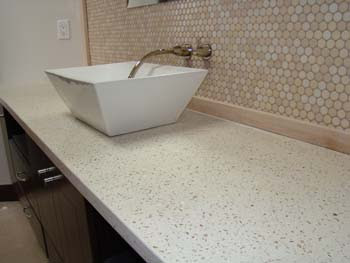
Here is a picture of a concrete countertop with the aggregate showing through.
Look for a photo of the fully finished patio in blogs to come!!!
You might have noticed that I missed Makeover Monday. So sorry, the kitchen island that I am taking from awful to awesome is almost ready for its reveal, check back in on Wednesday to see the transformation!




I know you posted this a really long time ago, but how much did it cost for you to do the countertops?
Hey Madaline – Sorry it took me a bit to respond, I changed my comments settings and it took me a bit to find the comments on older post.
I don’t know how much they spent on these, because our friends bought everything, but I asked my husband and he said that if you already had the tools then supplies for a countertop about this size would cost about $75. They just used Quikcrete 5000 for these outdoor tops.
We also have concrete countertops in our kitchen and we wanted a different color so we used a much more expensive concrete mix to insure uniform color and it cost close to $500 to do about 30 sqft.
Let me know if you have any more questions, I promise it won’t take me so long to respond.
Awesome! Do u think it works the same if i’m doing my own concrete flooring?
That is really tough to say. A lot of it is going to depend on the size of the area and what else is around it, but you should definitely be able to adapt and use most of these techniques for a floor.
Kara, I am sooo happy I found this. I have been wanting to do this for years now but have had no idea as to how! A few questions…. when you did your kitchen countertops how did you protect your cabinets from the excess concrete and did you nail your 2×4’s into them? Also do you need to seal these?
Thanks
Shelly
Hey Shelly,
The form that we used to create the overhang for our kitchen countertops was a little different than this one, but worked much the same way. We finished nailed it to the cabinets because we have full coverage doors and knew we wouldn’t ever see it. If that isn’t an option you may need to wrangle up a lot of clamps. We didn’t worry too much about protection our cabinets because we already had to take the doors off and we worked carefully. The countertops must be sealed. There are lots of sealers out that will work great. I would recommend a penetrating sealer. Smith Paints makes a great water based sealer.
Good luck with it and I hope I answered most of your questions.
Tim
Hello Kara,
I have a question and that is, when you did the kitchen, how did you do the edge around the inside of the sink? I have a porcelain sink. Thanks for all the wonderful ideas you have shared with everyone…
Pat
Hey Pat,
We bought a 4’x8′ sheet of 1″ thick piece of the pink foam insulation they use on the outside of houses and cut that out to the shape we wanted for our sink. We had to double it up so it was thick enough.
You can use a jigsaw to cut your shape out. Make some practice cuts because you need a clean as cut as possible. I like to cut just barely bigger than what I need and then use sand paper to clean it up and get to my exact dimensions. You can push nails or screws through to pin your layers together so they end up being the exact same shape.
When you have a shape you like use clear packing tape to keep the concrete from sticking to your sink form. All that is left is to put it in position and caulk around the edge to prevent leakage.
Hope this helps and thanks for stopping by.
Tim
Hi, Kara, I’m so glad I found Your blog. Thanks.
Peter (Poland)
Did you do anything for a backsplash or something to protect the fence behind? I have the same issue, only compounded by a really intrusive neighbor…