
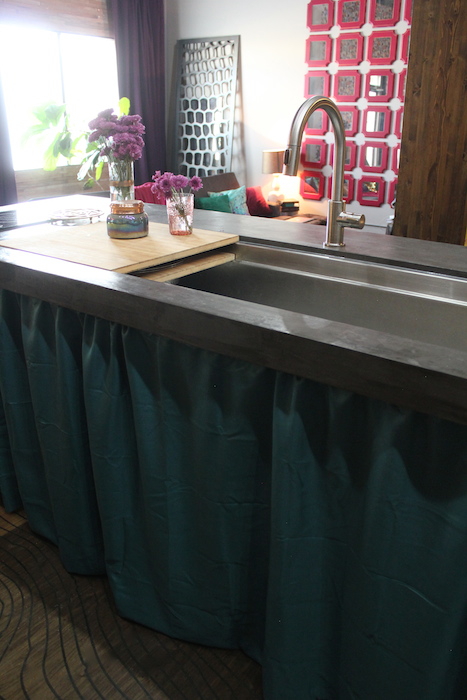
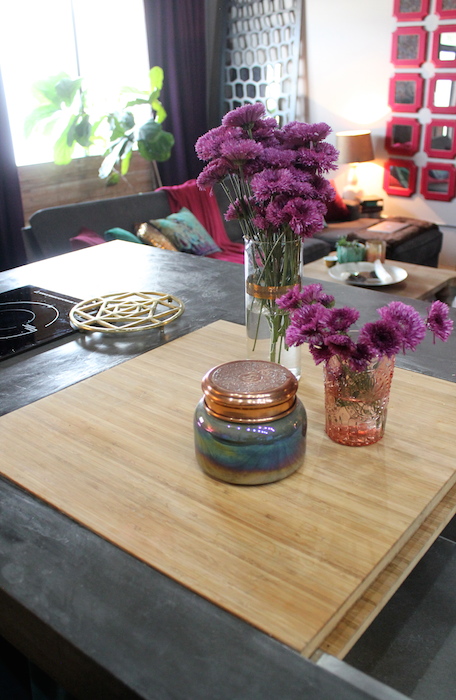
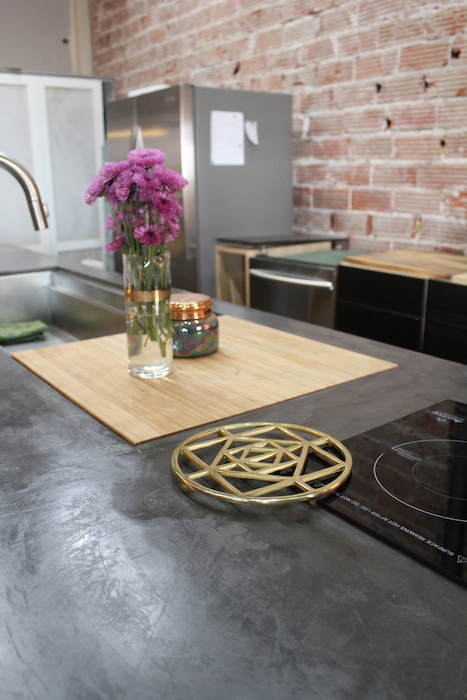
Oh my goodness, I am on my way to having the most amazing kitchen! We officially got one step closer to the kitchen of my dreams when we created our black concrete island…..
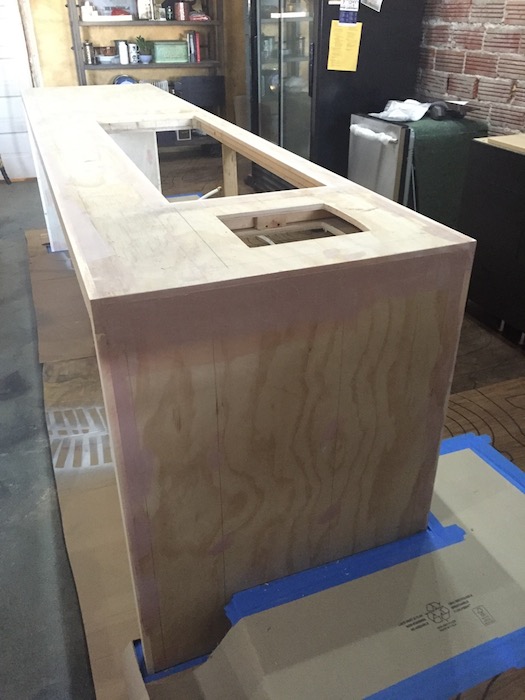
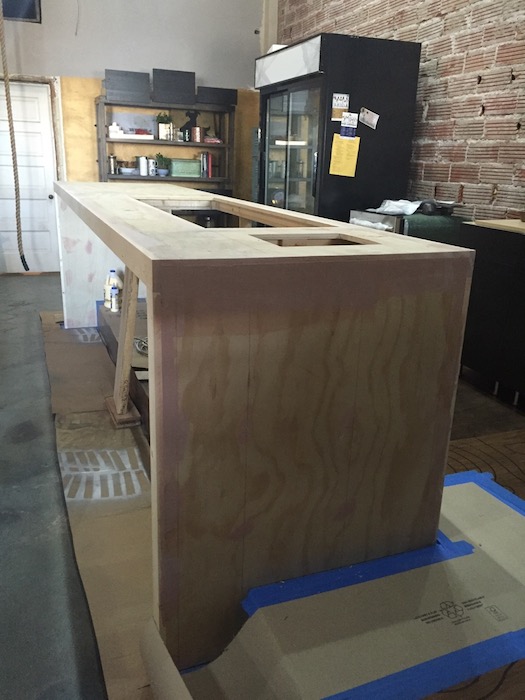

……Yep, all those pictures are of a plywood island. So how did we get to concrete? Well if you’ve been a reader for long, you know what I’m about to say! If you’re new to the blog, let me introduce you to one of the most amazing products I’ve ever used……ARDEX!
We’ve used ARDEX on dozens of projects and started a firestorm of bloggers taking our idea and trying it in their own homes! From Young House Love to Little Green Notebook- these high profile peeps have loved this concrete product just as much as we do!
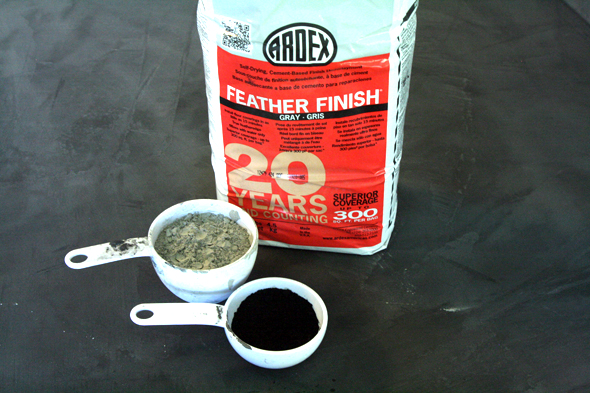
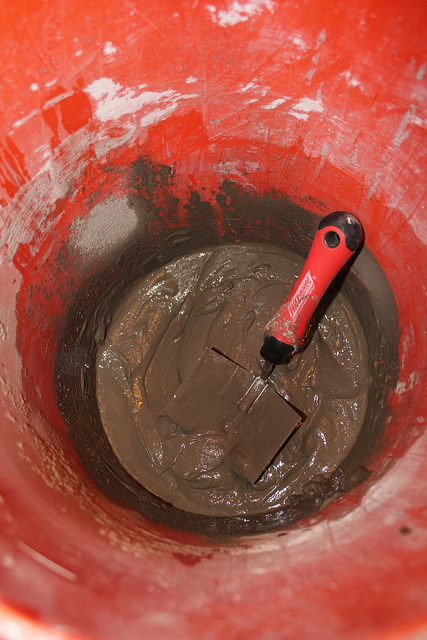
Well we’ve been planning on using ARDEX as our countertop option for a while and we finally got to the point that we were ready to make our dreams a reality. We grabbed a few bags of the trusty Feather Finish product and added this powder pigment before mixing it with water!
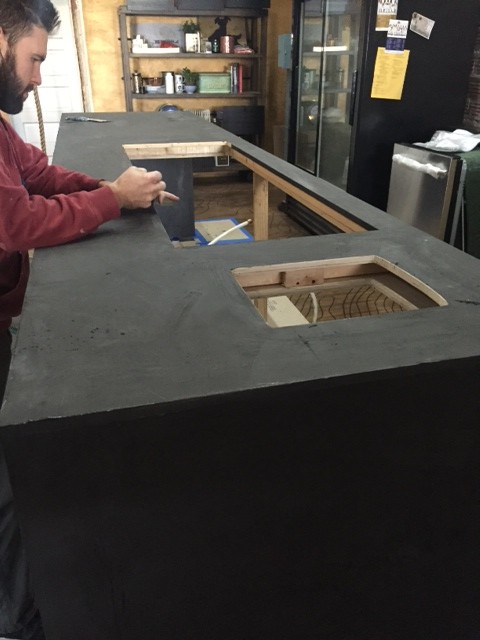
Here’s how the island looked as we added three layers of the mixture to the top of the plywood…
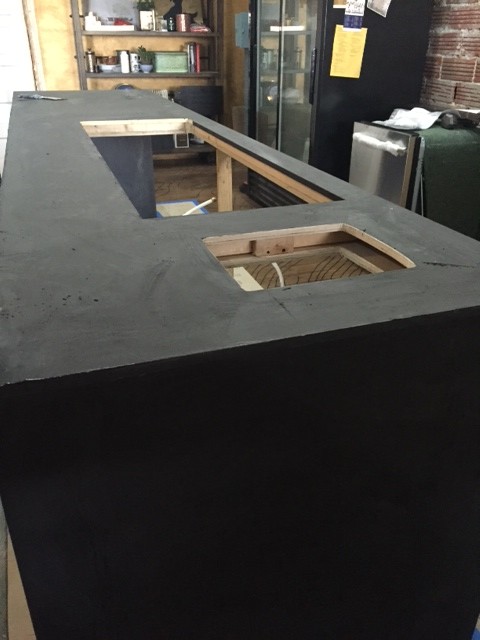
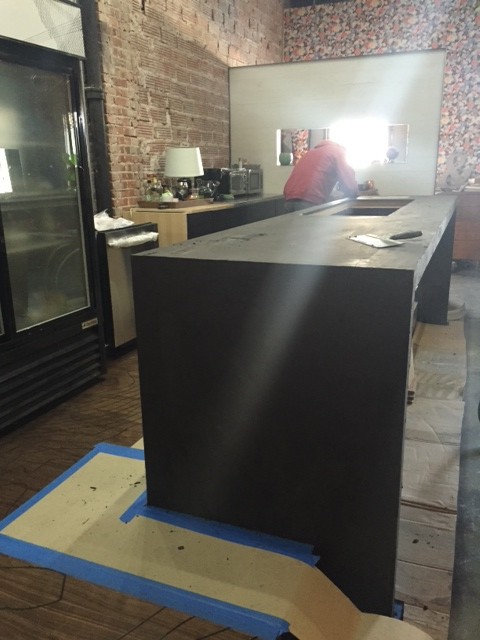
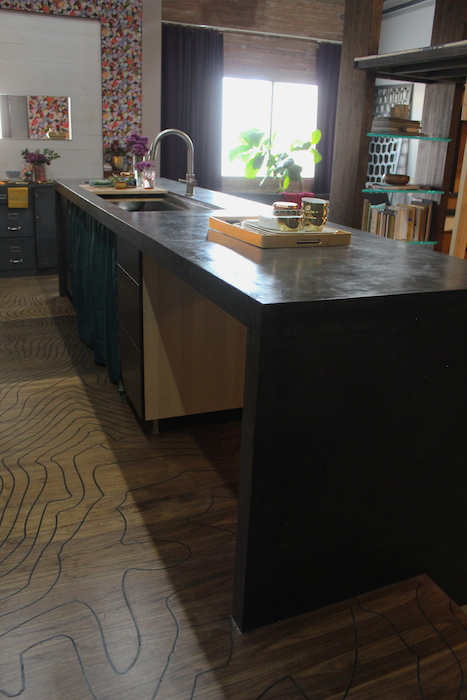
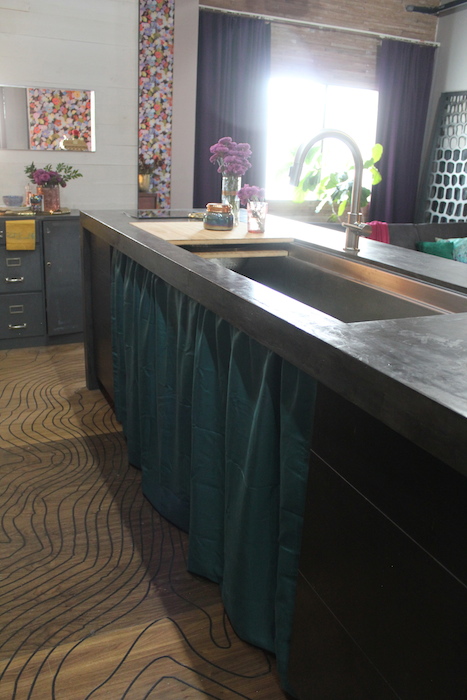
We’ve still got some building out to do underneath the island, but the countertop is now on point! Here’s how it looks finished out and sealed!

So, interested in how to get this DIY concrete look for yourself? Tim and I have the most detailed instructions out there. Keep reading and check out the detailed pics below!
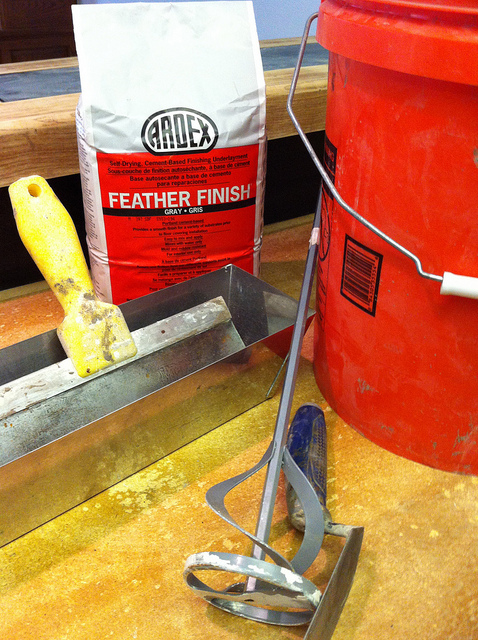
Here are the materials you will need:
– ARDEX Feather Finish
– Powder Pigment (if a color other than gray is desired)
– a bucket for mixing
– A drill attachment mixer (or you can mix by hand with a small trowel)
– a drywall “knife”
– a drywall mud tray (if desired, not essential)
– sandpaper (not pictured below)
First, mix up the concrete by simply adding water to the Feather Finish product. Add water and continue to stir until you get to a thin pancake batter consistency (add the powder pigment during this step if desired). Next you will want to allow the mixture to “flash set.” That means once it is mixed, allow the product to sit for 5 minutes, then stir again for a minute or two. This helps the product to stay workable for longer.
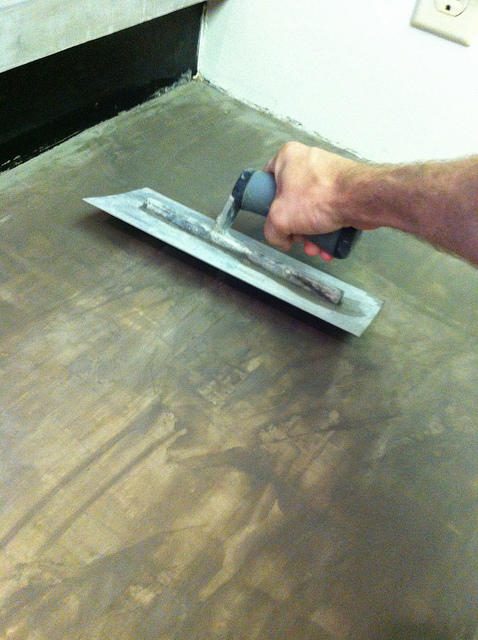
Now you can apply the concrete to your roughed up countertop. Simply trowel it on in sweeping strokes. You will do a couple of coats, so don’t try to put too much on in the first coat.
Use a drywall knife when you are up against a wall, in a corner, or doing edges. It is easier to control in these areas than the trowel.
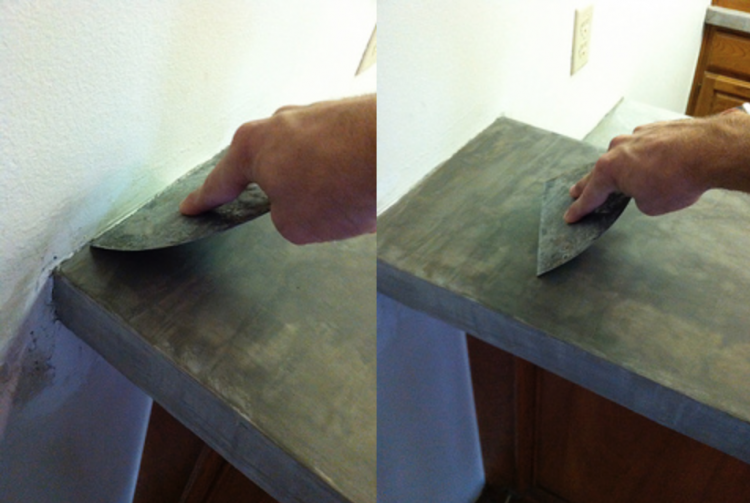
Edges and curves can be tricky. Tim and I have found the best way to cover them is to trowel on what you can for the first coat, but on the second and possibly third coat, let your mixture dry just a bit to almost a clay like consistency and then use you fingers to “sculpt” your edge. You can also use a plastic bag to help smooth a round over edge.
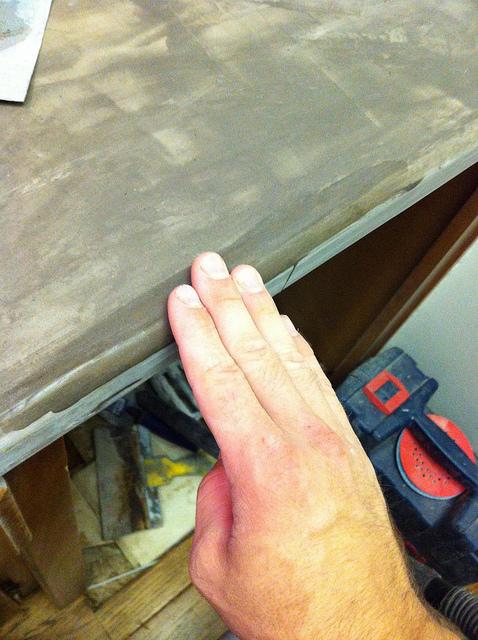
It is better to put too much on the edge at this point. The feather finish sands really well and the added thickness will allow you to refine your edge shape by sanding.
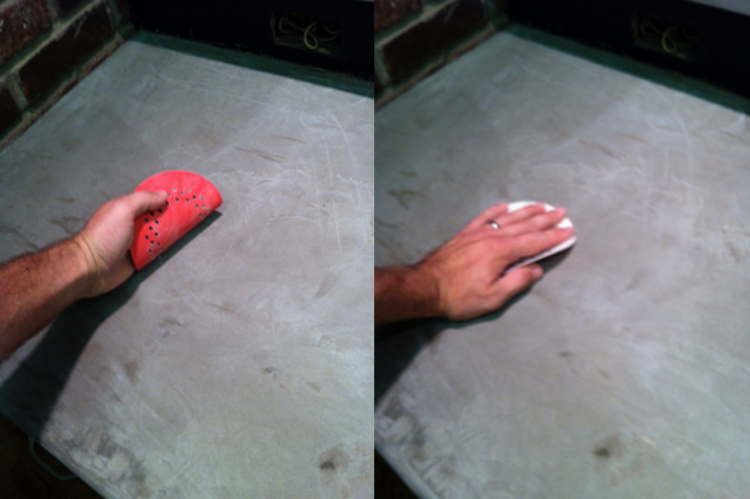
After each coat, you will want to lightly sanding the surface to knock down any rough spots that could mess up your finish on the next coat. The surface should be smooth to the touch after each sanding.
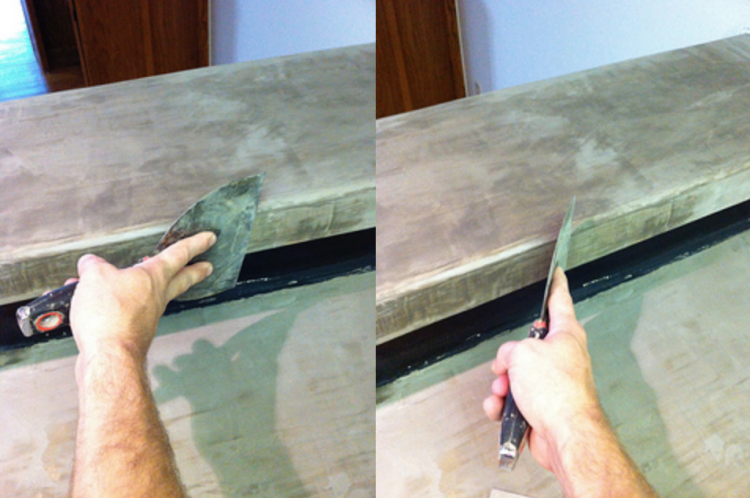
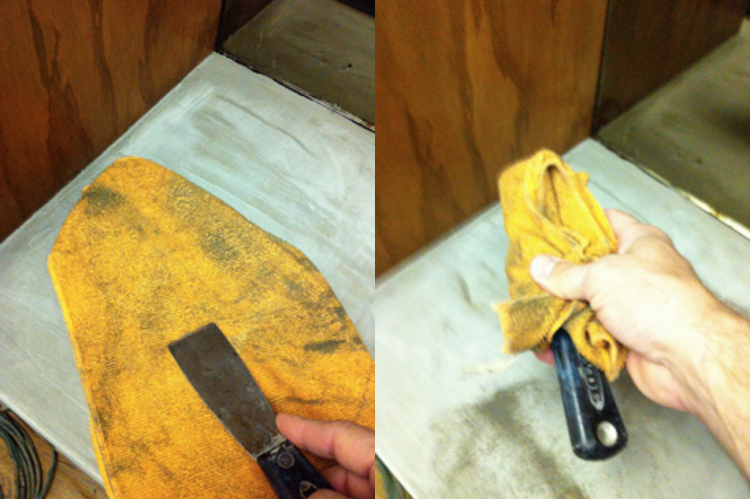
You may find that some product makes it’s way up onto the wall surrounding your surface as the photo below shows.
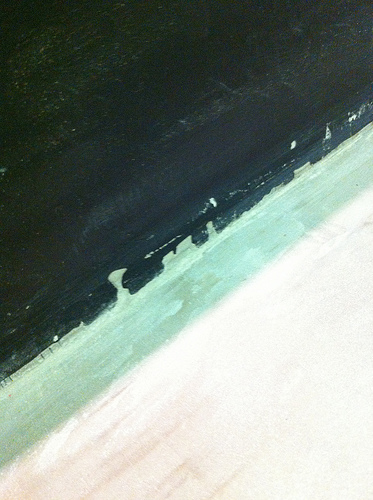
To remove this simply wrap a small putty knife in a towel (to give you a strong edge) and wipe along the surface to give you that nice clean edge!
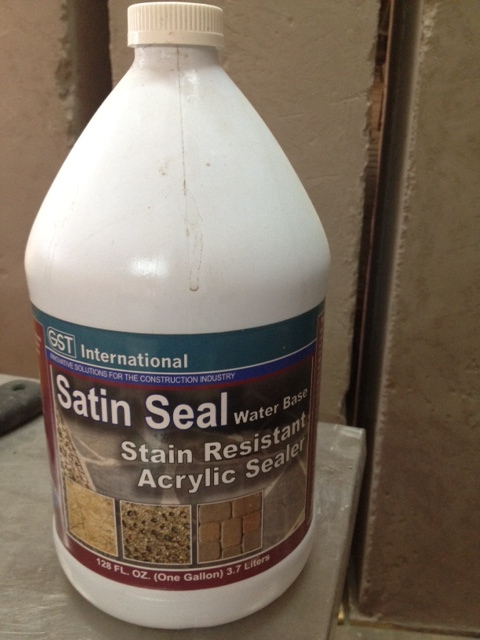
Once you are happy with the coverage of the product (usually 3 coats) and have completed your last sanding, it’s time for sealing. The process is super simple. You simply wipe the product on with a sponge, allow to dry, and repeat a number of times. We used this concrete sealer (below), but where ever you buy your ARDEX should supply a product that works the same way.
Find your nearest ARDEX supplier by clicking here!
Disclaimer- We choose to do projects that we believe will enhance homes and be lasting. However, sometimes our applications are not specifically suggested by Ardex. If you are concerned with warranty policies, please refer to the ARDEX Feather Finish technical data sheet for instructions and warranty information. ARDEX only guarantees recommended and approved applications outlined in the ARDEX Feather Finish technical data sheet. For more information, visit www.ardexamericas.com.
i love how shiny the sealant makes it. and the contrast with the curtain is amazing.
How durable is this once sealed? Is it just regular smooth, wipeable, etc?! I haven’t really “touched” a concrete kitchen surface before so having some trouble imagining it.
Just wondering if I am brave enough to do this on my countertop once we get the kitchen reno started… Maybe I should start with a more manageable area first! Love the look of the black and the wood sink covers together!
Oh and I was reading through a new-to-me blog the other day, Design Mom, and she did the floor of her little reading nook in concrete and as she’s about to explain how she did it, I was thinking I should comment about your posts… but she had already linked to yours!
I’m planning on trying Ardex to create a dining room table top. If I build it in the garage and attempt to move it – 1) how heavy will it be? 2) have you ever tried to move the surface – will it crack? Thanks so much!
hi! I love what you did! your kitchen looks fabulous! Can you tell me exactly what pigment product you used? I know you added a link to it but there are several ones and yours is powder. The ones on the link look like they’re liquid? I want to make sure I get the correct one. Thanks so much!
Love the countertop! I was wondering if you could tell me how much pigment powder you mixed in and the ratio of pigment powder to concrete? Trying to figure out how to do this on my own and want to make sure that my countertop is pigmented! Thanks!
Could I use this on a feature wall? I do not want a sheen, and I actually want a rough texture; no smoothness required. Would this product work? Or can you direct me somewhere else?