
Today I am excited to reveal a super chic and wintery decor idea! There are all sorts of directions you can go when decorating for the Holidays. Some like to go super elegant & traditional, some head towards a homey farmhouse vibe, still others like the simple scandinavian style. I feel like the idea today would go great with a modern or contemporary Christmas feel.

Crystals have been gaining popularity in the last few years and I (like many people) really love their natural, yet glitzy nature! I would love to have a vast collection of crystals that I could display and gawk at all over my home. However, finding large and gorgeous crystals inexpensively is virtually impossible! So. . . . let’s make our own! 🙂
All you need is:
– Insulation foam
– Clear Plastic Straws
– Hot glue and glue gun
– Scissors
– Different paints
The process is super easy.
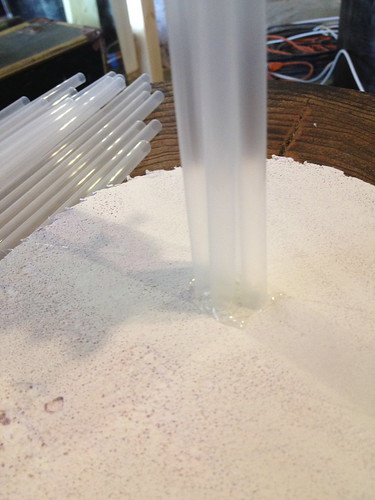
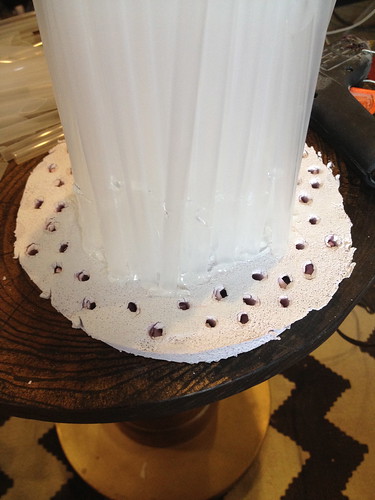
1. First, figure out what shape you want the footprint of your crystal to be. Cut that shape out of the foam and paint it white.
2. Next, gather your straws and start to attach them to the foam and to each other with hot glue. Use enough glue to make the structure stable.

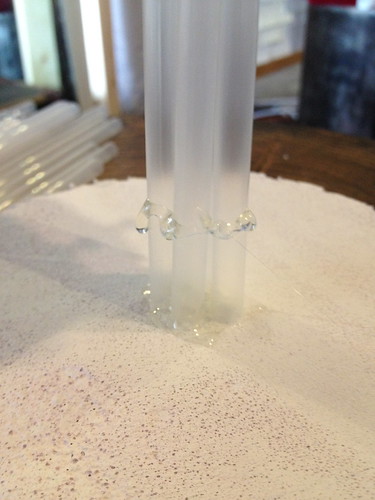
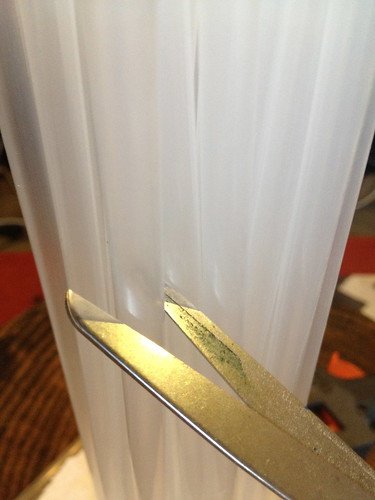
3. Once you have a good chunk of straws glued up, it is time to start creating some dimension. Using sharp scissors, start to cut the straws at different heights and angles.
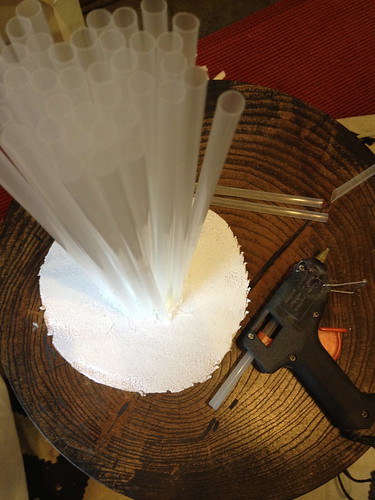
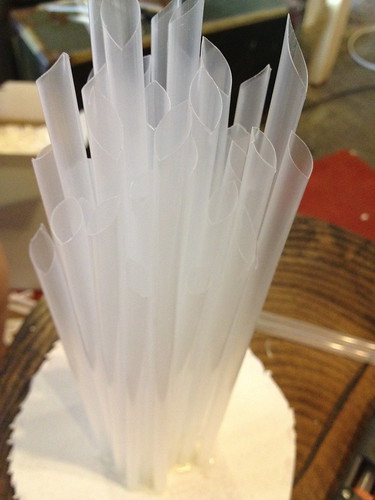
4. As you begin to reach the outer edges of your foam piece, start to spread your straws out a bit. In order to give the straws more stability, poke a hole in the foam with a pen/pencil. You can then slide the straw into the hole (along with hot glue) for extra holding strength!


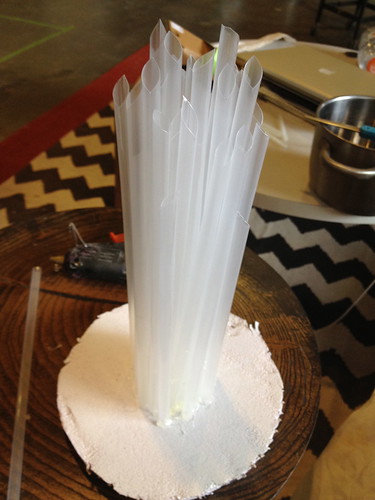
Soon you will have a clear crystalline looking structure.
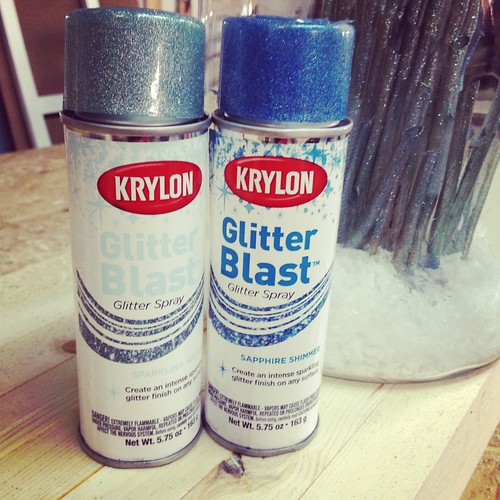
5. Now it’s time to paint!
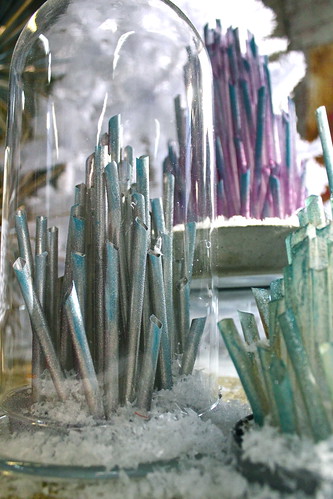
You can go with a number of different color combos. I used some of Spectrum Paint’s Olympic Gold Metallic Paint, some aqua’s from Martha Stewarts craft line, and some Glitter Blast spray paint from Krylon (which I found at Michaels) ! I brush, sprayed, and blended until I was happy.
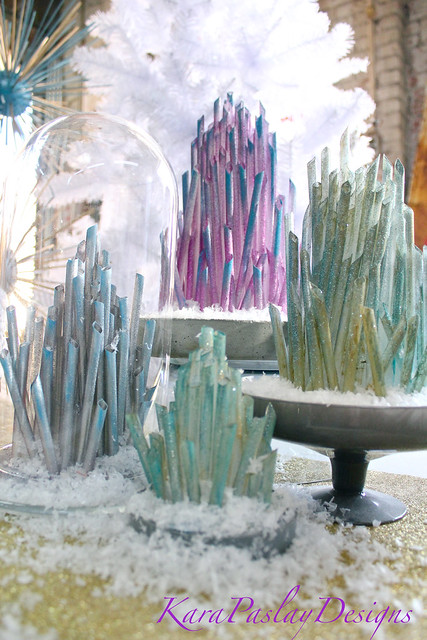
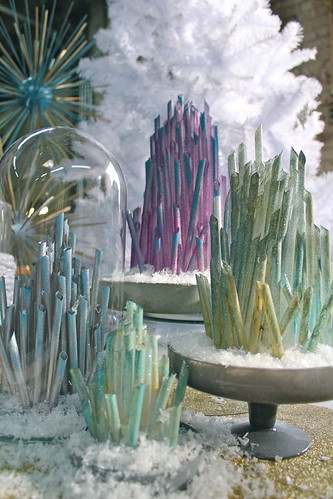
6. Lastly, it was time to place the crystals on different pillars, platters, and compotes. I even placed one in a glass dome to feature and protect it. Finally, using fake snow to cover the bases of the crystals finished off the wintery vignette nicely. . .

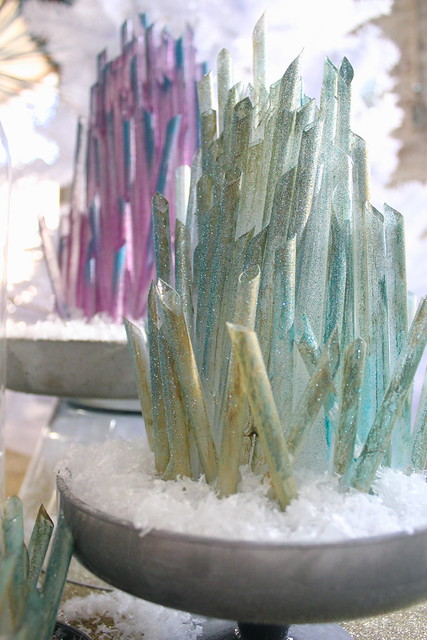

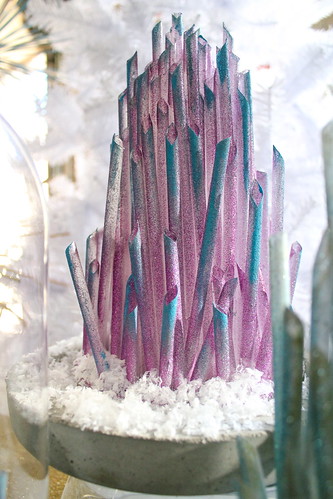
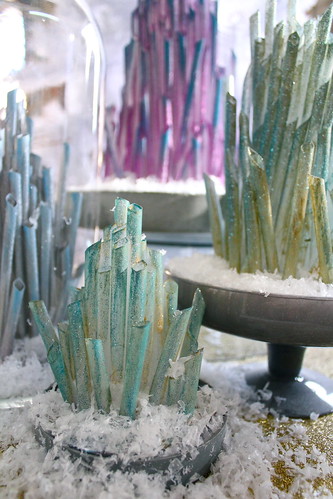
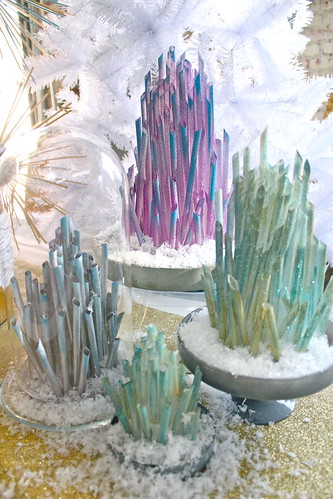
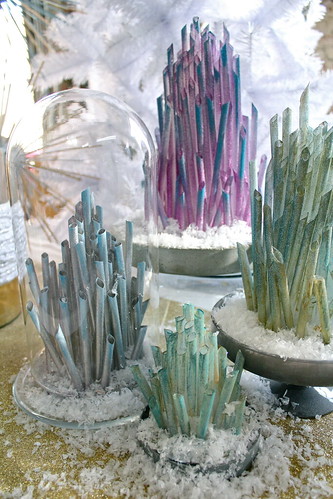

When the crystals are backlit, they have a kind of transparent property. In different lighting however, the pieces look a little more edgy.
There ya go, the first of many Christmas decor ideas! Hope you enjoyed it! 🙂
Those are so cool looking (and easy to make!). I especially like the one under the glass. Thanks for sharing!
Oh, so cute! As usual, you do such great work!
Totally unique. They look like Superman’s Fortress of Solitude–in a good way!
Seriously one of the BEST ideas I have seen in a long time. Been looking for something a little new & edgy. This is it! Thanks!!
Seriously one of the BEST ideas I have seen in a long time. Been looking for something a little new & edgy. This is it! Thanks!!
Awesome!! Fabulous!! A great way to celebrate the wintery Christmas with these seemingly crystal decors.
These are so pretty! I am wheelchair bound and there are so many projects that I can’t do because of not being able to get ingredients, products etc. I also live in a VERY small rural town, but we do have a Dollar General store but still the things I need are not there. This project has items that would be easy for me to get. Thank you so much.