

I just want to say thanks for all of the kind comments we have received over the past couple of days. It has been a tremendous encouragement and has pushed us to work even harder to reach our ultimate goal.
For anyone who hasn’t gotten to see our clip from the Nate Berkus Show, they added our segment to the House Proud archives and you can check it out here!

As I promised earlier in the week, I am back for my second post. Yes, that is a record. Kara had a post ready for today, but I told her I had made a promise and you all would be disappointed if I didn’t share my drum table tutorial. She will have to wait until next week.

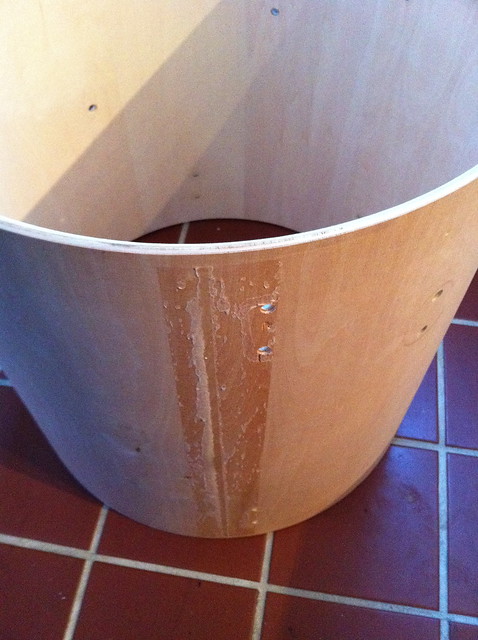
This project really is one of my favorites. It didn’t take a lot of time or money and looks great. The table looks like it was custom made by a professional, but really only requires some simple electrical work. I made it to serve as the coffee table in the waiting room of the music school we just finished. This is what we started with.
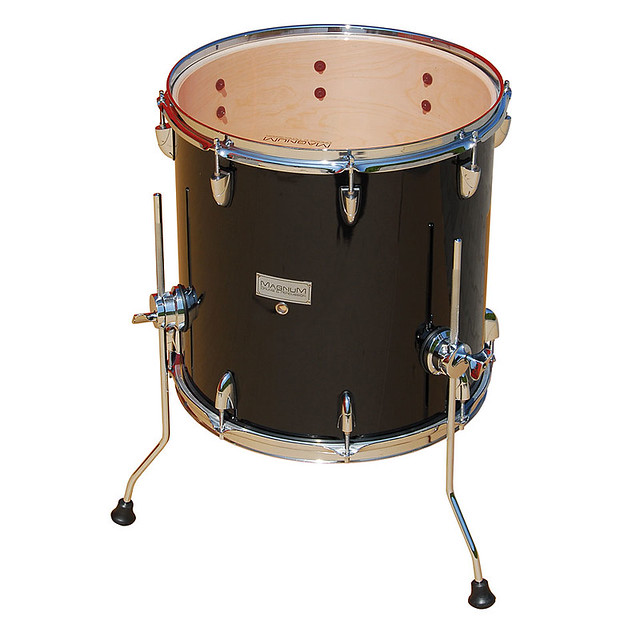
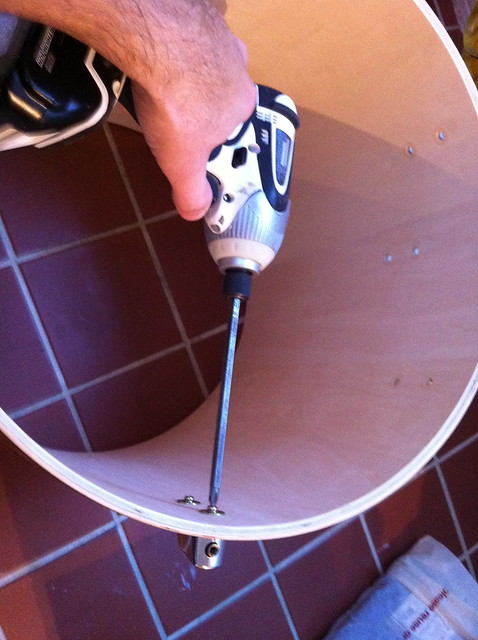
Amanda had an extra drum laying around and didn’t mind if we messed it up, because it wasn’t very expensive. We thought we would throw a coat of paint on it, top it with the glass from an old patio set she had, and call it good. So I started prepping for paint by removing all the hardware.
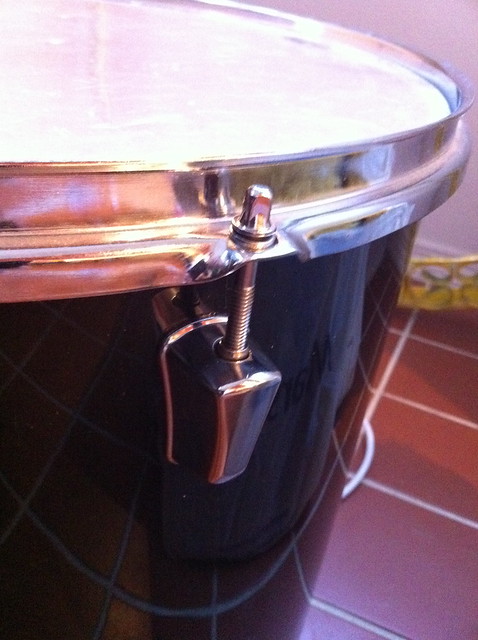
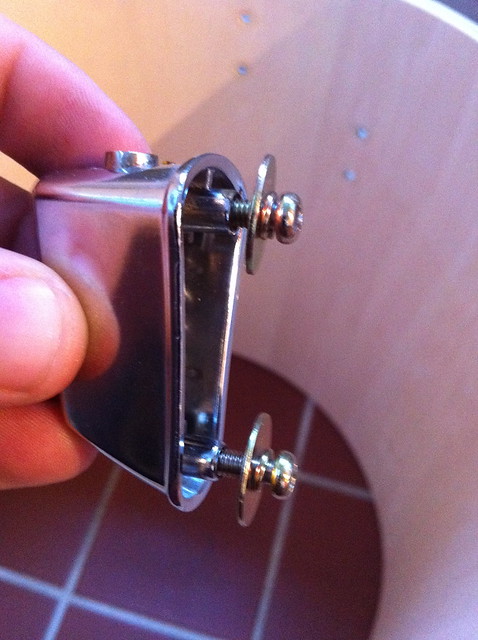
To remove these top bolts you can use a drum wing key or a just a pair of strong hands.
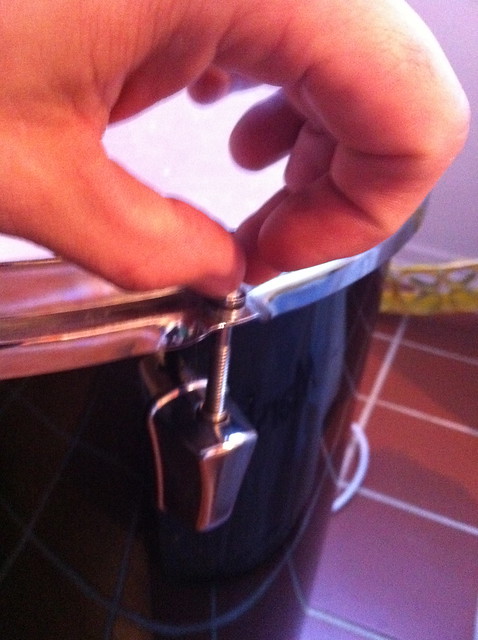
Since Kara was busy with something else I used a wing key.
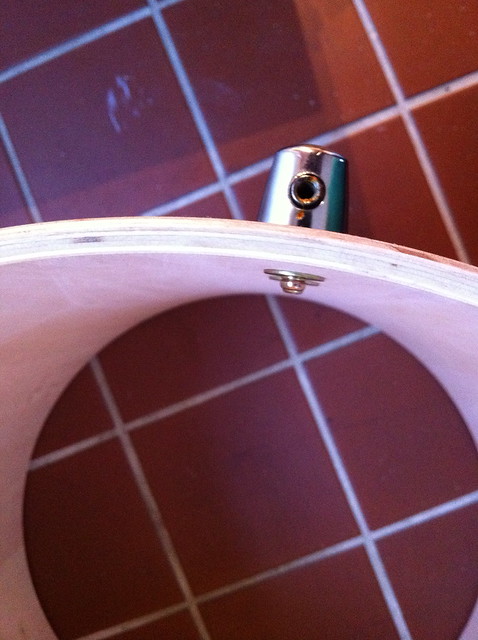
There were a lot of screws. Whenever I am taking something apart that has lots of pieces, I like to put screws back in the hardware so I don’t lose them or get the pieces mixed up.
Once I took the top off, I noticed that the black exterior of the drum was just a piece of laminate. We decided that the paint would be less likely to peel if we removed this black piece. I assumed that the entire thing was glued and would require quite a bit of sanding, but in the end I thought it would be worth it.
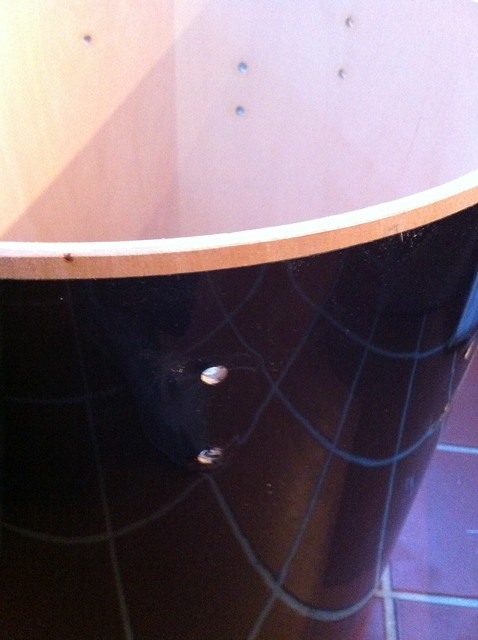
I pulled the two staples and started peeling the laminate. I was happily surprised to discover that only the seam was glued and it wasn’t too hard to take it off.
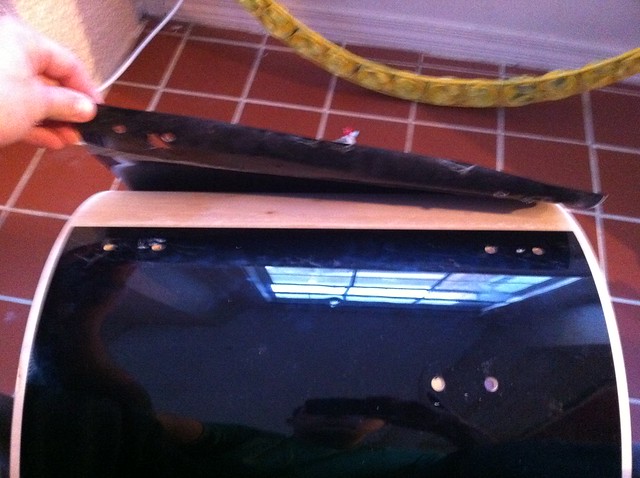
There was about a two inch strip of glue residue that needed to be addressed. I used a combination of paint thinner and sand paper to clean it up, but either one by themselves would have eventually gotten the job done.
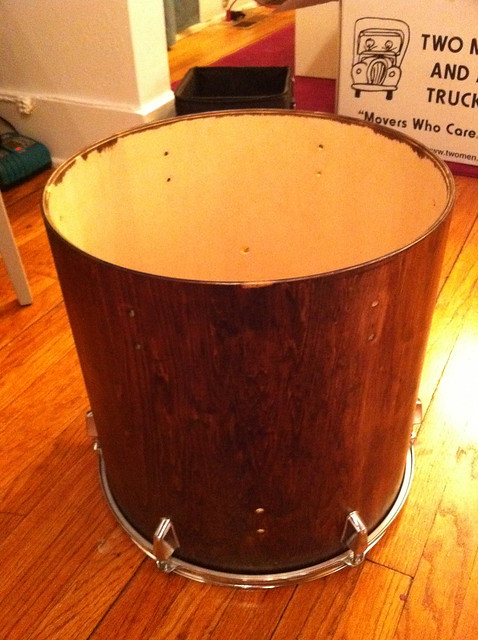
Here lately I have really liked pieces with a combination of stained wood and paint. I wanted to try it out, but Kara talked me out of it since there was already so much going on in the room. (Don’t tell her, but she was right.)
We ended up staining the piece with Minwax’s Provincial and added a couple of coats of polyurethane from a spray can. The aerosol poly is a little more expensive, but for small projects like this, it is worth it. It dries fast, leaves a flawless finish, and requires no cleanup. Just remember it takes multiple coats. If you try to do it with one thick coat you will end up with drips that look awful.
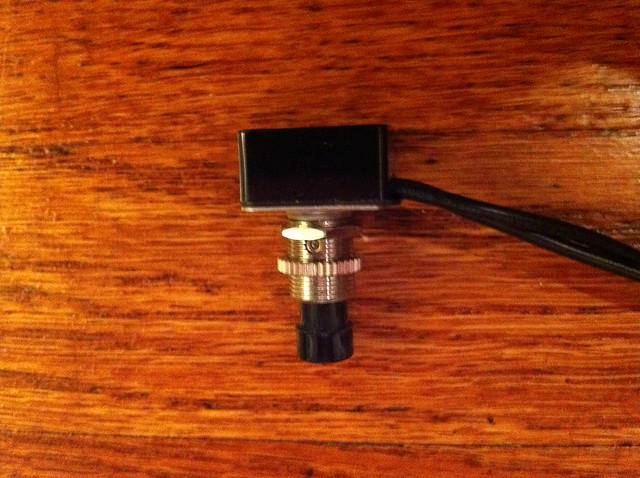
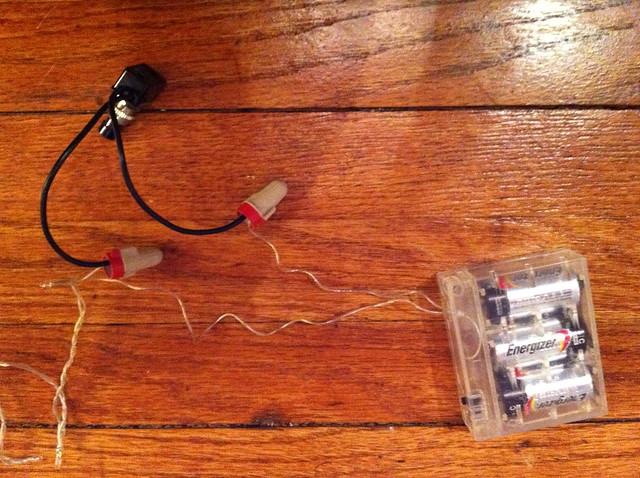
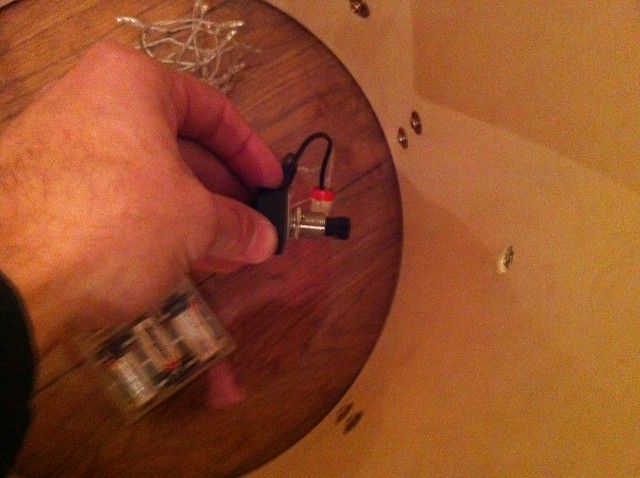
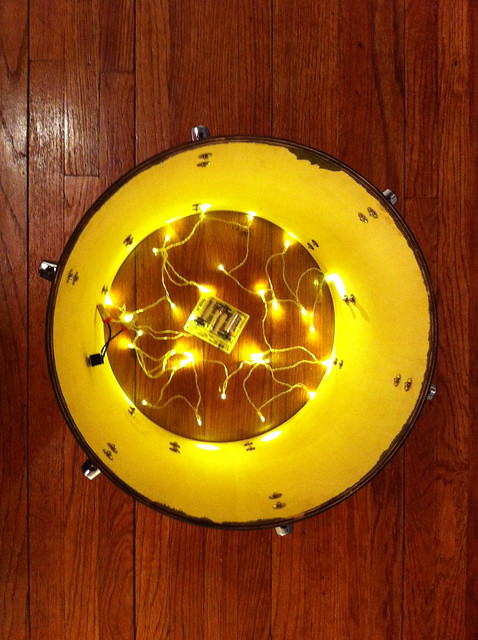
Since we went with the plain stain on the outside I knew the drum needed a little something to make it special. I had the idea to put lights in the drum, but there wasn’t a plug near by and there was some fear that a cord may pose a tripping hazard in the waiting room. Kara had some battery powered LED christmas lights left over from the setup she did for her brother’s engagement, but I needed a way to turn them on and off so we didn’t drain the batteries too quickly.
I bought a push button switch and spliced it into the lights before the first bulb. All that entailed was cutting and stripping the wires then using wire nuts to secure the leads on the switch in place.
Make sure the lights are turned off at the battery pack before you cut the wire and then turn that switch back on to allow the new switch you just installed to control the lights.
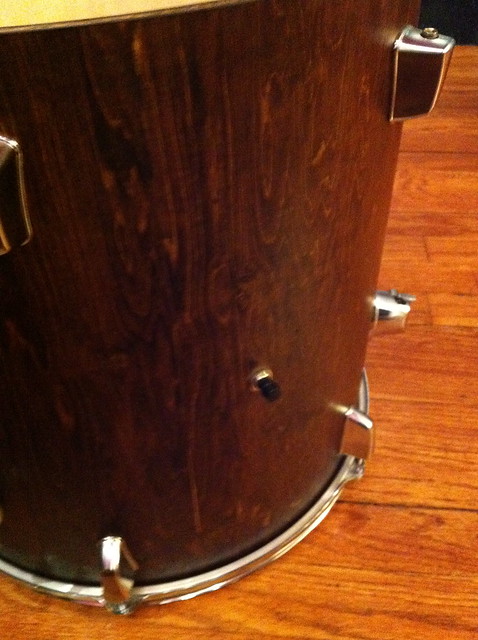
After putting all the hardware back on the bottom of the drum I added the lights. I had hoped the switch would fit perfectly inside the existing air hole, but I had to enlarge it just a hair to accommodate the switch.
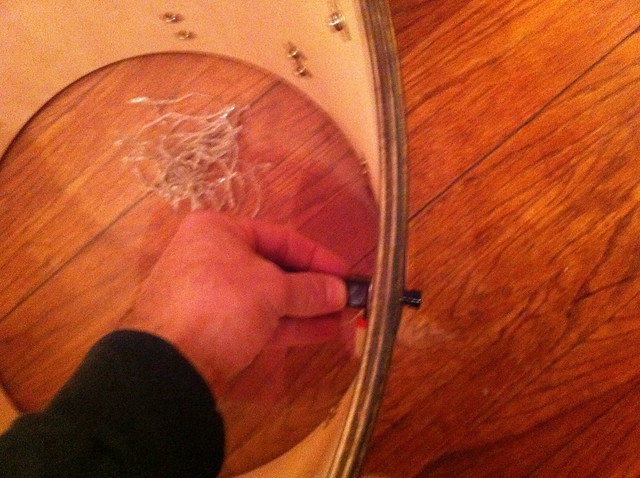
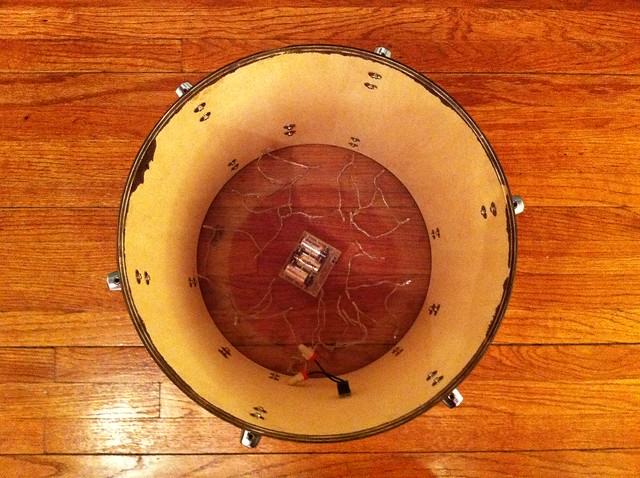
I ended up securing the lights with tape (not shown) to keep them from sliding around if the table need to be moved. We didn’t want to see the individual lights, so we added rice paper to to the top to create a nice diffused light and reinstalled the remaining hardware.
The original drum was way too tall to serve as a coffee table. I used a grinder with a fiber cut off wheel to cut the metal legs down. I was able to reuse the plastic slip-on feet to cover the sharp cut end. We easily could have just left the legs off, but I wanted the drum to sit up off the ground just a bit and allow the light to enhance the floating effect.
With everything in place we set the drum in position and added the glass top.
The warm wood tone adds depth to this bold, colorful room and the polished chrome provides the punch I was looking for when I wanted to add a painted pattern. I should have learned my lesson by now, but working together wouldn’t be any fun without a few disagreements along the way.
Wasn’t that quick and easy? I know that electrical work is intimidating to a lot of people. Since the lights are battery powered and low voltage, this project would be a great way to start developing this skill set. You don’t really have to worry about hurting yourself or ruining something expensive.
Does anybody have the confidence they could take something like this on themselves? I hope you have a great weekend!
OMG u guys on Nate Berkus?! wowwweeee
so very cool! LOVE the wood tones! Who knew?!
I saw you guys on Nate! Congrats- I’ve been following you all for awhile- but you’re even more charming and engaging in person! I now know why Nate was all- “don’t you hate them” lol You do see like the perfect DIY couple! 🙂 Congrats on the show appearance!
Now this is a real project I like. It’s so original… low cost and fairly easy and definitely one of a kind. I love using what I have on hand. Sometimes I see something I’ve had for a long time when a light bulb will go off and I know what I want to do with it. I like projects that involve more than just scissors, hot glue or sewing. I love brick, wood, electrical … I guess more meaty projects. This is awesome.
becky @reinventingtheordinary.com
I love it that I was reading your blog before Nate Berkus found you! Love the house proud segment.
That was a nice little segment on you both, defiantly show cased your abilities very nicely. Congrats! Hope it gets you all closer to your dreams.
I am glad you liked it. Isn’t it disappointing that the wood was underneath that cheap plastic the whole time. I might understand if the wood was ugly or something, but it just needed some stain to make it stand out.
Becky, I like some projects that require out side of the box skills and/or thought, but a lot of times they end up requiring a lot of time for trial and error. This project really is as simple as it looks and that is what made it one of my favorites.
We really were pleased with the segment. Even though it was pretty quick we felt like people got to see an accurate representation of who we are and how we work with one another.
Tim
Loved your Nate piece – congratulations!
Soooo…about the Nate show…I know I used to get it so I turned my tv on EVERY 30 MINUTES. That Wed. I think it is the most our tv has ever been turned off and on and more commercials than I’ve ever seen in my life!! (ya know, cuz I had to go through all the channels and wait for the commercials to end so I could see if that was the nate show channel or not)
I guess they don’t have it in Tulsa anymore…good to know.
Anyways! Glad you linked to it! LOVE it!
-Mitzi