
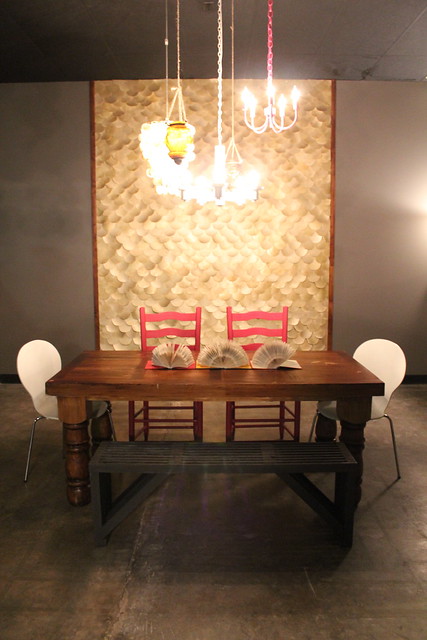
Today I am back to show you how to create your own fish scale feature wall!
The process is simple, but it may take some time.
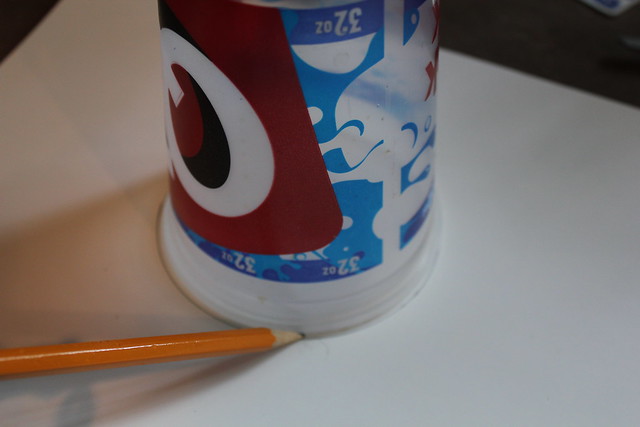
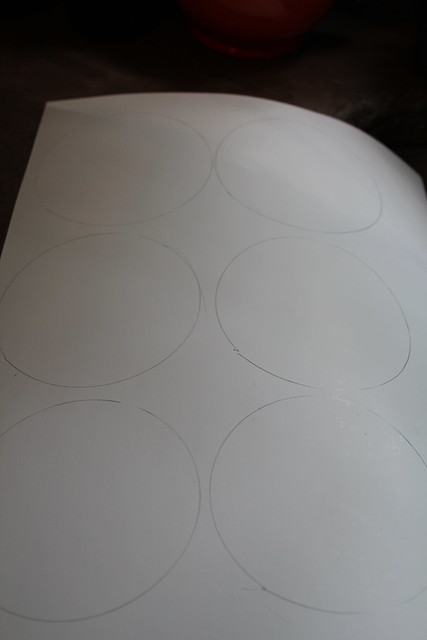
Step 1– Trace out a bunch of circles onto posterboard. I used a QT cup to make sure the circles stayed consistent. (If you’re not familiar with QT, I’m so sorry. It is only the best gas station in the world! Yes, it’s that good!)
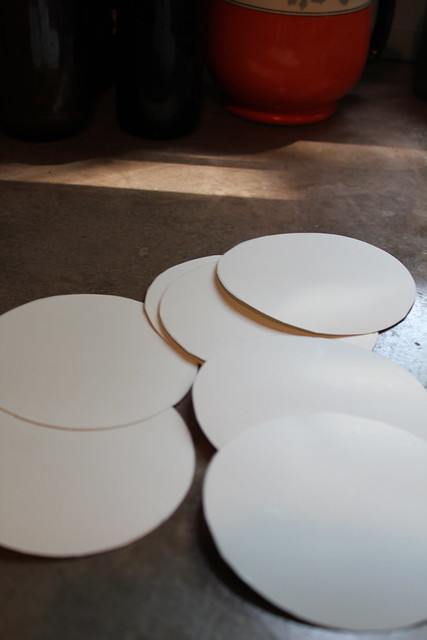
Step 2– Cut the circles out. If you have a circle die cutter this first part can go really fast, otherwise it will take a while.
Step 3– Spray paint the circles if they are not the color you want already.
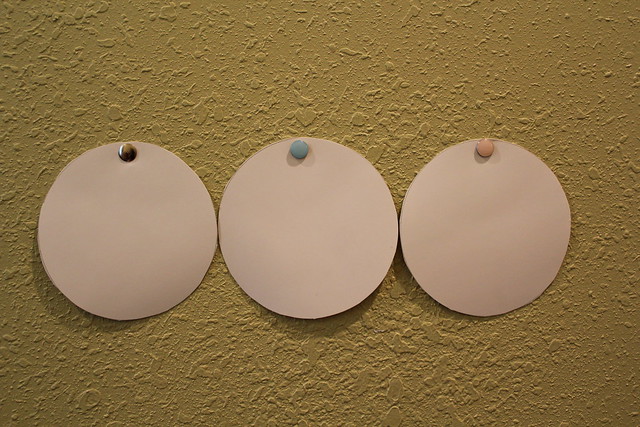
Step 4- Install the circles. Make sure your first row is straight/level. I used thumb tacks to stick my circles to the wall. Some people are completely against putting holes in their wall, but it’s so easy to fix I don’t mind at all. I also like that it allows the poster board to come away from the wall a bit and provide a nice texture.
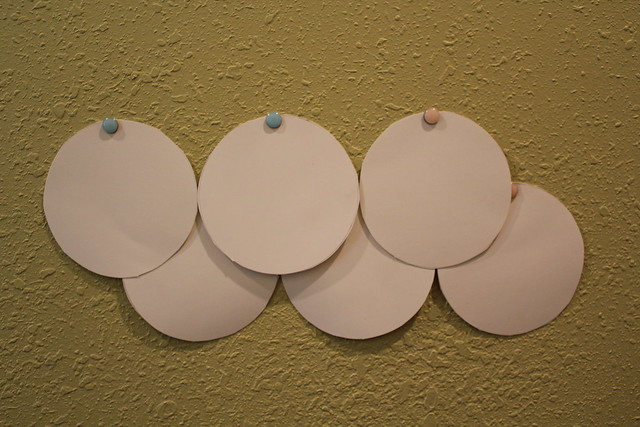
The second “tier” should be applied as shown below (halfway down the first row and off-centered). You can see that as you apply the second row of circles, the thumbtacks on the first row are covered.
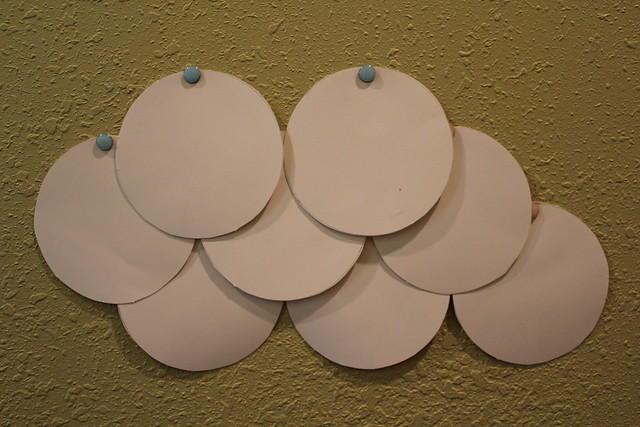
Continue this process all the way up the wall. At the top you can either spray paint the thumb tacks to blend in or use some spray adhesive on the back of the circles.
Pretty soon you’ll have a beautiful fish scale wall! 🙂
If you use this tutorial I would love to see pictures!
So cute!
Wow, so simple and such a huge impact!
Great idea! This is a great focal point.
Yep, QT is the best gas station in the world. I live in Birmingham, AL, and whenever we drive in to Atlanta, we have to stop at QT for a milk shake.
thank you for showing us how you made that gorgeous wall! I’ve been thinking of doing this as a head board for our guest room.
love this! how many circles do you think you used for this? or, how many pieces of posterboard? i am thinking about doing this in my living room.
Oh yea! I’ve been hoping you’d post a how to on this project. I’m planning on replicating this on the ceiling of my entryway. I’m going for a capiz shell look. Do you mind sharing what colors you used? Also curious how you made it reflective? Thanks so much! You’re so generous to share your ideas!
Dana
dfrieling1@austin.rr.com
I second Dana’s question! It looks like a few colors layered… is it? 🙂
Awesome!
Lindsey
You all have to send me pictures if you decide to replicate the idea! I can’t wait to see all of your spaces!
Miriam, this wall took a lot of poster board sheets. At least 30. If you are doing a large space, a die cutter would be a great investment.
Dana and Lindsey, I just used one color, a metallic gold spray paint from Lowes. The metallic makes the wall look like it’s glowing when the light hits it. I’m glad you ladies like it!
Hi, I got all my circles cut and now I have a few q’s. Did you spray your poster board before you cut? Sprayed them when they were cut? Or otherwise? Also, did you make a grid on the wall to make your rows straight? (Husband seems to think we should) AND finally, what did you use to finish the sides? I was thinking trim ribbon? How did you attach it?
That’s all for now! Thanks Pics coming!
This is amazingly unique! I’m the editor for Tip Junkie Decorate and will be featuring your project on the 21st if that’s okay!
I love this idea! It would be perfect for a show booth.. All shimmery and layered. Adore! Oh, and you know that QT cup makes it even better 🙂 Way to represent! heehee. I’ll be sure to send pics when I use this idea. Thank you for posting it!
what did you trim the outside with (the darker brown)
Sorry it has taken me so long to respond to both of you, I have tried something new with comments on old post and it took me a bit to find these.
Misty – We sprayed the scales after they had been cut. I didn’t make a grid for every row, but after every 3 or 4 rows I would check with a level and adjust if need be, but it certainly wouldn’t hurt to grid every row. We used stained pine 1×2 to trim the wall and attached it with a finishing nailer. I would imagine ribbon would look great! Please send some pictures I would love to see it.
Risse – The dark trim is stained pine 1×2. They are pretty cheap and I liked the way they frame the space.
Again sorry it took so long.
I LOVE this! I think I’m going to do it on the wall at the end of my bed. How does it look during the daylight, without all the fun lighting on it? Also, did you paint both sides of the circles?
Glad you like it. I used a metallic spray paint that looks great in any light. We didn’t spray both sides, but depending how much you curl the bottom it might be a good idea.
How can we send you pictures when we copy your DIY projects?!
Hey Nolan,
Sorry I didn’t see your message for a bit. Please send me any DIY projects you have copied to Kara.paslay@gmail.com. I can’t wait to see them.
Kara
So creative!!! Looks wonderful!
Gorgeous !!!
Need one! Definitely! Beautiful!
Can you recommend circle die cutter?
In my experience there is not any die cutter too much better than the other. I would choose one based off the size circle that you want. You can find circle punches/die cutters at almost any craft store. Happy punching! 🙂