
Well I hope everyone had a great weekend. Kara and I got the chance to put some finishing touches on Amanda’s music school and take some pictures. We should have a DIY project for you everyday this week. When I say we, I really mean Kara. I am getting my post for the week out of the way so I can focus on some furniture I am working on. I promised a friend I would have a coffee table for him in time for the super bowl.
Speaking of, what about the games yesterday. I scheduled my projects so I could watch the second half of each game and it wasn’t worth it. I really thought the Ravens were going to win it with the last drive. Poor Joe Flacco. Tom Brady gets the good looking girl, gets to go to the Super Bowl and all poor Joe Dirt gets is his awesome mustache.

Christopher T. Assaf, Baltimore Sun / December 11, 2011
On to the stuff you really care about. I am going to show you how to make a “slip cover” for a lamp shade.
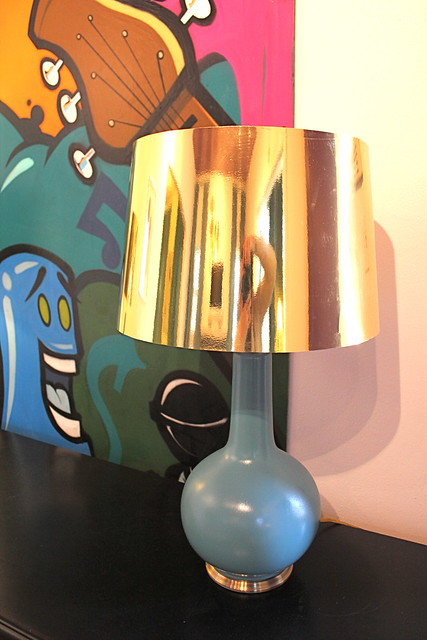
Amanda already had two lamps for her waiting room, but Kara wasn’t happy with them. She didn’t like the color of the base or shade. Fixing the base was easy. A couple of coats of spray paint and we have new bases. The shade could have been even easier, but that ain’t Kara’s style.
She could have made it easy and sent me to find an alternative. I am kind of a professional scavenger hunter. When we work on movies or commercials, I am in charge of finding the random stuff. So maybe she knew it wouldn’t be a challenge for me and came up with another plan.
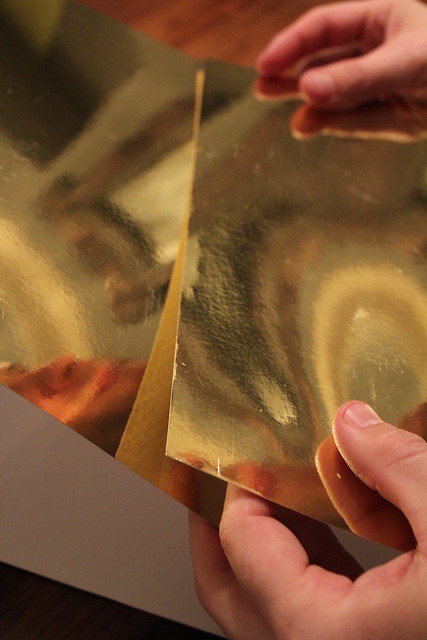
I started with two sheets of Chromalux poster board (it comes in gold and silver). Kara picked it up from Michael’s. If you forget your coupon, just let them know, they are usually kind enough to give you the discount anyways. The shade I was covering was a fairly good size so I had to tape my two sheets together to create one long piece. Let them over lap about an inch and make sure they are as straight as possible.

I carefully wrapped my shade with my “new” long sheet and temporarily secured it with scotch tape. You don’t have to worry about the tape tearing your poster board, because the metallic finish effectively releases the tape when you remove it.

Basically what I have now is an oversized slip cover for my lamp shade. I was kind digging this look, but I didn’t even try it with Kara. I used a pencil to trace the top and bottom edge of the shade on to the back of my poster board. I rolled the shade with one hand while I traced with the other.

After tracing both edges I removed the tape and laid my piece flat. You can faintly see my pencil lines. They are curved because the shade is tapered. If you had a drum style shade you could just measure and cut a straight line.
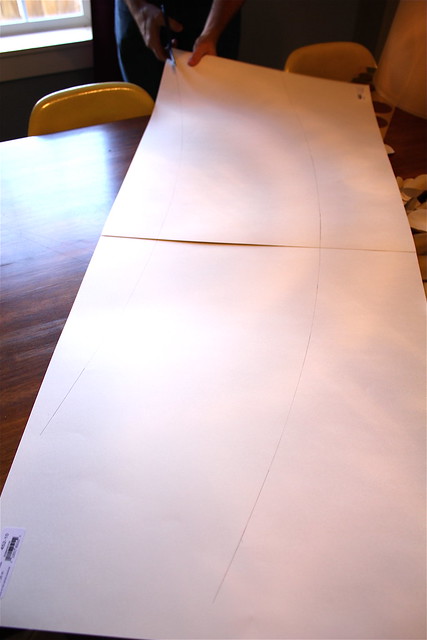
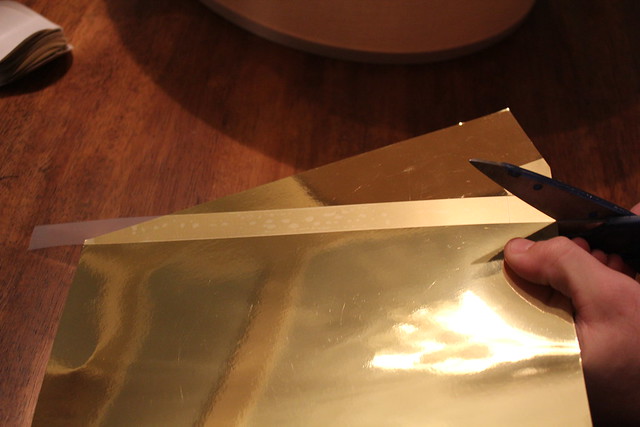
Before you start cutting, be sure to mark where your two pieces overlap with your pencil. This will help you align them later when you are adhering them together. I carefully cut out my shape, barely leaving the line. I would rather have a hair too much poster board than leave it short and leave a bit of my old shade exposed.
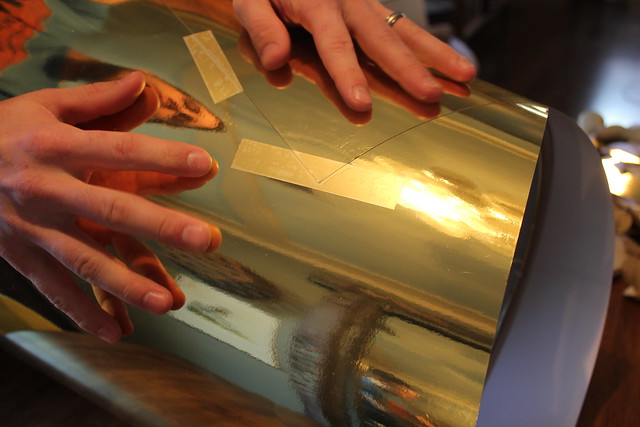
Next, I decided to go ahead and glue my two pieces together. I placed a piece of tape along the pencil line I made to align my pieces. This made applying my glue a little easier.
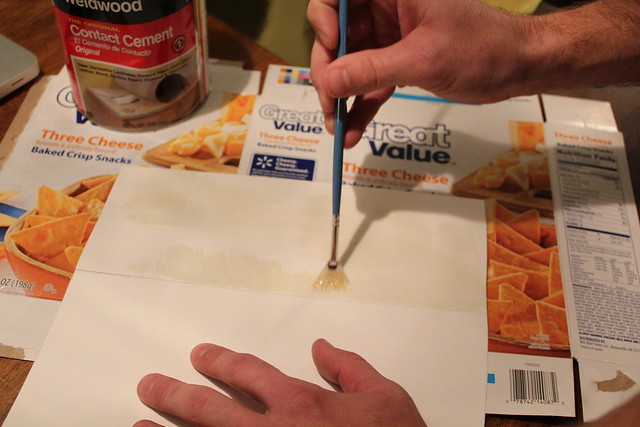
I used contact cement to glue my pieces together, I am sure there are some other great products that work just as well, but I doubt there are any that smell as good as contact cement…Sike! Try to use it in a well ventilated area. I applied it to both pieces and then waited until it was dry, about 15 to 20 minutes. You can check it by touching it and it shouldn’t smear or leave figure prints.
When you go to stick your pieces together be really careful. Even though the dried glue doesn’t feel like it will stick to anything, when it touches something else you have coated with contact cement, it WILL NOT let go. You really only get one shot to align things so make it count.
Next, I wrapped my piece around the shade again. Where your piece overlaps you will most likely have a slanted seam. I wanted to fix this so I marked a vertical line with tape and trimmed my piece.

I wrapped the shade once again and marked where my seam would land with another piece of scotch tape (use any tape you have around). I like scotch tape because it shows up so well in my pictures. Ha!
Now you are ready to repeat the contact cement process. This time it is a little trickier because the sides you need to adhere are on opposite sides. My piece was long enough that I could roll it back on itself without creasing it (Sorry Kara was eating dinner during this part and I know better than to bother her while she is with her food, so I don’t have a picture of that).

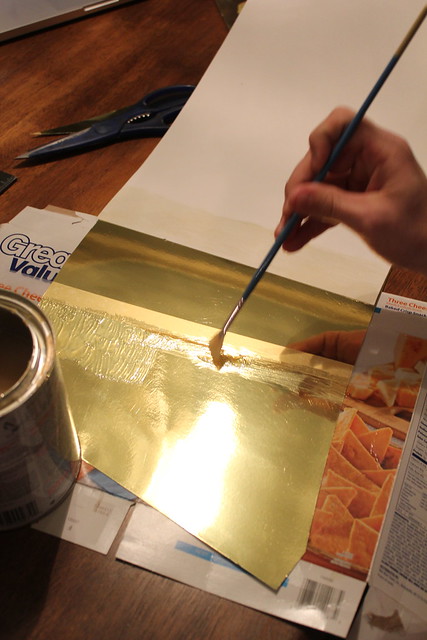
I would leave the tape on while I was applying the contact cement and then pull it before it dried. The cement leaves a visible enough line that you can easily align your pieces when you are ready.
Finally your lamp shade slip cover is done. You should have a slip cover that is just slightly larger than your original shade and fits right over the top. I thought I might need to using some sort of adhesive to stick the cover in place, but as long as you are careful and precise it should fit securely in place without anything extra. If you make one for a drum shade you will definitely use some rubber cement or hot glue to stick it in place.
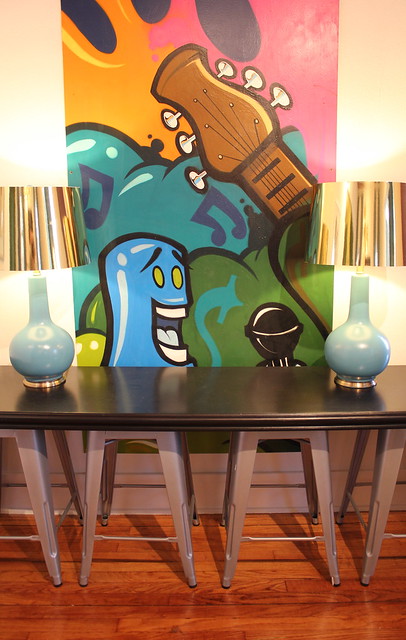
So, there you have it. Kara informed me that the reason she didn’t send me on a scavenger hunt is because she wanted gold lampshades and had never seen them before. I could have found them, but probably not for the $2o that we spent to make these two.
Well that is it for me, y’all are stuck with Kara the rest of the week.
They have such an elegant look to them.
Do post the pics of the coffee table when you finish them:)
Thanks Jennifer! I wanted something a little different and I’m pleased with the result! 🙂 Tim will definitely post pics of his coffee table! Have a great day!
Very nice and inspiring.
I didn’t get the step when you first glue to pieces. do you apply an other piece of paper? They seemed to be next to each other, not overlapping. thanks
When you first layout your first two pieces you need to let them over lap by at least an inch. That way when it come time to adhere them together you have some material to glue.
In the glueing step that I have pictured, my overlap is probably closer to 4 inches, but that is a bit much and isn’t necessary.
Thank you. You rock
These are gorgeous! Y’all are so creative. Thanks for sharing the step-by-step tutorial. 🙂
Absolutely Andrea! Let us know if you decide to make your own! We’d love to share photos of it on our facebook page!