
I have always been inspired by and adored the functional beauty of Japanese glass fishing floats. These floats were really used for fishing back in the day but have since been replaced. However after almost 50 years since they’ve stopped being made/used, you can still find these beauties washing up on shores. Can you believe that? How crazy!
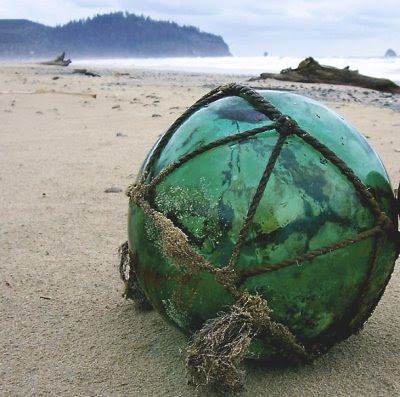
Pic found here
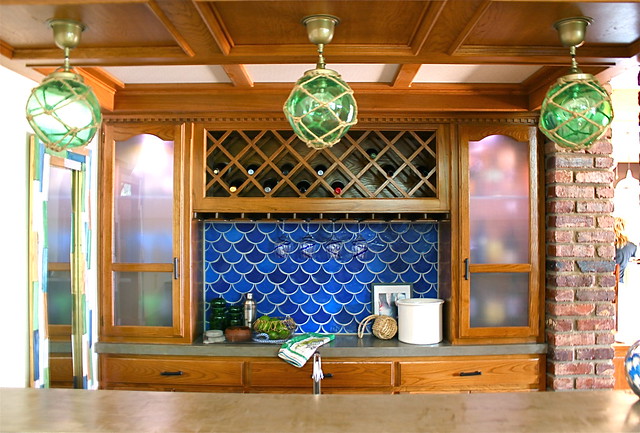
Anyway, when I was thinking of unique accents to add to Heather’s Bar Area, I really wanted to include these gorgeous floats in some way. Then the thought occurred to me that we could create lighting for the space the looked just like the vintage floats.
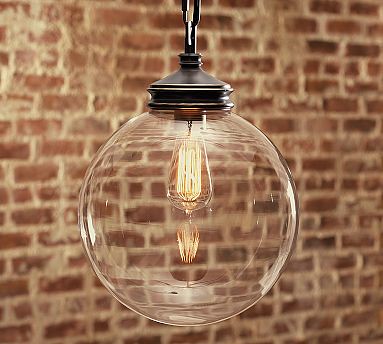
We’ve gotten to a point in our business that we have decided it is no longer wise for us to create lighting from scratch (at least for other people) due to the fact that our lights are not UL listed, so I’ve been getting creative on how I can slightly modify fixtures that are already out there for a whole new look. So, I found a light similar to this. . .
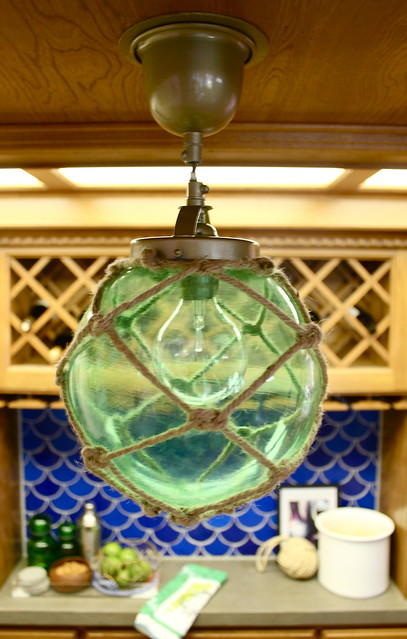
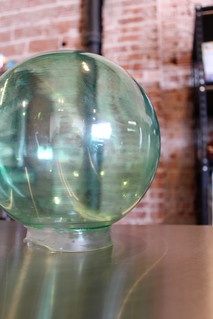
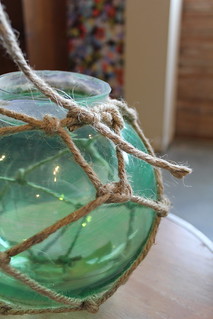
and made it look like this. . .
Here’s how I did it.
First, I used green transparent glass paint (bought from Michaels) to make the formerly clear globe green, then I began the process of creating the rope incasement. I used a thick jute for my rope. I tried to break this process down with detailed step by step photos. So, here’s to hoping you can follow them.
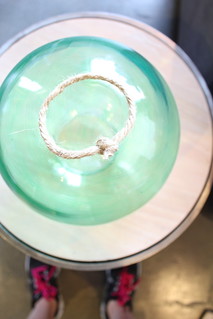
First, you’ll tie a circle and lay it on top of the globe. Next you will cut (4) 10 ft long pieces of jute. Double each piece up and tie it onto the jute circle. This will cause the circle to become more of a square. At this point you should have (8) 5 ft long pieces coming out from the circle/square.
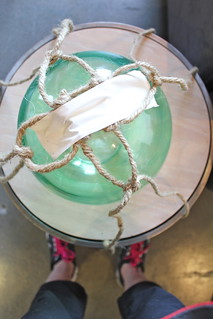
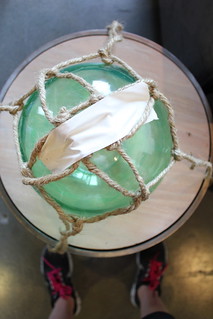
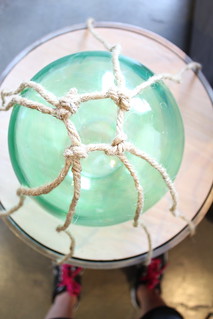
I like to use a piece of tape to keep the rope in place for the rest of the process. The next step is to take one piece from each rope pair and tie knots with the rope piece next to it. Try to keep things relatively uniform as you tie all the knots.
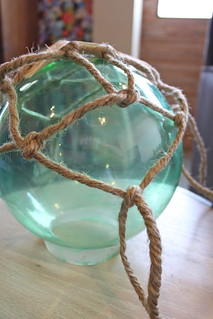
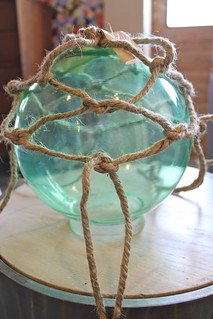
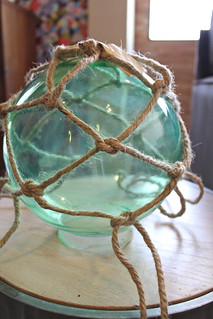
Continue to separate the rope pairs and tie knots as work your way down the globe. If the rope starts to slip back up towards the top of the globe, just use your fingers to pull it down and help it start to mold around the circular globe.
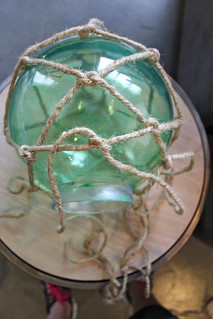
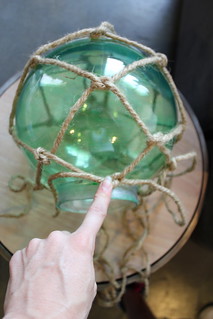
You know you are finished when you can pull one of the knots toward the lip of the globe and it stretches to the opening. Now you need to tie the “netting” you created off and secure it. To do that, cut and extra piece of jute.
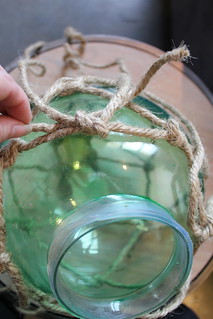

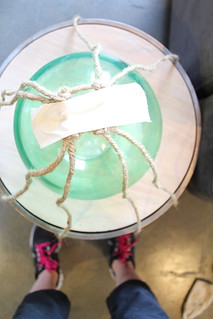
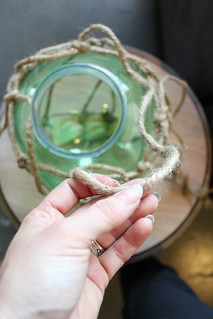
Begin to weave that piece of jute under and over the last layer of knots you created. Once you get back to where you started, tie the two ends together, pull tight (which will make the netting form around the globe) and cut off the access! Also, cut off any access left over from the 5ft rope pieces.
Last, screw your globe into place!
Pretty, right?! I love that these lights are completely unique and add a fun, sea inspired element to the space. Custom lighting is my fav! We will finish up our last post having to do with this bar makeover tomorrow! See ya soon!
Those are beautiful. What a great tutorial. Megan
What a great idea!! thanks for the inspiration 🙂
This comment has been removed by the author.
Pingback: A Light Fixture From Looking Glasses | Kara Paslay Design
Awesome tutorial – I thought your pic was the :inspiration” for your piece. Thanks for the idea!