
I haven’t posted a DIY project this week, so I thought I would go ahead and show you guys how I created the “ribbon” canopy for Victor and Claire’s wedding! 🙂 Let’s get to it!
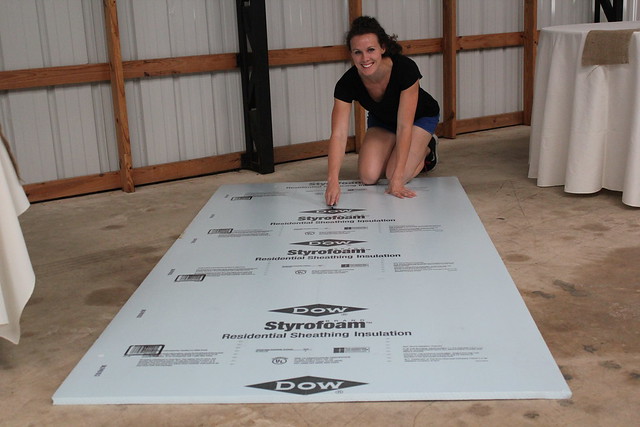
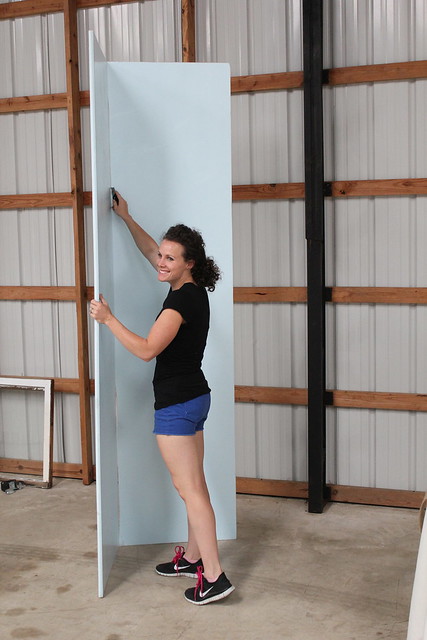
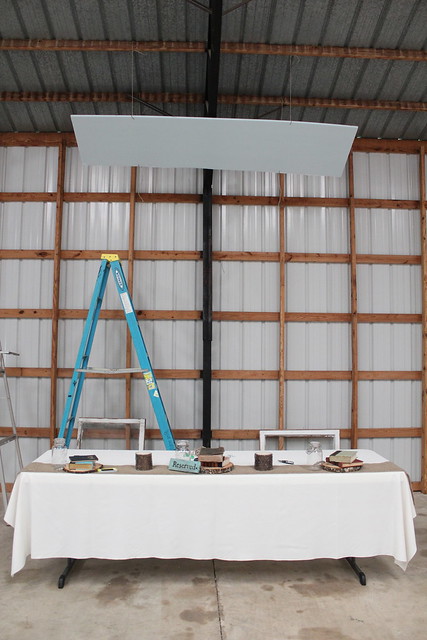
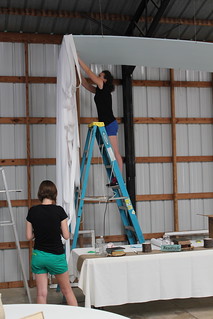
First, I got a piece of foam insulation and cut it to the dimensions I wanted the canopy to be. You can find this at home supply stores.
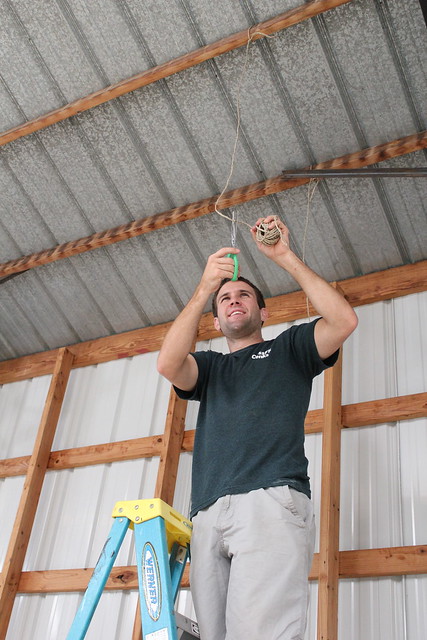
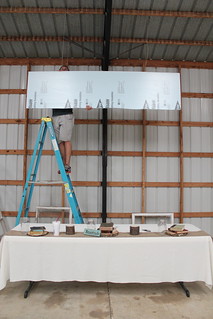
Next, I needed to hang the foam. Tim helped me with this.
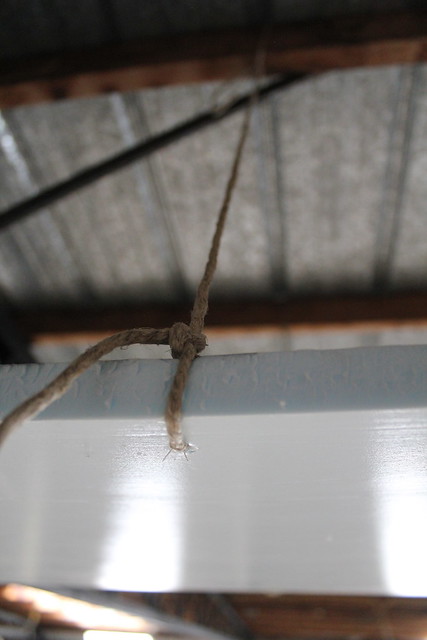
First, he tied four strings onto the rafters and left plenty of string to allow our canopy to hang a few feet from the ceiling.
Second, he put four holes in the foam about an inch in from the edge. He used scissors to make the hole. It doesn’t have to be pretty. No one will ever see it.
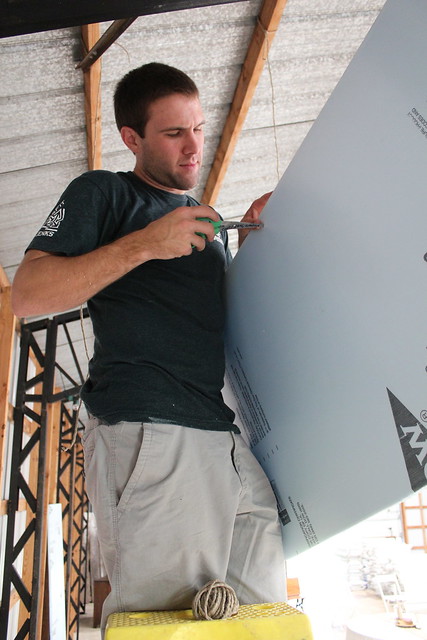
Then it was time to tie the foam up and secure it with the jute. We did both holes on one side and then both holes on the other side using a knot to keep the piece in place.
So, once the foam was hung it was time to start attaching the “ribbon.” Some of you questioned what material the “ribbon” was. Well here’s the big secret. . . it is actually receipt roll paper! 🙂
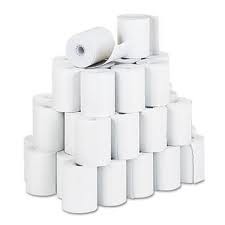
Claire had asked me months ago for a few ideas on how to tackle this project. I thought receipt rolls would be an easy and cheap option to get the look she was going for. I used around 15 rolls for the whole installation.
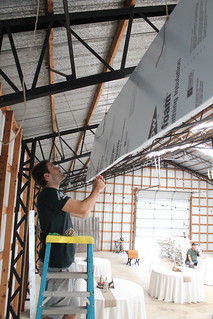
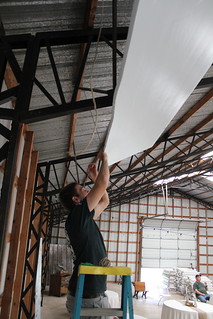
So I started on one edge of the canopy and worked from the back to the front. Basically, I set up a contraption so I could pull the paper from a roll while I was on the ladder.
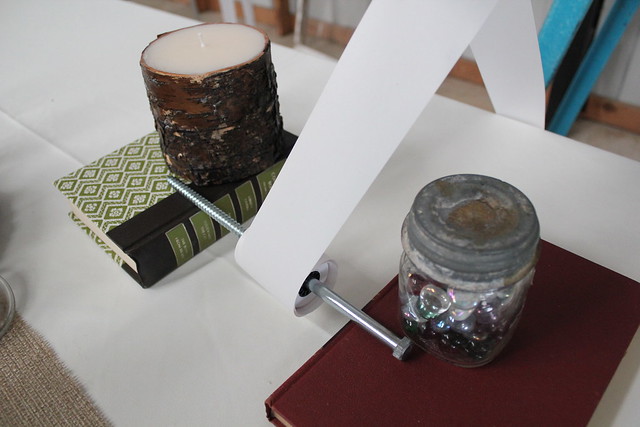
I used hot glue to attach the paper to the foam. I packed the edges with a lot more loops and left the center a little more sparse. I used a snake like pattern so that I didn’t have to cut the paper unless I was at the edge of the foam and needed to start another row.
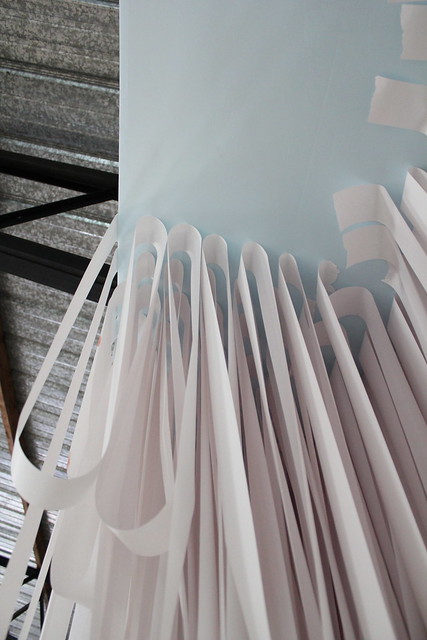

So, I just kept looping and glueing, looping and glueing.
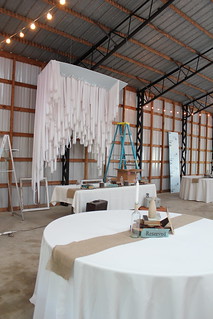
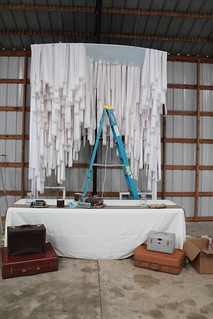
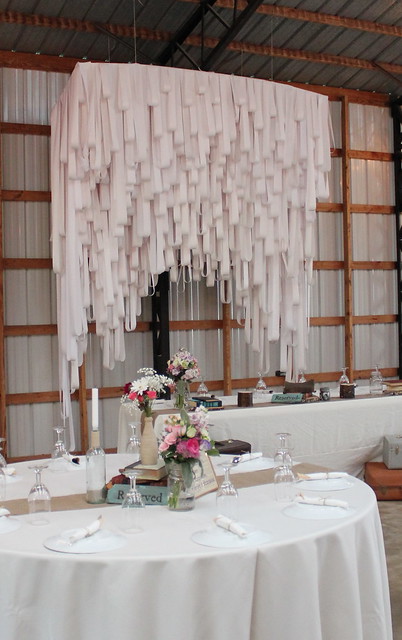
Until eventually I got this. . . .
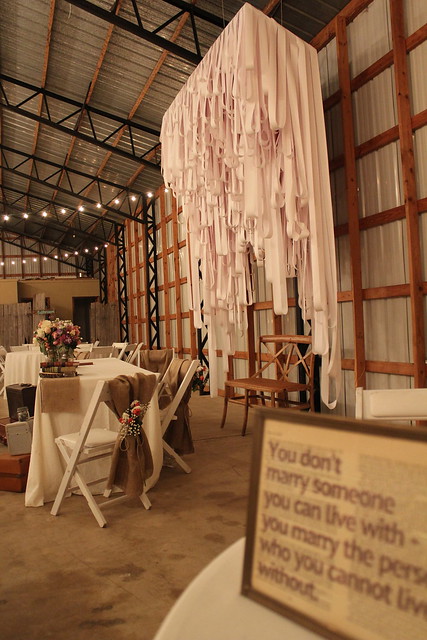
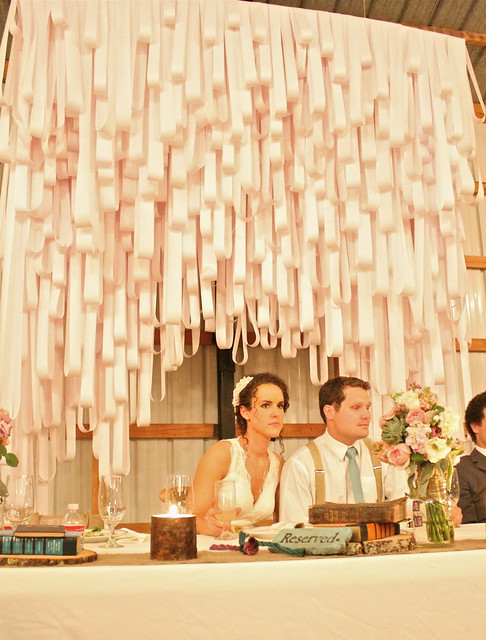
This idea came from a photo Claire pinned on Pinterest, which was originally from the blog, 100 Layer Cake. What a great look for a great price, right! 🙂
Yay! Now how can you use this idea for your next party, wedding, or home?!
How wonderful! I’m thinking about making one from actual ribbon or fabric for a bedroom! That is just so cool looking! Would make a fun curtain if it were modified just a tad too!
Receipt roll paper…brilliant!
Can i ask how many receipt rolls it took? I’d love to do something like this for my little girls birthday… but on a smaller scale.
I’ve also thought about using crepe paper so I could get some color. Thoughts! Thanks for all the inspiration!
Oooo Jill, I’d love to see this adapted to a home setting! I can’t wait to see it! 🙂
Ha, thanks Dana! Looking forward to seeing your burberry wallpaper room come together! 🙂
Hey Nichole! 🙂 The whole thing took about 15 rolls of receipt paper. And you could definitely do it on a smaller scale! I’d love to see pictures if you end up doing it! 🙂 Crepe paper could work, but it might break a lot easier than the receipt paper. It’s worth a try though! 🙂
this is amazing! my sister’s wedding was last weekend and we originally wanted to so something like this for the ceremony backdrop! we ended up going in another direction, but this would have been awesome info a couple of months ago! 🙂 so wonderful!
This is…glorious! I hope I remember this in about 10 year when my kids start getting married 😉
Hi Kara – do you remember about how long it took you to create?
Valuable information ..I am delighted to read this article..thank you for sharing. Do you make bows using these Grosgrain Ribbon from Yama? I like them either. I usually Wholesale Ribbon from them. It’s a great choice.