
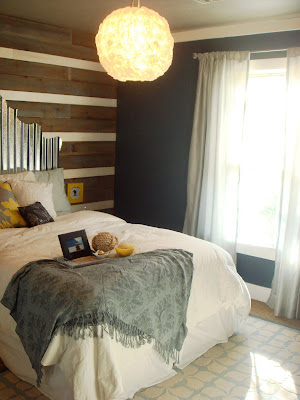
It’s finally time to unveil the guest bedroom. It’s come a loooooooooong way!!!


It was one of those rooms that we completely gutted. In fact we had a HUGE hole in the floor revealing the crawl space underneath!!! We lived like this for longer than I care to admit (let’s just say it was more than a couple of weeks). And YES!!! there was some marital strife caused from this.


But I have to say, there is NO other man I know that would take on the tasks Tim does, having no idea how to do them when he starts and becoming an expert (or close to that) by the end of it all!!! Oh, the things we do for LOVE (the love of design that is).
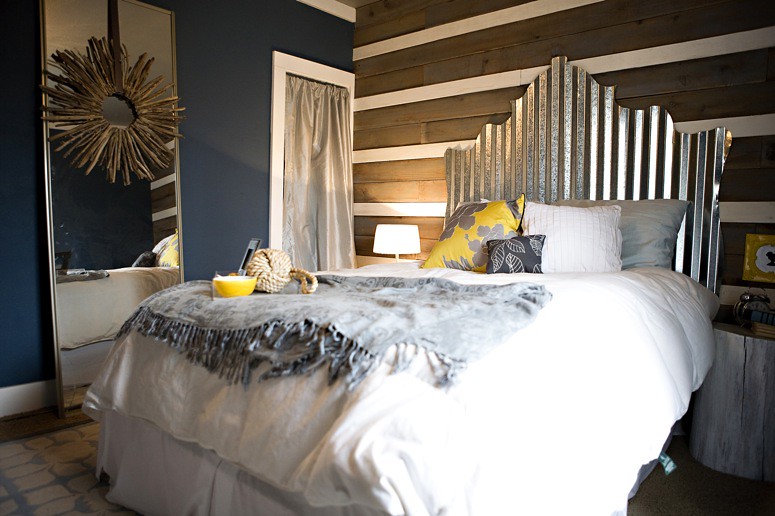
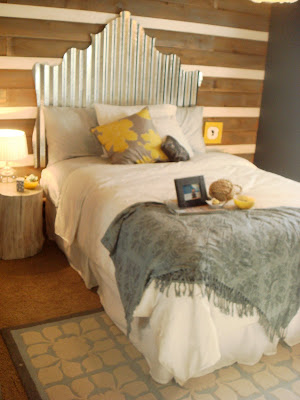
The focal point of a bedroom is almost always the wall that the bed sits on and it is no different in this room. To create the eye catching design I desired I used reclaimed fence pickets to produce a striped effect on the wall. Then it was time for the headboard!!! I wanted something unexpected and glamorous!

Velvet and tufts seemed way too ordinary, so I came up with this! While the shape and sheen seem glamorous the actual material is rustic!!! Thank you corrugated tin.
Then, of course I needed to address night stands. Enter these stump side tables. I whitewashed the sides and painted the top a metallic silver. CLICK HERE to see a how-to video detailing the process behind turing stumps into furniture.

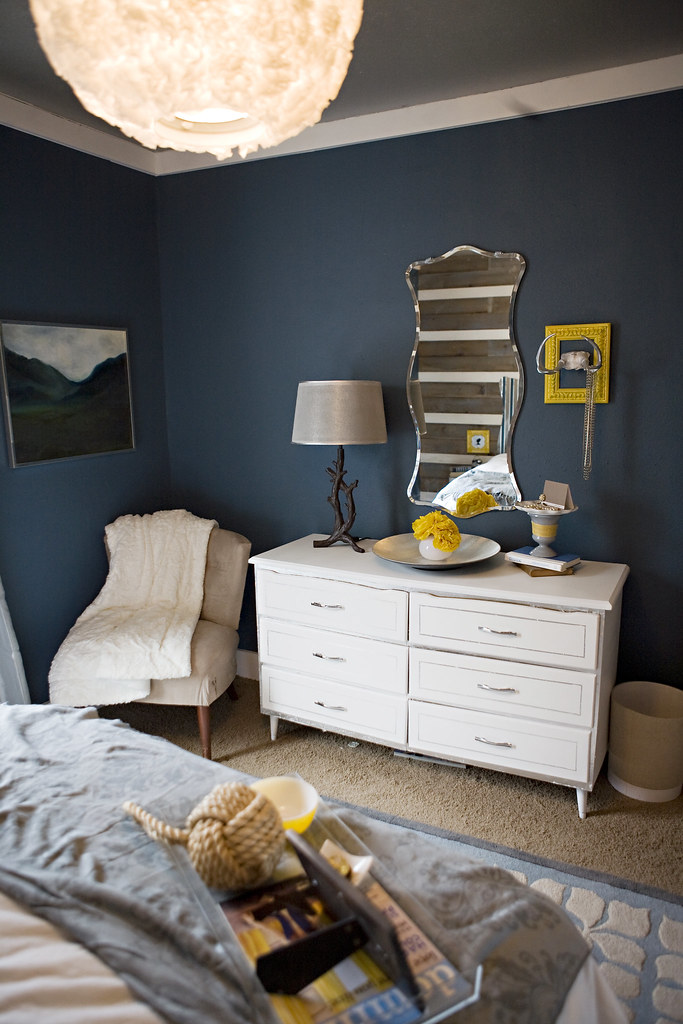
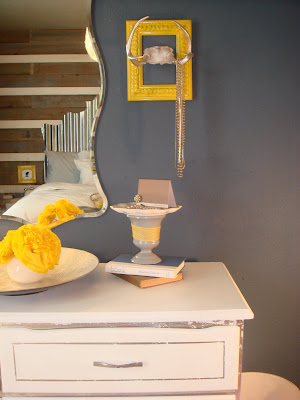
Now while there is a main focal wall in the room, I definitely couldn’t leave the other walls lacking. Directly across from the bed is a dresser, mirror, and small chair.


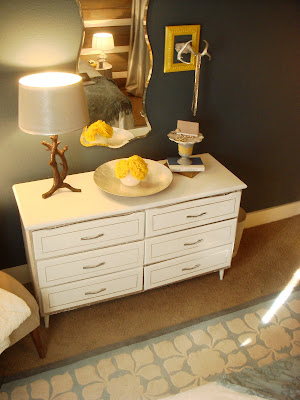
I dressed up the dresser by adding a little silver leafing on the frame and around the drawers. For a how-to on that process, CLICK HERE!
Now as I have said before, accessories are SUPER important when it comes to making a house feel homey. Add in “homemade” accessories and you’ve got a room that really shows off your personality. Here are a few pieces I put together.

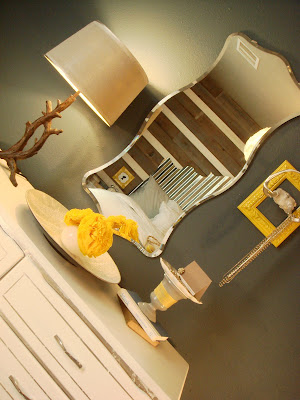
A jewelry plate pedestal (holding a little letter to thank visitors for their company)!

Silver coated deer antlers that are just for looks OR for function.

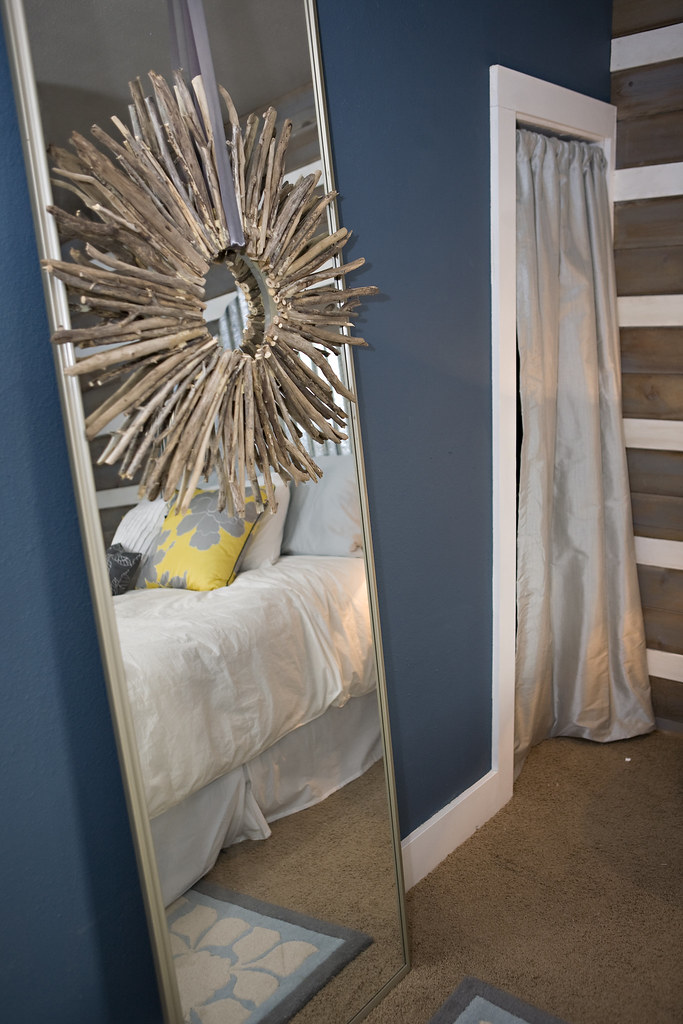
A driftwood frame to add some rustic texture.
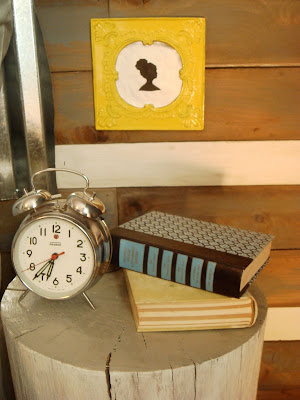
I love creating easy artwork! A small silhouette was simple and cheap!

And of course this lamp that I created from a thrift store piece. Want to make your own lamp? CLICK HERE for a full tutorial!

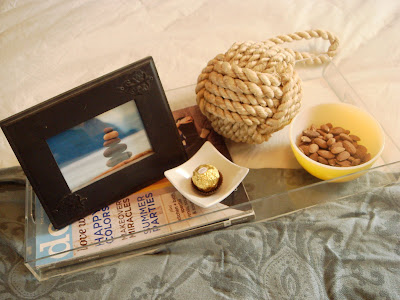
I love to lavish my guests with love! I gathered this tray of goodies to say “WELCOME”!!!!! Chocolate and a good magazine can really make for a day great!!

I always like to make a statement with my lighting and that often gets expensive. The overhead light in the guest bedroom used to look like the one you see below.

That’s right the spherical lantern hanging above the table. It was a little too rustic for me and I wanted something more modern in this particular space. So, with a little modification I created a completely different look for very little money!!!

There you have it, a guest bedroom ready for some action!!!! (Brian and Becky NOT that kind of action!) Any takers????!!!!!!
Yeah!
Gorgeous…as always! I love gray and yellow.
i really really love the main wall(i think it is!) where the headboard is. I love grey and yellow. I love the yellow frames. 🙂 You did great.
Wow, amazing as usual! Love that headboard.
Rustic and glamorous! You have a great sense of style!!
Wonderful! What a great look. Love the log cabin wall and the tree stump side table are a great compliment!
I love it! So fun!
-D
Kara…that is stunning! I love all the creative and unique elements. Can’t wait to see it in person…yes I am still trying to figure out a date to stop by…
There are so many beautiful things it is hard to pick just one!
Oh my goodness, this is incredible. You are so talented. I can’t get over all the innovative details and the pure symmetry of materials, colors and function! Absolutely gorgeous. So glad to have discovered your blog!
W-O-W! I love your style. I’m visiting from Mrs. Limestone’s site and I’m so happy to have found your blog! Great makeover.
Kara, this room is totally gorgeous–well done! What did you use to cut the headboard shape? Are the edges sharp? The combination of the shape and the material you used looks totally fabulous!
I just found you on Design Sponge. This room is to die for! You are very talented, and I’m adding you to my reader right now!
Yes, I too am wondering how you cut it and whether the edges are sharp. Also, I saw that you made the lantern, and would love to know how! It’s a fabulous room!
Hey Ladies,
I cut the metal with a jigsaw and blade made especially for cutting metal. As far as it being sharp, it’s no too bad. I mean unless you are trying to cut yourself, it should be fine! 🙂
For the lantern, my husband wired it up and I made it look completely different with coffee filters! 🙂
Ha! That is sort of what I figured for the edge sharpness:) There are lots of objects in the world that can be dangerous if you try hard enough:)
Hi Kara – BEAUTIFUL room! I featured it this week on my Friday Favorites over at our blog.
http://www.CabinChronicles.com
How did you make the headboard! I love that 🙂 Are the edges sharp?
I love everything about this room! Seriously, that bed is genius! One of my fav styles [and the style of our farmhouse] is rustic opulence! FAB!! =-D You did great work here.
http://classiclyamber.com/blog/
Hi! LOVE your blog and home!! I am totally going to try that tin headboard idea…or get my husband or dad too…LOVE!!
And I just wondered if you knew that your antlers are hanging upside down…and I love the idea of silver leafing them…sooo going to do this for my bathroom!
http://www.farmerstrophywife.com
I love the colors and the feel of this room. What are the colors that you used? Also what did the metal run in cost? You know design!! you can e-mail me at
rebekah.keil@gmail.com
or just comment and i will check back
This comment has been removed by a blog administrator.
OH my stars this is a fabulous post! You answered several of my design delimmas with your gorgeous headboard and stump treatment guidelines! I have a bed with no head board and a stump that is untreated. Wonderful site!
Hi, I LOVE this room and I’m wondering how you treated the corrugated tin to make the edges not sharp? If you have time for a reply that would be great!
You can email me at ekreis-at-gmail-dot-com.
Thanks!
I enjoyed reading it. I require to study more on this topic. Thanks for sharing a nice info..Any way I’m going to subscribe for your feed and I hope you post again soon.