
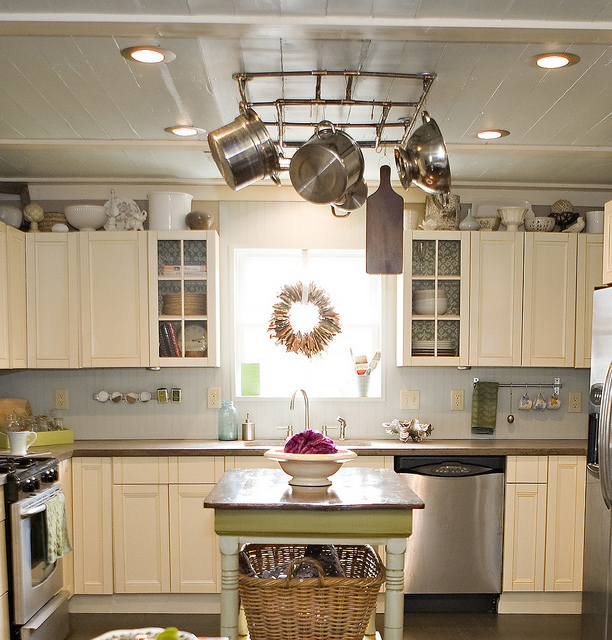
Some of you have been waiting a long time for a tutorial on our copper pot rack. Well we finally got around to putting one together just for you!!


Now our pot rack had a somewhat detailed design so rather than tell you the exact measurements for what we made, I am going to leave the shape of your pot rack up to you.
There are two ways you can do this project- one involves soldering and the other is much easier and involves shark bites (you’ll find out what those are later).
First, I am going to show you the way that involves soldering. Here is a supplies photo and list.

1. (2) 1/2 inch plumbing floor flanges
2. A pipe cutter
3. Copper (reclaimed or new will do)
4. 1/2 in Copper “T” pieces (you won’t need these for the simple example and am doing today, but you may need them if you design something more intricate)
5. 1/2 in Copper male adaptor pieces
6. 1/2 in Copper 90 degree elbow pieces
7. Soldering Flux
8. Roll of Solder
9. A Candle Lighter
10. Propane Torch
Lowes sells a soldering kit that has just about everything you need for $20. Plus it will last you for a number of projects!

Step 1- Cut your copper pieces to length using the pipe cutter. It’s a good idea to cut all your pieces first and do a dry fit before soldering anything.

For this very simple “single bar potrack” I needed one long piece (mine’s about 20 in) and 2 small pieces (about 1 1/2 in).

Step 2- Screw your male adapters into the floor flanges.

Step 3- Apply the flux to your small 1 1/2 in pieces and place them inside the male adapters.


Now it’s time to play with fire!!
Step 4- Light your torch. Simply twist the knob allowing for propane to come out of the nozzle (you will be able to hear it). Then use your candle lighter to ignite the gas. This sounds scary, but don’t worry!

Step 5- Solder the pieces together. Solder comes in a wire form. You’ll want to unroll a length of the solder (wire) and make it straight.

The key to soldering is to get the copper good and hot. After you’ve held the flame on it for a good 20 sec, lightly touch the solder to the pipe (while still keeping the flame on it). The solder will instantly melt and form a bond between the copper pieces.

Step 6- Solder the elbow piece onto the 1 1/2 in copper piece. The copper will turn colors from the heat, which I don’t mind at all.


Here’s a photo showing how to ignite the propane with the candle lighter.

Tip- When using your propane torch, keep it upright otherwise the flame will go out often.

Tip- It’s a good idea to sand (with regular sand paper or a pipe cleaner) the ends of your copper (the part that will be soldered) to make sure there is a tight bond and also to makes sure the pieces fit together nicely.
Step 7- Place flux in the end of your long copper piece and put it in place. Then solder both ends.

Then your single bar pot rack is complete. Obviously you can use this same tutorial and these tips to create a much more intricate pot rack design or other fun copper accessories!


And here’s what it looks like hung on the wall with some screws.
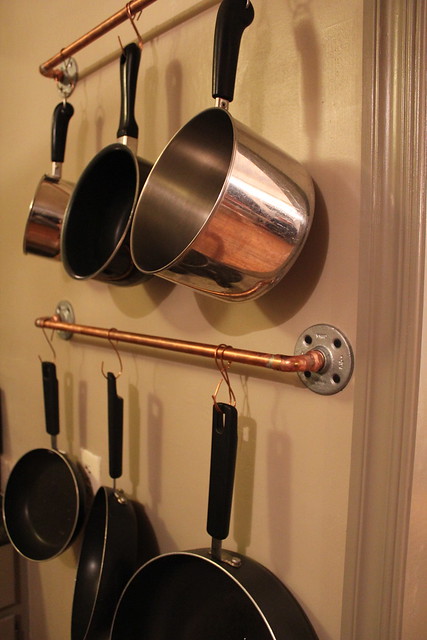
Our pot rack fits best on the ceiling in our kitchen, but here we took and down and attached it to the wall for a prop in the movie we worked on last year!

Tip- If you accidentally get solder where you do not want it (like below) simply heat it up and wick it away with a scrap piece of copper.

Here’s the second way to complete this project. You can completely forgo any fire and blow torches by using these handy dandy plumbing pieces called “Shark Bites”. They basically just snap onto the pipe and create a very tight bond. The only down side to this method is each Shark Bite costs at least $5 each. Oh, and you don’t get to play with fire. . . a definite downer!

Great tutorial! I love the simple wall-hanging rack you made for this! I wonder if I can work that into my small kitchen somehow…
I found a link to this tutorial on homepodge. Fantastic! Thank you so much for sharing!!
great directions!
I definitely like the single bar pot rack. I have a small kitchen that can’t support a ceiling or a wall, nor a free standing pot rack. And I was not looking to purchase a utility bar; so this ideal is great for me.
Besides this pot rack tutorial, I can also see me working on my pluming too. Thanks!