
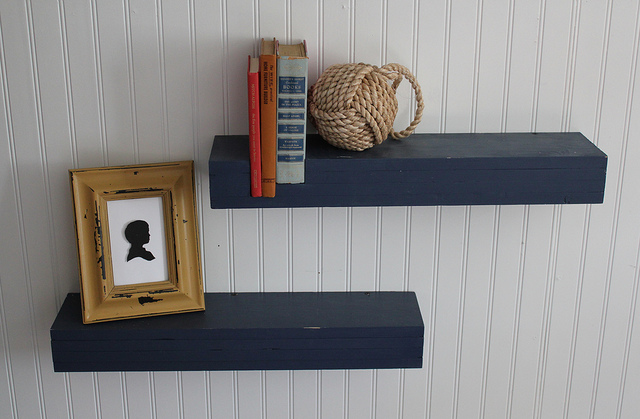
I’ve added another addition to the upstairs room. Since I am trying to make this Tim’s space, I thought it would be the perfect place to hang these floating shelves Tim created a while ago. We both really like how the books are integrated into the shelf placing extra emphasis on them.

This would be a great idea for books that you really love and want to display, books that tell a story about who you are and what you’re about. Some of you might want to display a Bible, a favorite childhood book, or a literary classic for example. In our’s there is a furniture building book (perfect for Tim) but the other two were admittedly only picked for color.

Here’s a close-up of how the books become part of the shelf.

And here’s how you make your own “Integrated Book Shelf.”
1. Cut (4) 1X6’s the length that you want your shelf. Tim used a chop saw to do this.
2. Use a clamp to hold the wood secure while you mark out your book placement.

3. Decide which books you want to display and how you want them arranged. The books should be about 5 1/2 in wide so they fit well on the 1X6.

4. Mark the positions. Make sure each book starts at the beginning of a board. This will make for easy cutting.


Here are the lines that I drew and what you should cut to make room for the books.

5. Unclamp the boards and cut them down one by one. Here’s how they will look after you place them back together.

6. To secure the boards back together you can use wood glue and clamps or screws.
7. Finally, it’s time to hang these puppies. Tim did it a different and more difficult (but nice) way, but you could just use simple “L” brackets like I show below.

And you should end up with something like this!
Very cool — I didn’t notice them IN the shelf at first — a cool twist!
Those are so cool! Going to have to try those myself! Thanks for sharing
i didn’t notice them sunk into the shelf, but now that you mention it… that’s gorgeous!
going to be trying this one, for sure!
Great project! Thanks for sharing!
i didn’t notice them in the shelf at first either, i thought it was the angle of the camera. very cool though!
Very cool!