
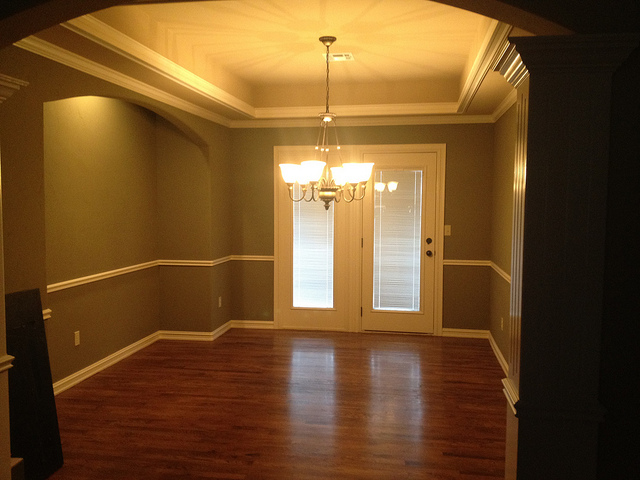
Hey Friends! Today I get to share a portion of a dining room I recently completed! We’re back in the home of some of my good friends, B and Anthony! They are the type of clients that just make me love my job and I hope my love for them shines through as I put my heart and soul into creating a design that speaks to their family!
Today I am showing off the before and after photos of the built in nook on the left side of their room.

Let’s take a look at the before and after and then I’ll give you the details!

The existing cut out called for something creative. The nook was an obvious focal point, so I wanted to do something special and unique. I’ve loved the Inhabit wall tiles for a while and I thought this was the perfect time to try them out. In my opinion, these tiles were a great choice for this area because the lighting in the nook cascades down the tiles creating shadows and super cool texture! Much to my delight, I realized that the pattern created by the tiles is the same shape the Pittsburgh Steelers use in their logo. The Steelers just happen to be Anthony’s favorite team! I love that these tiles speak to both B and Anthony!
Let’s compare. Logo. . .

Wall tiles. . .
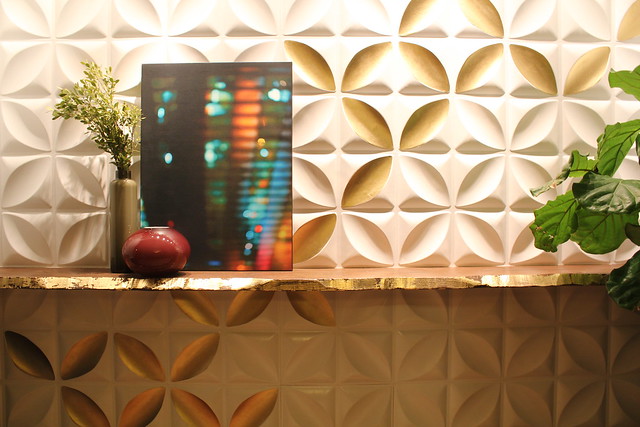
Do you see it? 🙂
The whole focal wall went through quite a makeover! We started with this. . .
First, we installed the live edge wood shelf and hung the wall tiles, which gave us this look. . .

I loved how things were shaping up but it felt like I needed to put something else along that wall. I thought about a huge piece of art, but I really didn’t want to cover up the super cool tiles. So, after a lot of contemplation, I decided that I would use gold paint to create a pattern within the pattern of the tiles. This allowed me to keep the focus on the amazing tiles, but also allows me to break up the white a bit.


I didn’t want to use a console in the area, but I did want to create a place that B could place and/or display items! So I opted for a live edge shelf that spans the entire opening. To add a little pizazz, I gold leafed the front edge.
Here’s an “in progress” shot. . .

And some photos after the gold leafing was applied. . .
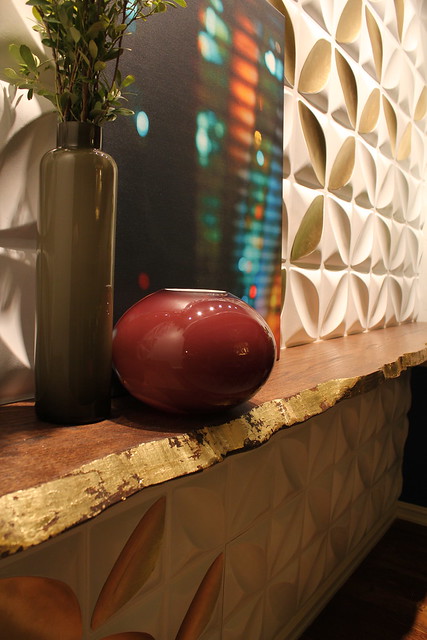
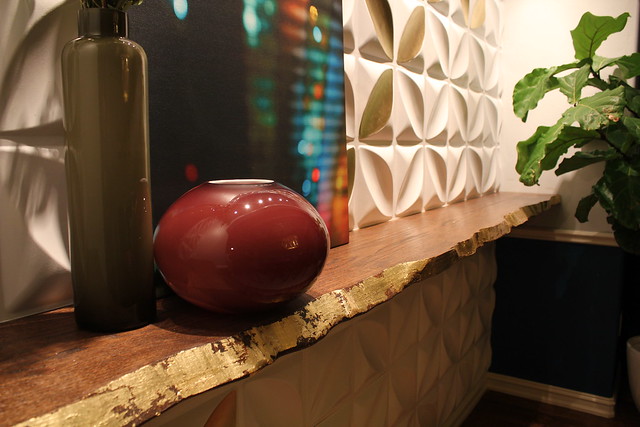
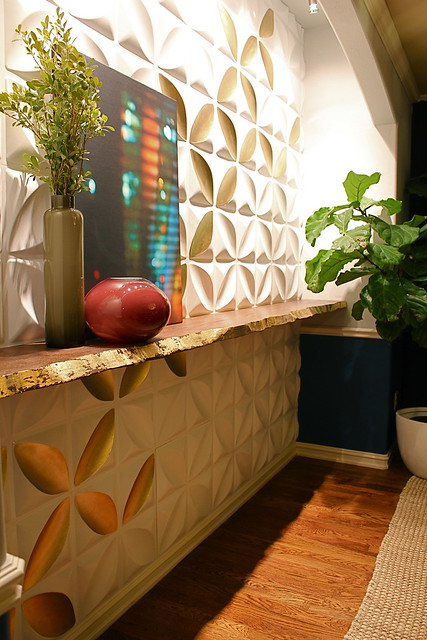
Here’s a little tip I love- If you want to add elegance to your space, bring in a touch of gold. It will add an instant sophistication and visual warmth to boot!


So, what do you think? Anxious to see more?! I’ll be revealing the whole room very soon! 🙂
I’d love to know where you purchased those tiles and what materials they are made of and how you applied them to the wall.
I’ve followed your blog for some time now and you inspire me to want to change out my master bedroom and do a textured tiled wall on the focal wall where I’ve placed the bed. I’ve thought about wood panels as texture, but those tiles are just gorgeous, especially with the light insets above.
Nice job, Kara.
Regards,
Ryan Shultz
American Bridget (Jones)
Love, love, love this after. Probably in my top three favorites, with your old upstairs room and new place foyer wallpaper being the other two. Though once you are done with whatever magic you plan for the new fridge it will probably be added to the list:)
That looks amazing!- so much better than the BEFORE. Id love to see the rest of the space. From the sneak peeks it looks like a fabulous dining space altogether(that light fixture….OMW)
Wow! What an AMAZING focal wall. It’s such unique. I love it.
*It’s such a unique space.
I’d love to know where you sourced your live-edge shelf. My husband and I are building a media center and fireplace surround, and I was hoping to find a live edge shelf to use as a mantel.
Could you share where you obtained it?
Thanks!
Hey Ryan! The wall tiles are from Inhabit! There is a link in the post above. They are not cheap, but affordable. I’d looooove to see your focal wall when you’re done with it! Have a great day!
I LOVE the gold, great work! That really highlights those tiles. You’re work is amazing, I would love to have a job like yours 😀
You could probably make the live edge shelf, I featured a tutorial once where this woman used a belt sander on regular wood boards to make the live edge effect, might save some money too!
Ahhh, thank you so much! Now I’m hoping I don’t disappoint with the fridge! 🙂
I’ll be revealing the finished space very soon! I know- that light fixture is a fav of mine! 🙂 It’s at Z-gallerie if you’re interested! 🙂
Thank you so much Caroline! I had a great time creating it and I’m happy to report B and Anthony love it too!
Hey Ginger! Actually. . . we DIY’d our live shelf. 🙂 You can try calling your local lumber yard though. They should be able to point you in the right direction if they don’t have what you need. 🙂
Thank you! Gold is my fav! It makes everything and anything look so fab! 🙂 Have a great day!
The dynamic decorating duo:)