

Well, we are finally to the fun portion of the design process- the point where you get to start implementing all the ideas you’ve been coming up with! If you remember, so far we have covered:
– Creating Your List
– Assessing Your Time, Space, & Budget
– Creating Your Plan
– Bring in Your Passions and Personality
. . . and now it’s on to Implementing Your Plan!
The first thing I want to tell you as you begin this part of the process is to be flexible. Many times things don’t work out exactly how you thought they would, but adjustments can always be made and sometimes it’s the last minute change of plans that really make the space!
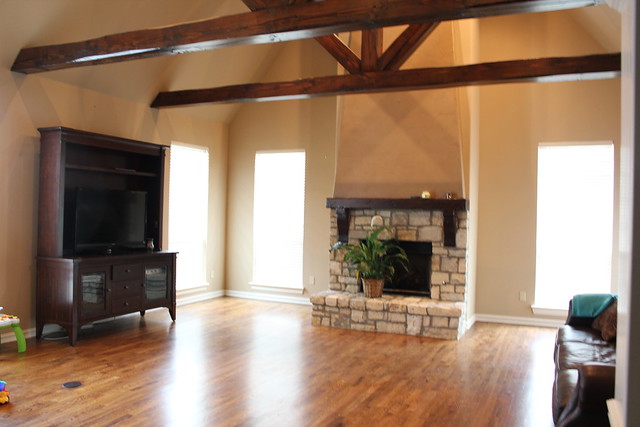
Ok, so here’s we were with B’s room. . .
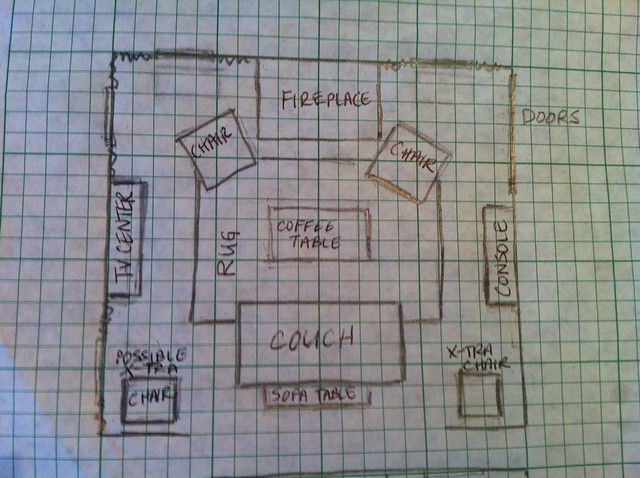
I came up with this space plan. . .
And this design plan. . .

I started putting the few things B already had in place. . .

Next I started ordering the pieces that I could and searching for unique or vintage pieces I planned to use. One of those pieces was a console that would sit opposite of the media center to balance the space and provide a place for Jaxon’s toys. I looked and looked for the right piece and then realized it was sitting in my storage space! Of course it needed to go through a transformation to fit the space. If you’ve forgotten, here’s the before and after.
BEFORE. . .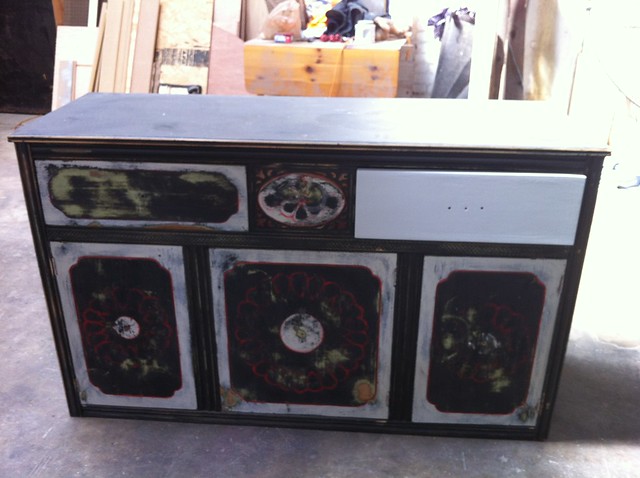
AFTER. . .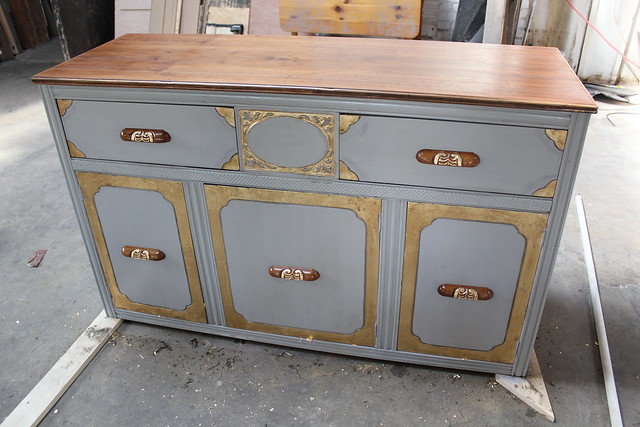
With the new look, this console was ready to be put in place. . .


At this point, we had almost all our big furniture pieces in place. But we were lacking a number of things. As you can tell from the photo below, the space was bare and needed some accents to keep the decor in line with the grandeur of the architecture.

Two elements that can instantly change the feel of a room are window treatments and floor coverings. By adding tall and full curtains, the windows now compliment the fireplace and draw your eye up to the gorgeous beams.

A right sized rug is imperative to help ground a space. Placing a couch in the center of a room creates coziness, but without a rug the couch can seem like it’s floating. Choosing a rug that is slightly wider than your couch will make things feel grounded and perfectly placed.
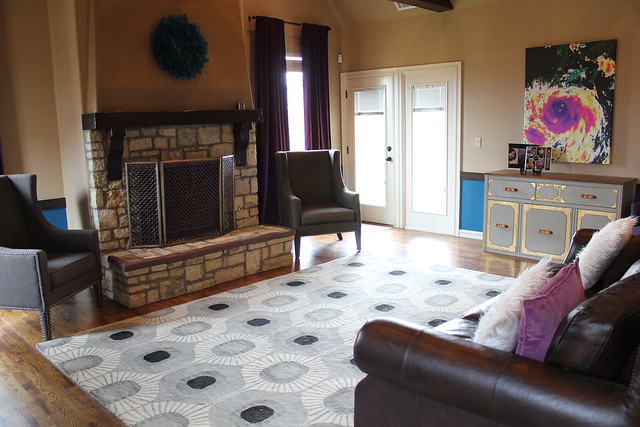
Once the rug was in place it was time to add the last piece(s) of large furniture. Due to the size of the space, a large coffee table/ottoman was a necessity. I wanted something that was close to 6’X3′ but everything that size was extremely expensive. My solution? Place two identical ottomans side by side. You can see below how a single ottoman just doesn’t fit the space, while the double dose of tufted goodness is perfect!


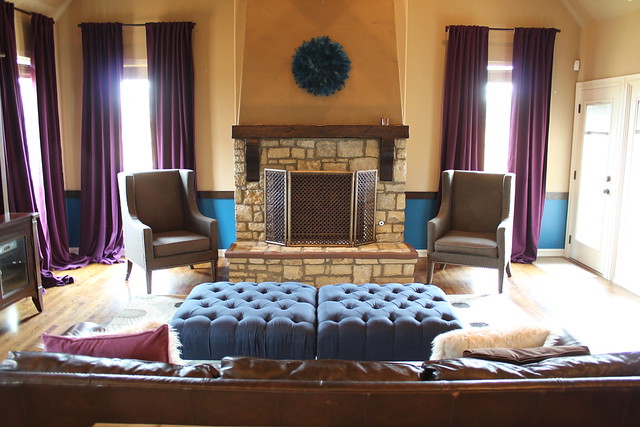
So now that all the furniture and major accent pieces are in place, the room is really starting to feel like a finished space. But one very important step is left in making this room a show stopper. . . ACCESSORIZING!!!! If you like this room now, you will be amazed at how a little accessorizing elevates the design of a room. I am soooooo excited to show you the final reveal!! Stay tuned, because it’s coming at you next week!
Could You divulge where the carpet came from thanks
It looks great, but I’d love to see some cute tapered legs on that console!
This comment has been removed by a blog administrator.
Thanks for your thoughts Lori. Because of the trim on the piece, it would be hard to add legs and have them look like an original part of the console. Plus, I wanted that piece to feel “heavy” to keep the room balanced. I think adding legs would take away some of the visual heaviness of the piece, especially when you pair it with the light paint color I used on it.
That beautiful rug came from Joss and Main- an online shopping resource I use often. You can sign up to be a part of their site with this link! http://www.jossandmain.com/invite/634C8F
Wow I love the design plan and it’s coming together perfectly! The colors seem to be working really well, nice and sophisticated but fun too. Great picks! I especially love the juju hat 🙂 Where did you get that?
I love this series of posts and seeing how the room is coming together!
P.S. That DIY floormat headboard was amazing
its been so great to watch the magic unfold!