
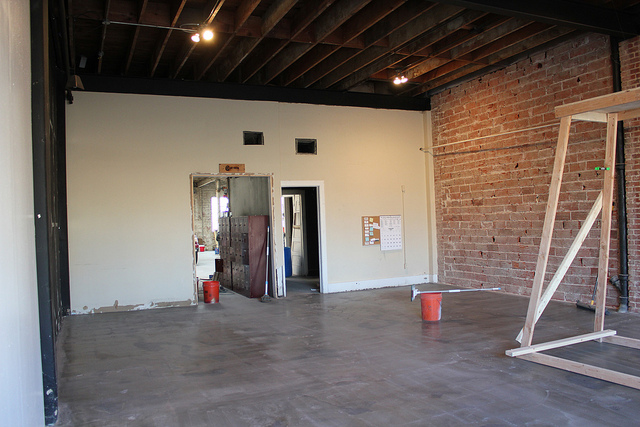
Ok, so are you curious how our new home is coming along? Well, we have a long way to go, but we are certainly making progress. Here are a few things we’ve been doing . . .
See that pipe that is spanning the length of the room about half way down the wall?


Well, that pipe is the water line that runs to the back of space where a bathroom is. From a functional stand point, there was no problem with the pipe being there, but it is simply not visually pleasing. So, since we were moving plumbing around for our bathroom buildout, we decided to go ahead and get rid of the eye sore.

First we turned the water off and unscrewed the the pipe piece by piece. Of course we still needed water to get to the back of the space, but we wanted the pipe to be concealed. So, we drilled through the beam spacers and ran pex pipe through each hole.

As you can see, the pipe is totally concealed unless you are right up next to the wall. . . and since our kitchen cabinets are going to go along most of that wall, the chances of anyone ever noticing the pipe is slim to none! 🙂
Ok, so as I said we are in the process of doing a bathroom buildout. The space does already have one bathroom (with a toilet and utility sink) but that will be the shop space’s bathroom. We are building a whole new bathroom.
In order to build things how we wanted them, we first needed to take a wall down. So, it went from looking like this. . .
To this. . .


Next we got rid of some plaster and a weird window on the right side of what will be the bathroom. . .


This wall is going to be where our shower sits.
Therefore, we had to move some electrical boxes that were smack dab in the middle of where I will eventually be washing my hair. . .

We will applying some sort of great material (hopefully copper) to the shower wall. For this reason and because another water pipe runs across this wall, Tim thought it would be a good idea to build the wall out just a bit so that we could attach to wood rather than plaster. . . which is not fun. Of course this solution also means the pipe will be hidden with in the wall.


Great idea, right? You should have seen us trying to put the top part of this wall in place (just the two of us). Each one of us on a ladder lifting about 1500 lbs of awkward wood from the ground and up over our head. I am still afraid of ladders, so it’s always a mental challenge for me to climb to the top and do anything much less lifting something heavy over my head! Yikes! But I survived. I figured I’m not a sissy about much so Tim can deal with me being a little dramatic when it comes to ladders. Haha! 🙂
PS- Tim “sistered” the boards to complete the wall and bring it all the way to the ground.

Anyway, so the built out wall is up and in place and the next thing to do is pour the concrete tub!! Woohoo! Stay tuned!
Holy cow, what a project! You guys will definitely have some amazing before and after shots!
Oh I so understand what you are going through! We have removed so much lath and plaster from our old house! I think I have a picture somewhere of me with a mask over my mouth and nose, handkercheif tied over my hair as I scooped that dirty stuff into a wheelbarrow to get it out of the house! And we know all about moving and removing old pipes. Pex is the best stuff! I think we finally have almost all of our plumbing swtiched to it.
You have the best space to work with – love that brick wall! So happy you are sharing the journey with us – I love to see a new post from you showing up in my blogroll!
God Bless!
It looks great! I can’t wait to see the final outcome!
wow. all i can say is wow.
i cant wait to watch the transformation!