

No, I didn’t forget about posting a upholstered headboard how-to! Even though November is over I’m back to share my first tufted undertaking! Here’s what I started with.

Step 1- First, I painted the sides of my headboard because they were not going to be covered with fabric and painting before all these other steps is definitely the easiest method.
If you do not already have a headboard that you can start with, simply cut out a piece of plywood in your desired shape and skip to Step 3.
Step 2- I put a layer of batting within the insets that were already in my headboard to make sure that I had a somewhat even surface.

Step 3- Then, I took 1 inch foam (you can go bigger if you want a deeper tuft), cut it to size, and used contact cement to attach it to the wood of the headboard.


Step 4- Next I covered the 1 inch foam with a layer of batting. I attached it with a staple gun on the back of the headboard.

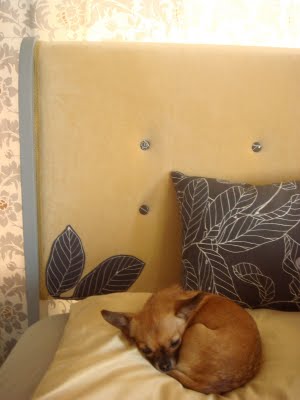
Step 5- After the batting, I attached the fabric in the same fashion. In addition I also used staples on the sides of the headboard for security and aesthetics. Tip: When attaching the fabric make sure to pull it tight to ensure no sagging or ripples.


Now to the tufting!!!
Step 6- Create your buttons. You can find tufting buttons in a kit at most craft stores. I got mine at Wal-Mart. You start with this piece of plastic below.

Set your fabric on top of the plastic piece upside down.

Place your button to be covered on top of the fabric and push down until the button is inside the plastic piece.


Fold the fabric down.

Place the back on the button on top of the folded down fabric.

Place the blue plastic piece (also included in the kit from Wal-Mart) on top of the button back and use a hammer to force the button back into the button front securing the fabric in between.

Viola!! I super cute button!

I needed 10 for my headboard.

To be continued tomorrow. . .