
3751 South 73rd East Avenue
Tulsa OK 74145
Phone: 918-301-4737
Happy Friday Friends! I hope you have exciting plans for this weekend, maybe you’re even hoping to get a project in! If you’re looking for a way to spruce up your house, Tim and I have a great suggestion for you today!
 It’s no secret that Tim and I are concrete lovers. Sidenote- Our next DIY Concrete Class in coming up on August 11th. You can find more information here if you’re interested. Anyway, Tim and I have been using concrete products for a long time. Many of those products have come from a company called ARDEX, which just recently became a blog sponsor of ours! Yay!
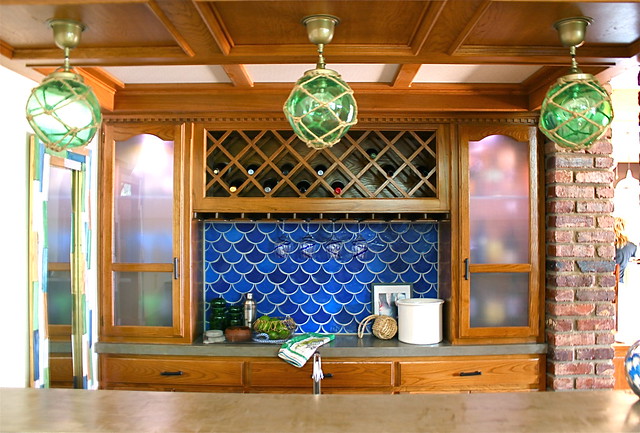
ARDEX has a number of products, most of which are centered around concrete flooring and refinishing. However, if you like to think out of the box and be a little more creative, there is so much more you can do with AREDEX’s amazing products! We figured if the ARDEX overlays were meant to withstand the wear and tear that floors receive, it could certainly hold up for a countertop installation. And when we were creating a plan for Heather’s bar area, it seemed like the perfect place to use ARDEX’s Feather Finish product.
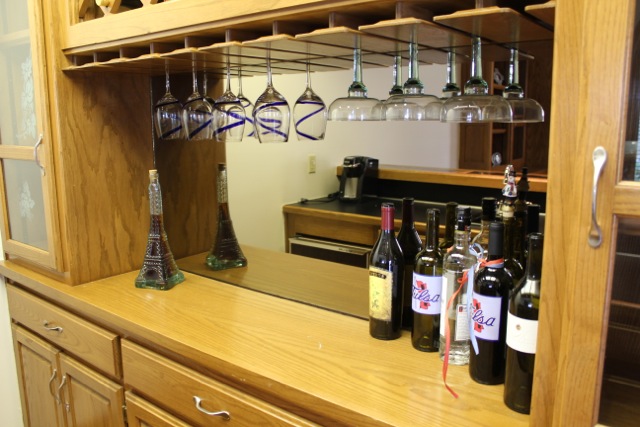
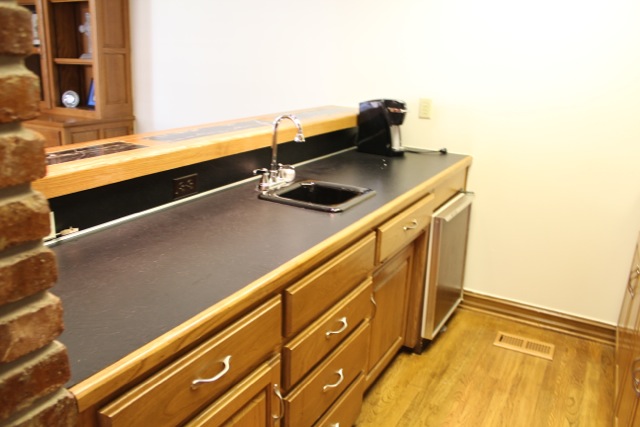
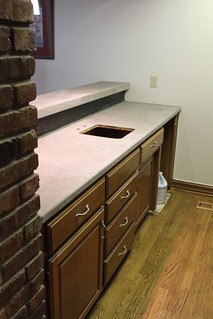
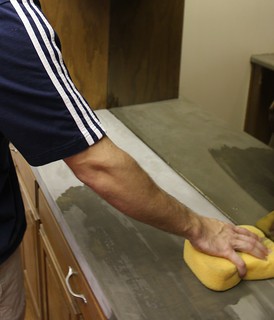
As you can see in the photos below, there were 2 countertops in Heather’s bar area: wood, laminate, and a wood/marble combo.
Here’s the great thing about ARDEX- you can apply it over the top of almost any surface. You just have to make sure to prepare the surface correctly. Any smooth finish will need to be roughed up to provide a surface that the ARDEX can grip onto. You also want to make sure the surface you are covering is structurally sound. If there are cracks in the surface, this indicates that movement is occurring and your concrete may crack if the problem is not addressed before hand.
For this particular project, we sanded the wood and marble surfaces and opted to remove the laminate layer from the main countertop. When we removed the laminate, particleboard was revealed underneath. Because of its rough texture the particleboard provided a great surface for us to overlay onto. Tim lightly sanded to remove any remaining adhesive.
Here are the materials you will need:
– ARDEX Feather Finish
– a bucket for mixing
– A drill attachment mixer (or you can mix by hand with a small trowel
– a drywall “knife”
– a drywall mud tray (if desired, not essential)
– a trowel (not pictured below)

First, mix up the concrete by simply adding water to the Feather Finish product. Add water and continue to stir until you get to a thin pancake batter consistency. Next you will want to allow the mixture to “flash set.” That means once it is mixed, allow the product to sit for 5 minutes, then stir again for a minute or two. This helps the product to stay workable for longer.

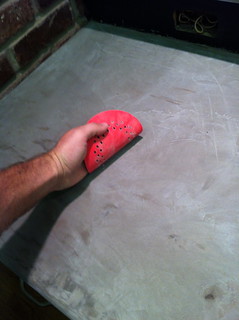
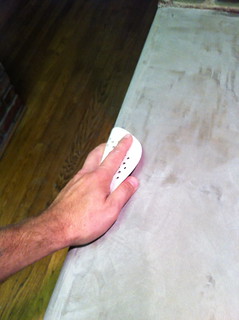
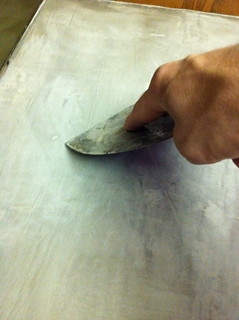
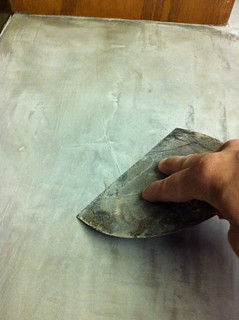
Now you can apply the concrete to your roughed up countertop. Simply trowel it on in sweeping strokes. You will do a couple of coats, so don’t try to put too much on in the first coat.
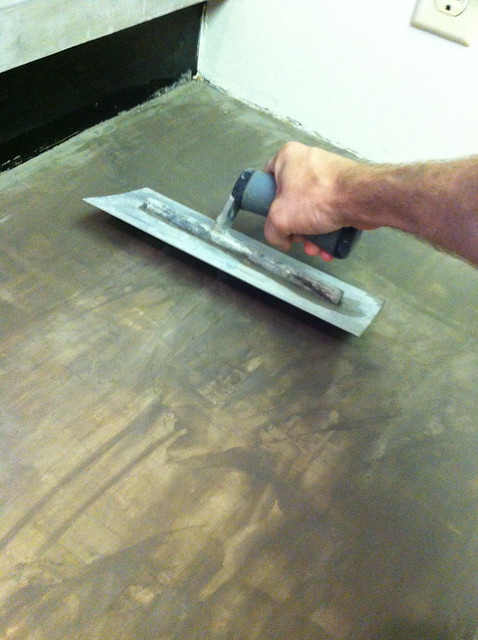
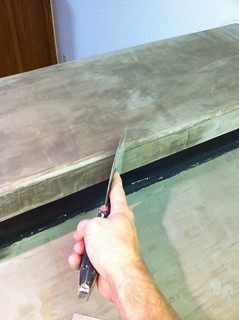
Use a drywall knife when you are up against a wall, in a corner, or doing edges. It is easier to control in these areas than the trowel.
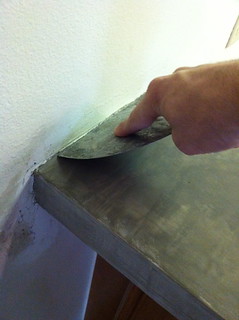
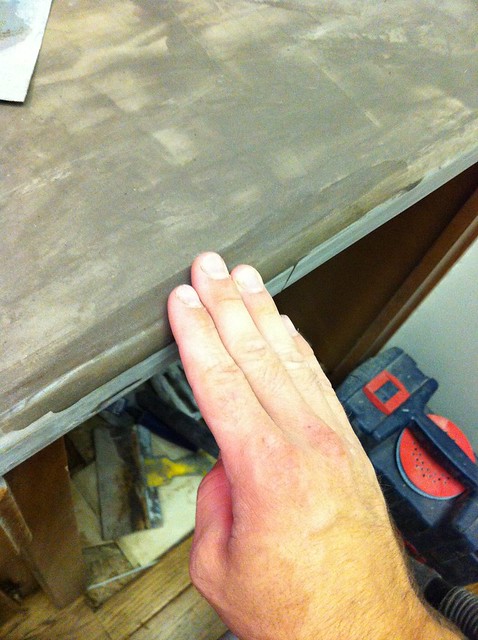
Edges and curves can be tricky. Tim and I have found the best way to cover them is to trowel on what you can for the first coat, but on the second and possibly third coat, let your mixture dry just a bit to almost a clay like consistency and then use you fingers to “sculpt” your edge. You can also use a plastic bag to help smooth a round over edge.

I really like the artisan look of hand troweled concrete so I like to see the trowel marks in the surface. However, if you prefer a smooth surface, you can achieve that look with more sanding.
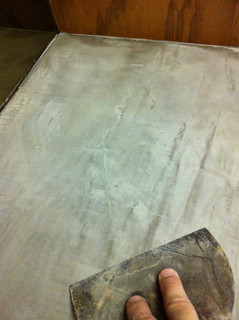
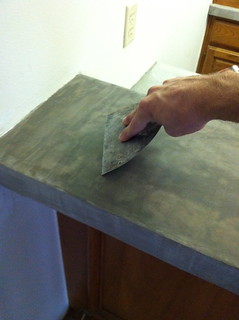
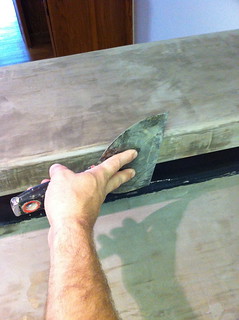
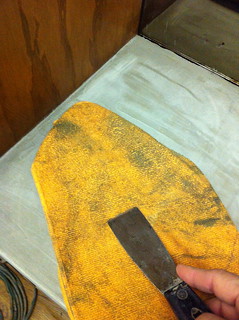
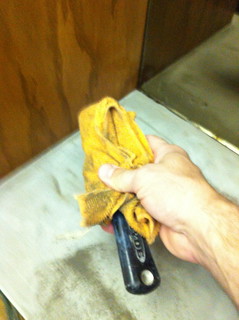
You may find that some product makes it’s way up onto the wall surrounding your surface as the photo below shows.

To remove this simply wrap a small putty knife in a towel (to give you a strong edge) and wipe along the surface to give you that nice clean edge!

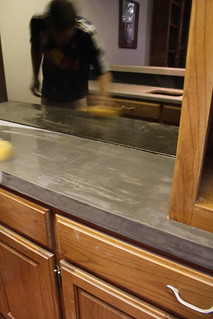
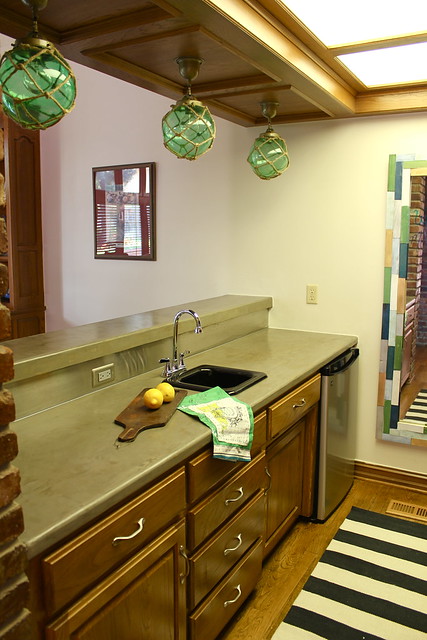
Once you are happy with the coverage of the product (usually 3 coats) and have completed your last sanding you’ll have countertops that look something like this. . .
If you would like to stain the countertops, you can do 2 coats of the Feather Finish product and then 2 coats of ARDEX’s SD-M product. The Feather Finish will not accept stain evenly, but the SD-M will.
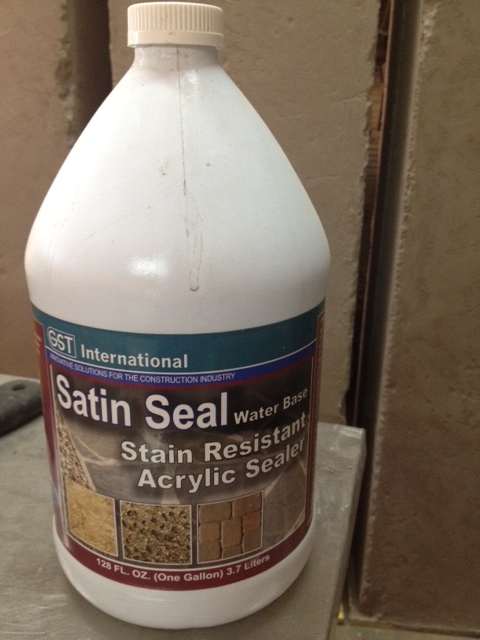
Now it’s time for sealing. The process is super simple. You simply wipe the product on with a sponge, allow to dry, and repeat a number of times. We used this concrete sealer (below), but where ever you buy your ARDEX should supply a product that works the same way.
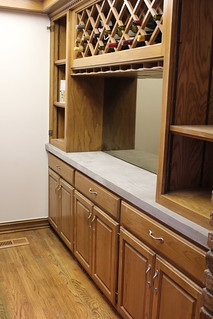
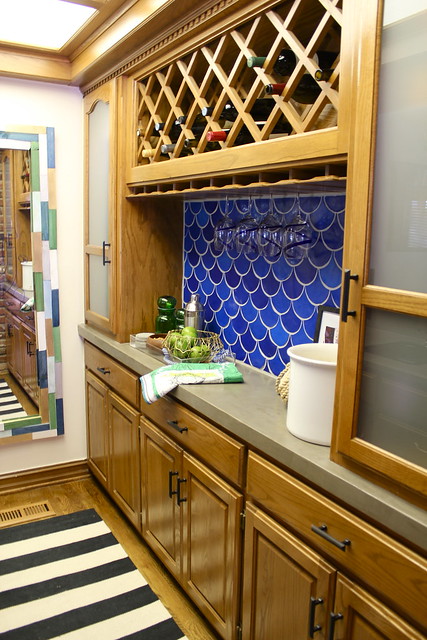
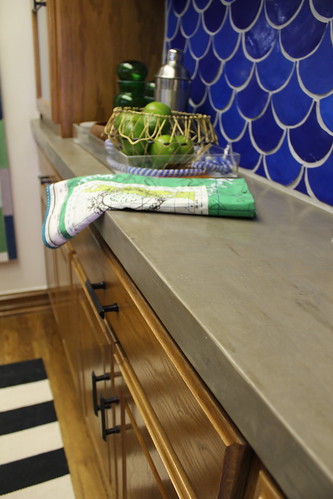
And here’s how the countertops will look when you’re finished. . .

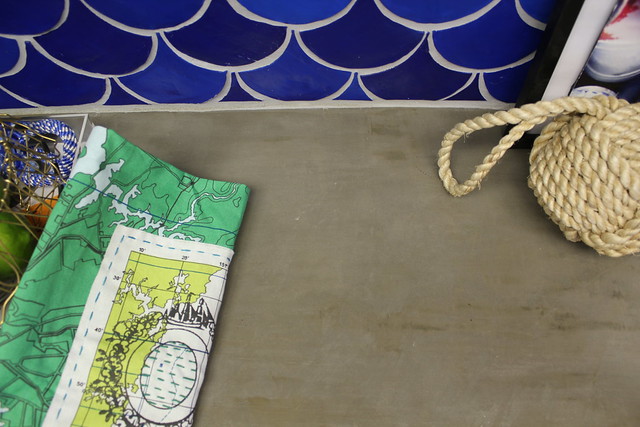


You can find your local ARDEX distributor right here!
Now, this process is doable, but there are some things that you just learn better with hands-on experience. To get some of the that experience and individual instruction, you can attend our next concrete class on August 11th! Click here to learn more!!
*Disclaimer- We choose to do projects that we believe will enhance homes and be lasting. However, sometimes our applications are not specifically suggested by Ardex. If you are concerned with warranty policies, please refer to the ARDEX Feather Finish technical data sheet for instructions and warranty information. ARDEX only guarantees recommended and approved applications outlined in the ARDEX Feather Finish technical data sheet. For more information, visit www.ardexamericas.com.
Does this product expand and shrink like normal concrete? If so does it change it alot?
Love the look and I think were going to try it, my husband is very handy.
This comment has been removed by the author.
You indicated that this product was originally made for floors.. Have you ever tried putting it over “ugly floor tile”? I wonder how that’d work?
I would feel confident that you aren’t going to notice any expansion or contraction any normal household application as long as the space is climate controlled. I don’t know how it would hold up exposed to the elements or over really long expanses (100+ ft).
I believe so. There is a distributor in Canada, you can check and see if there are any distributors or contractors in your local area, http://www.ardex.com/content.asp?ContentID=514 . Even if there isn’t one local, some of them will ship the product. If the one in Canada will not, you can check with our local distributor, they have shipped some for other readers.
Professional Flooring Supply
3751 South 73rd East Avenue
Tulsa OK 74145
Phone: 918-301-4737
We have not tried putting it over ugly floor tile, but that is what it is made to do so I would assume it would work great. The most important thing would be to make sure that you really rough up that tile so the ARDEX can form a good bond.
This project took 3 days, but they were not full days. I was only able to put in a few hours work each day because of other jobs, but it could for sure be completed in two days if you wanted.
Hello!
Do you know if this would work on a wall? I would like to make my wall look industrial and concrete looking… I live in Italy and the walls are basically made from concrete block, we just have paint on the wall now (its not a huge area that I would like to do.) I guess my next question could be… Do you know if I can fin it in Italy?
Thanks a million,
Carissa
I saw you guys on Great Day Green Country! I LOVE this project!
Hello! I am wondering how you rough up the area you want to put the concrete so it sticks? Right now our counters look like fake smooth wood (UGLY!) and could use a make over! Thanks
Laura all you will need to do is sand the surface with a rough grit sandpaper. 60-80 grit would be best. Be sure to wipe the surface clean after sanding. Take before and afters and put them on our Facebook page. Good luck!
I am a cement mason and did not know this was possible?! I have used feather finish, tilt wall, cd fine and many other ardex product-they are awesome-So glad I found this tutorial! One question for you- how do you remove the laminate to get down to the particle board? Maybe I overlooked it…
Thanks!
Jessica
Hey Jessica,
ARDEX makes some incredible products. Obviously this use of Feather Finish is not recommended or warranted by ARDEX, but they have been great with off the record technical support. The only reason we removed this laminate is because it was already coming loose. If it had been securely adhered we would have gone right over it. Since it was loose we just used a putty knife to pry it up and it came off quite easily. If your laminate is secure for the most part, but has a few questionable stops you I would just put a screw in those few spots. Counter sink them so they sit below the surface, but that should do it. Once the laminate is secure sand it with 80 grit sand paper to rough it up. Wipe up the dust and you should be good to go.
Tim
Just finished my countertops– they look amazing! Thanks so much for the tutorial, going to be the envy of the neighborhood!
Page –
We are so glad to hear it. Post some of the before and afters on our Facebook page! I don’t know if you have done it already, but SEAL, SEAL, SEAL. The key to them keeping them looking great is making sure you maintain a sealer coat. If you start to notice that your countertop gets dark within a few seconds of getting wet you need to reseal. It is a breeze with the water based sealers, but you have got to keep them sealed.
Have you ever used Ardex on walls? I really like the look of formed concrete walls but I don’t really want to tear down my house to redo. Ha.
Never mind, a quick search and I saw your other page about the walls. Have you ever done any stamping with these products are the layers too thin? I also saw the comment on the other page about cover wall, someone had asked about bathroom or showers. I have also been wondering this, it seems if you had a sealed membrane under this product it would work since concrete is permeable to water just like tile/ grout. It’s whats underneath that actually blocks the water.
Hey Justin, glad you found the other pages, I was in the process of looking them up when I saw your second comment. You can layer the Feather finish up to 1/4″ and do some light stamping. We haven’t played with stamps too much. We have used stencils to create some depth and different designs. It seems to be easier to work with when you use thin layers.
Regarding the shower application, the feather finish cannot be used in areas that are exposed to constant water. Ardex has another product designed for exterior applications that we are in the process of putting in our shower. We hope to be able to update you in a couple of weeks.
I’m a Tulsa resident and want to use the Ardex product on some countertops. Does the distributor you list sell to “regular” people, or just professionals in the industry?
They sell to regular folks. They are one of the few commercial suppliers we have run into that are quiet consumer friendly.
My husband and I just did this to our counter tops right over the laminate. It took us 2 days and less then 100 dollars. We absolutely LOVE it. We had slate tile as the back splash and the contractors went cheap with laminate. Would recommend this to even a beginning DIY person.
Hi – I would say it looks very smooth in the pictures, but can you confirm it is a smooth finish? Thanks!
This is exactly what I’m looking for! We were planning on the incrediably intimidating process of fabricating concrete countertops to replace the poor quality Wilsonart laminate that degraded within a month of installation. Now, since the basic structure is fine, I’ll changeout using this. Thanks so much!
Pingback: {Kitchen} DIY Concrete Countertop | Better Remade
Thank you for this information! However, it’s not easy to find distributor info on the Ardex website. Good ol’ Amazon comes through, though.
Pingback: Faux-crete Counters (from scratch!) | Sarah's Big Idea
Pingback: Pretty Parlor Wall | Kara Paslay Design
Pingback: Ombre, Metallic Fish Scale Feature Wall | Kara Paslay Design
We just finished putting the skim coat down. We used Henry from Home Depot because they didn’t have Ardex and the label claimed to use Ardex technology. It looks GREAT! But I’m concerned about sealing, especially for kitchen use. We did a sample piece and trialed oil, lemon juice and red wine spots over sealer and over paste wax. The oil was the worse. Another site recommends epoxy. Do you think that might be better for a kitchen counter? Thanks so much!
We are about to go to granite/quartz counter tops in our kitchen but I’ve always wanted cement. This looks perfect because it’s quick, cheap and easy! What could be better? I have some questions.
How did the sink fit in? Did you lay it on top of the cement? Would the weight of the sink crack/crush it? I’m willing to get a new sink.
Perhaps I would need an “under the counter sink” whatever the name of them is.
… Did I just answer my own question?
lol
Any input you have would be helpful.
I used Ardex on my laundry room counter and a bathroom vanity and love it! I’m just wondering how many coats of sealer you applied? After one coat, someone had placed a glass on the counter and it left a water ring so I realized I needed more sealer, but I’m just not sure how much will be enough. I’m using the same product you recommended. Thanks!
I have forest green granite tile put in by the previous homeowners. It is a constant eye sore. Will this work over granite? I love this!
Do you think this would work on a desk top? I have an old wood desk that had a laminate top that we pulled off and there is about a quarter inch inset that I would like to try this with! Would it be okay to pour it out at a quarter inch at one time? Thanks!!
How many bags did you use and how many linear feet did you cover. Looks like we can purchase on Amazon and I’m not sure how much to purchase.
What grit sanding paper so you use on the feather finish?
Can you share how much you purchased and used and how many linear feet you covered with what you purchased? I’d hate to order too little or way too much.
How long did you wait before sanding each layer?
Our laminate is textured, would we still need to rough it up with sandpaper?
This still relevant in 2019 lol?. I do floors for a living and honestly don’t know how i survived without Ardex.
it is by the best Feather finish/patch on the market. I had an old cube van for work and it was all rusted out. When i was floating a floor i would take the extra i didn’t need and go throw it on the side of the van to fill the holes. I eventually sanded and painted it and it has yet to crack or fall apart to this very day. Lol. That was in 2010